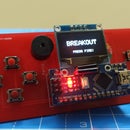
Introduction: How to Make 4-in-1 Arduino Nano Development Board
In this instructable, you will learn how to make an Arduino Nano development board. The Arduino nano development board is having an on-board slots for ultrasonic sensor (HCSR-04), Accelerometer, DHT11 sensor and Liquid Crystal Display (LCD).
This board having the 4- DIP switch, which is used to change the mode of the development board.
- Turning ON first switch displays the Text on LCD.
- Turning ON second switch displays the data from Accelerometer on LCD.
- Turning ON third switch displays the Temperature and Humidity data form DHT11 sensor on LCD.
- Turning ON fourth switch displays the Distance of Obstacle from Ultrasonic sensor on LCD.
I know, you are very eager to know how to make this, Lets gets started!
Step 1: Components Required
Custom Designed PCB ( Download the gerber files attached )
Female Header Pins
4 way DIP switch.
10K Ohm Potentiometer
Arduino Nano
Liquid Crystal Display (LCD).
Optional Parts
Ultrasonic Sensor (HCSR 04)
DHT11
Accelerometer Sensor
Tools
Soldering Iron
Attachments
Step 2: Watch Video First !
Watch this video, you will very clear and easy to make this.
Step 3: Procedure
It is very easy to make, just follow these few steps.
1. Place all small components on the PCB and solder them.
2. Place female header pins in their respective positions.
3. Solder all pins.
4. Insert all components in their respective slots.
5. Upload the code to Arduino Nano. (Download the code attached)
Attachments
Step 4: Hurray! You Made It .
That's all. You made it.
If you have any queries, please comment below.
If you want to learn C Programming you can easily learn at codingtute. It will enhance your arduino programming skills.
If you like this Instructable, support me by subscribing my YouTube Channel Tech Maker for more projects.


