Introduction: How to Make Green Eggs


Eeek! Green eggs!! These sunny side up green eggs are the perfect Halloween breakfast! Don't be fooled by the color, they taste great! These eggs are wonderful as an April Fools Day prank, Saint Patrick's Day fun, or a creative project celebrating Dr. Seuss! Does anybody have some ham??
This instructable will show you how to get glorious green yolks while keeping the whites nice and sharp!
You need:
Eggs
Green Food Coloring
Cooking Spray
Toast or Ham (optional)
Tools:
2 Small Bowls
Frying Pan
Spatula
Step 1: Seperate the Yolks
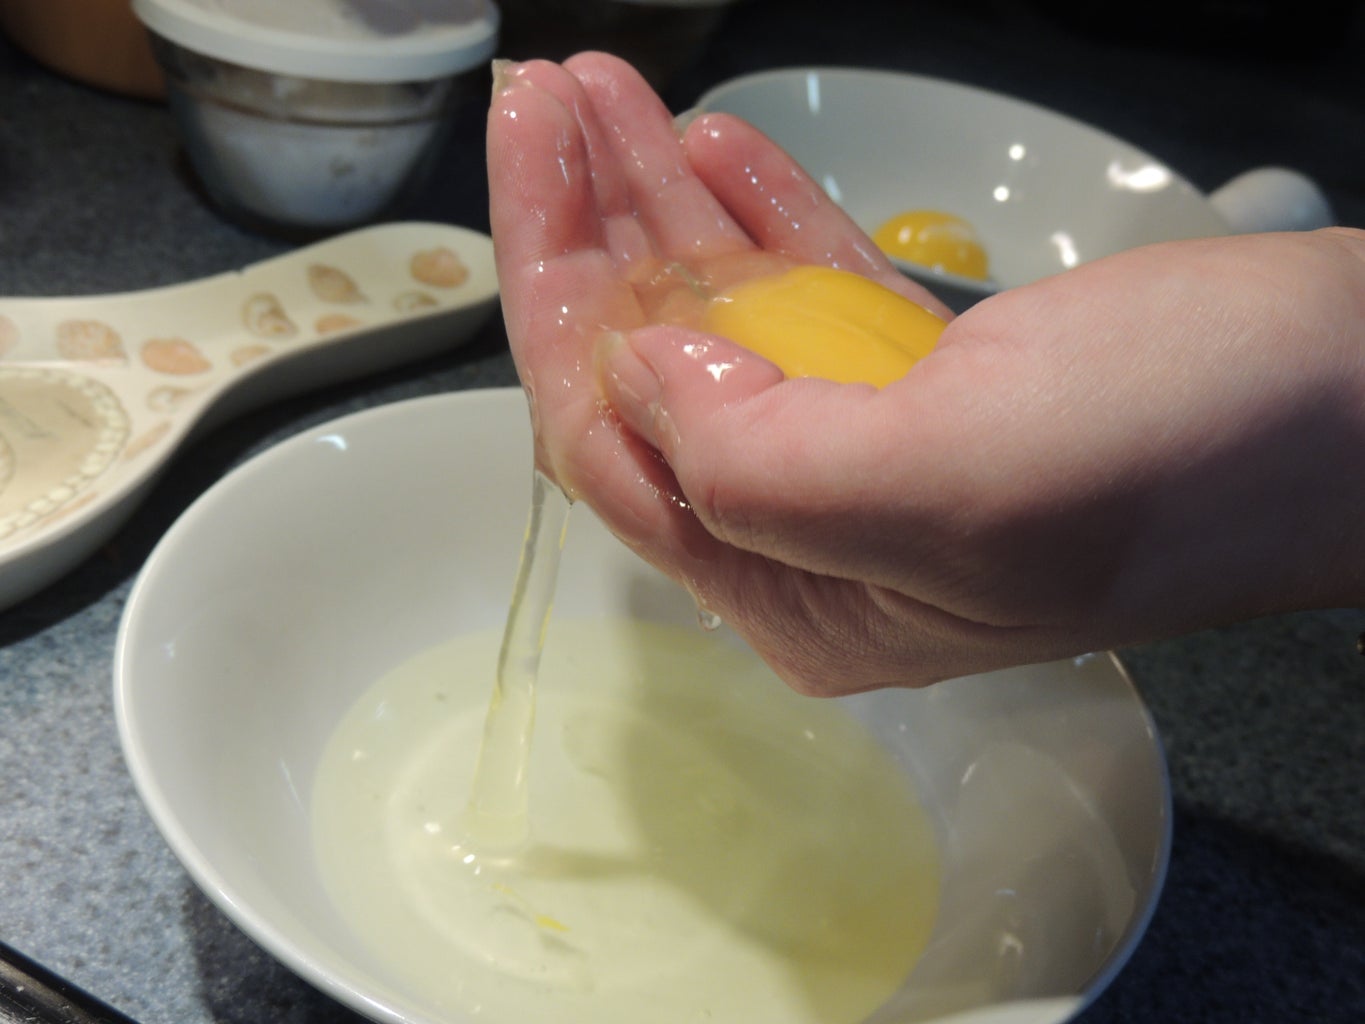

Start by separating the yolks from the whites. There are a few ways you can go about doing this. I cracked the egg into my hand and let the whites drip through my fingers. I did it this way mainly because I needed some whites on my hands for the next step.
Normally when I separate eggs, I slowly move the yolk back and forth between the two halves of the egg shell until all the whites have dripped off. This keeps your hands a lot cleaner! You can also use an egg separating tool, there are many different variations out there!!
If you are doing more than one egg, I recommend keeping each white in its own bowl or cup. You can keep the yolks together because you can easily separate them. You want to cook these one egg at a time incase you accidently break a yolk.
Step 2: Dye the Yolk


If you didn't use your hands to separate the yolks, lightly coat your hands in some of the whites. If your hands aren't lubricated, the yolk will stick and you will tear the membrane. This will result in a broken yolk and ruined eggs.
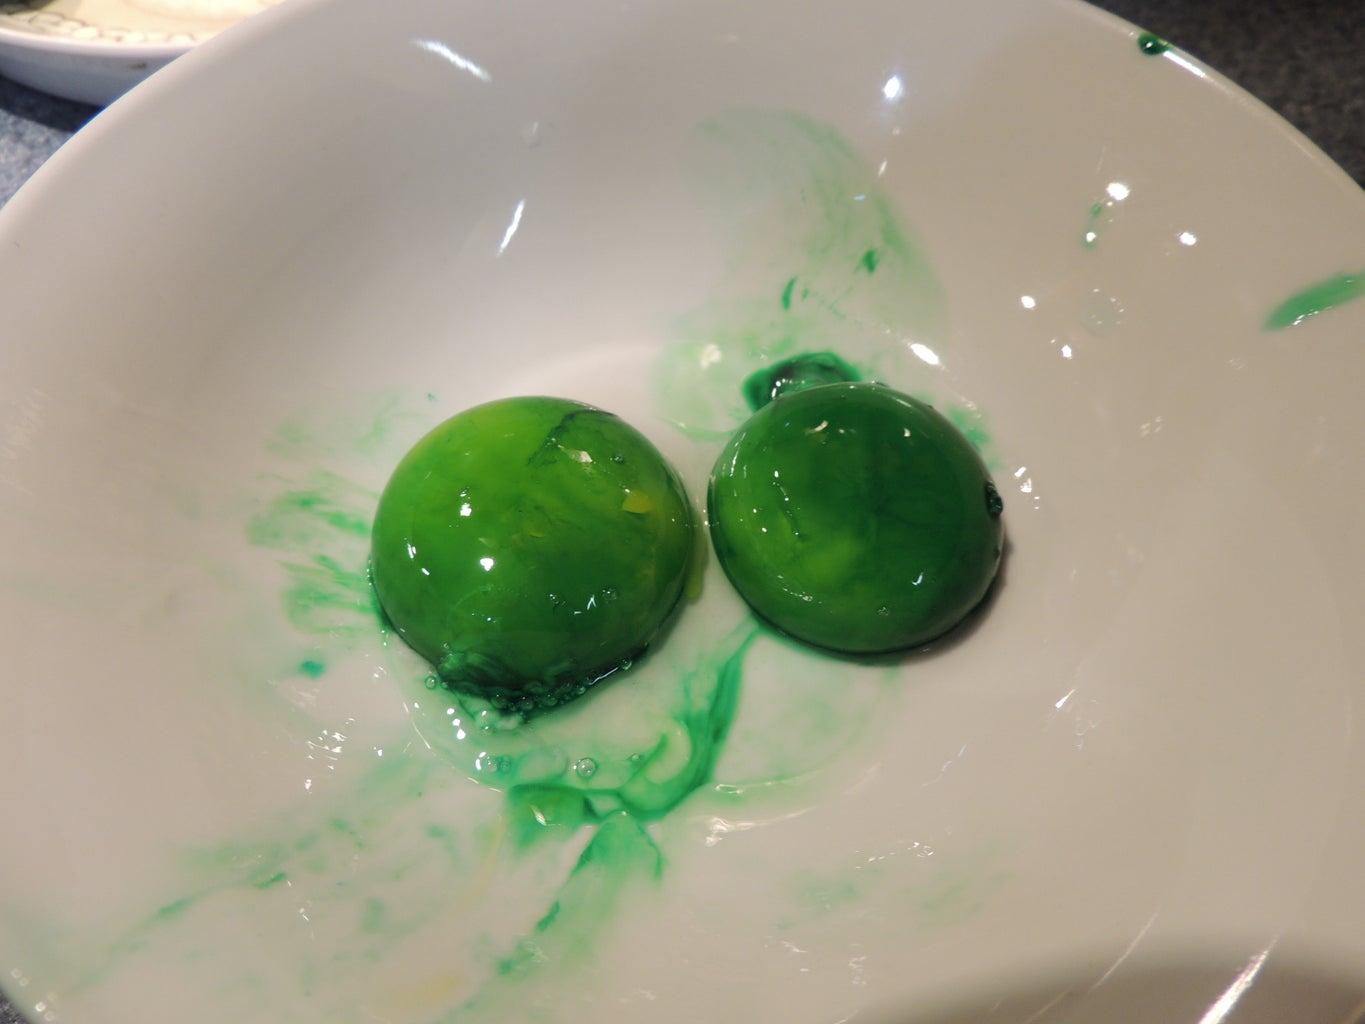
Add 2 drops of green coloring onto the yolk and gently roll it around between your two hands until the color is distributed. I ended up adding another drop to the underside of the yolk to get if fully coated. Try to handle the yolk as minimally as possible. You can keep the colored yolks in the same bowl until ready to cook.
Beware! You will have green hands!
Step 3: Cook the Green Eggs
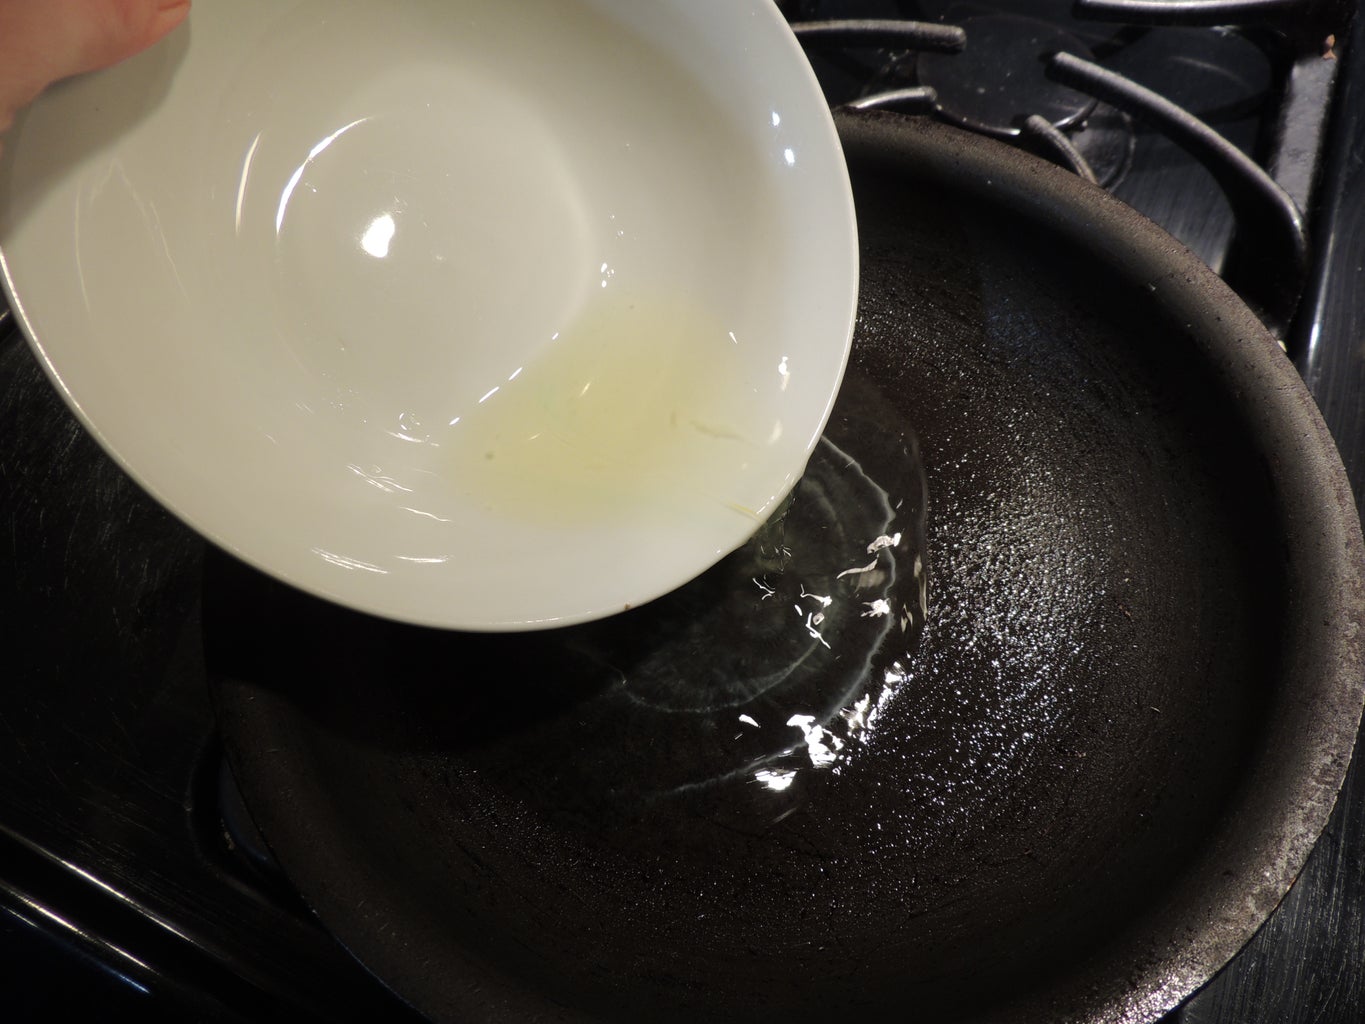

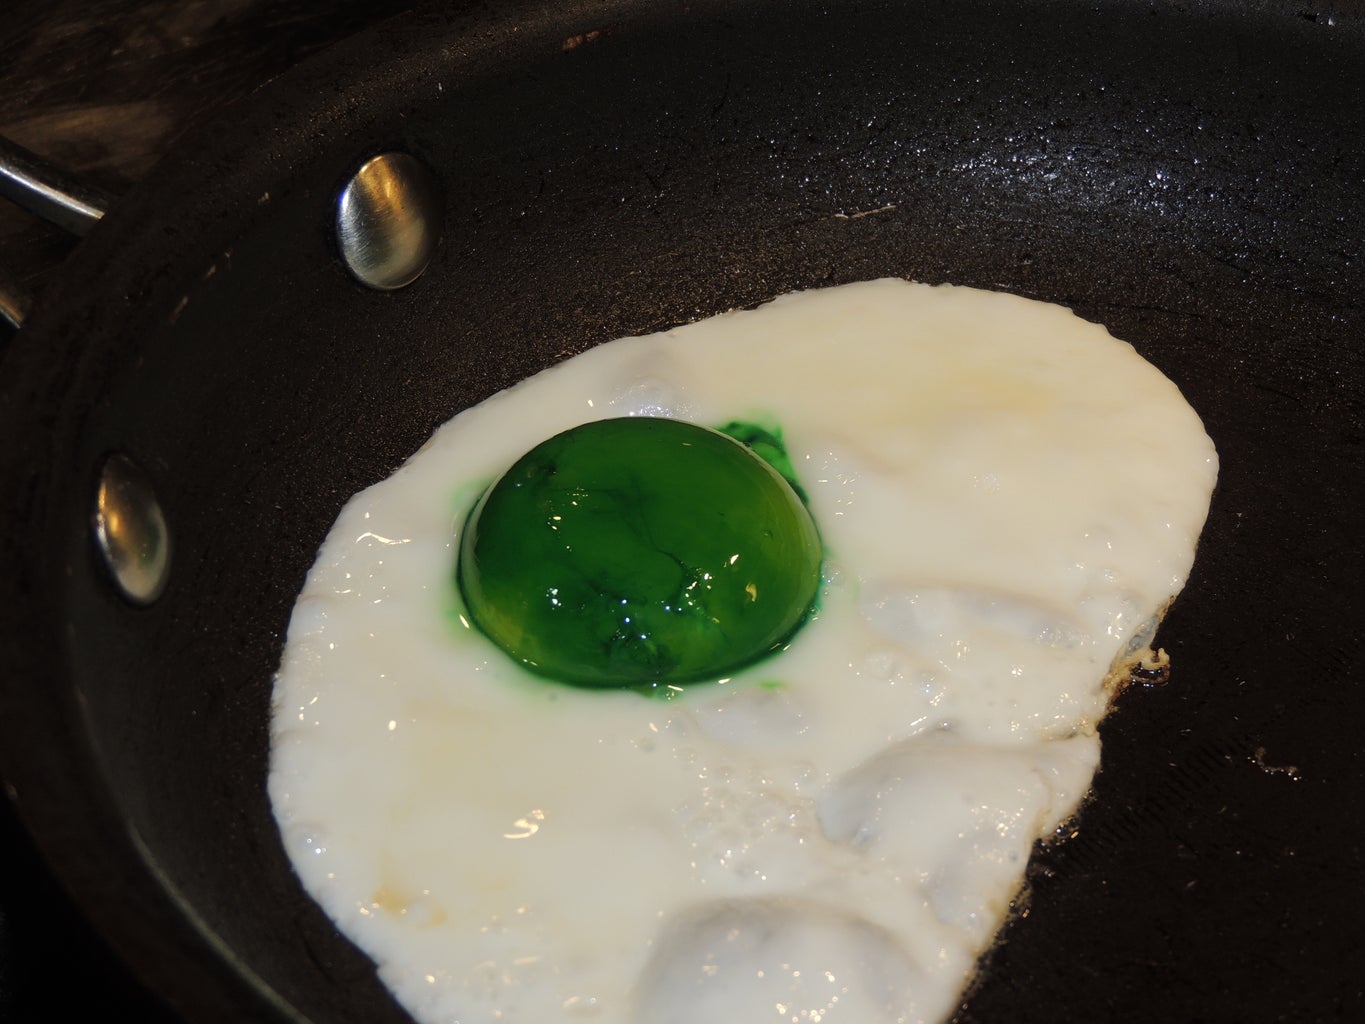
Spray the fry pan with cooking spray and heat it over medium low until warm. If your heat is too high, the eggs will not cook uniformly.
Once the pan is hot, pour one of the whites into the pan. Pour one yolk out of the bowl onto a spoon and gently slide it onto the center of the whites in the pan. Be careful not to pop the yolk! Normally when you cook eggs, this is the point where you add some salt and pepper to season them. You can add it if you want but I recommend waiting until right before you eat. This will prevent the pepper flakes from ruining the super crisp whites! I suggest you WOW your guests with presentation first, and season after.
Cook for 2-3 minutes until the whites have cooked thoroughly and have turned opaque. Gently remove the egg with a spatula.
If you're daring you can cook more than one egg at a time. I say it's daring because if you break just ONE of the yolks, you will ruin the entire pan's worth! Ok, they won't be totally ruined, they will still taste like yummy eggs! You just won't have that perfect green yolk/white whites we are trying to achieve here.
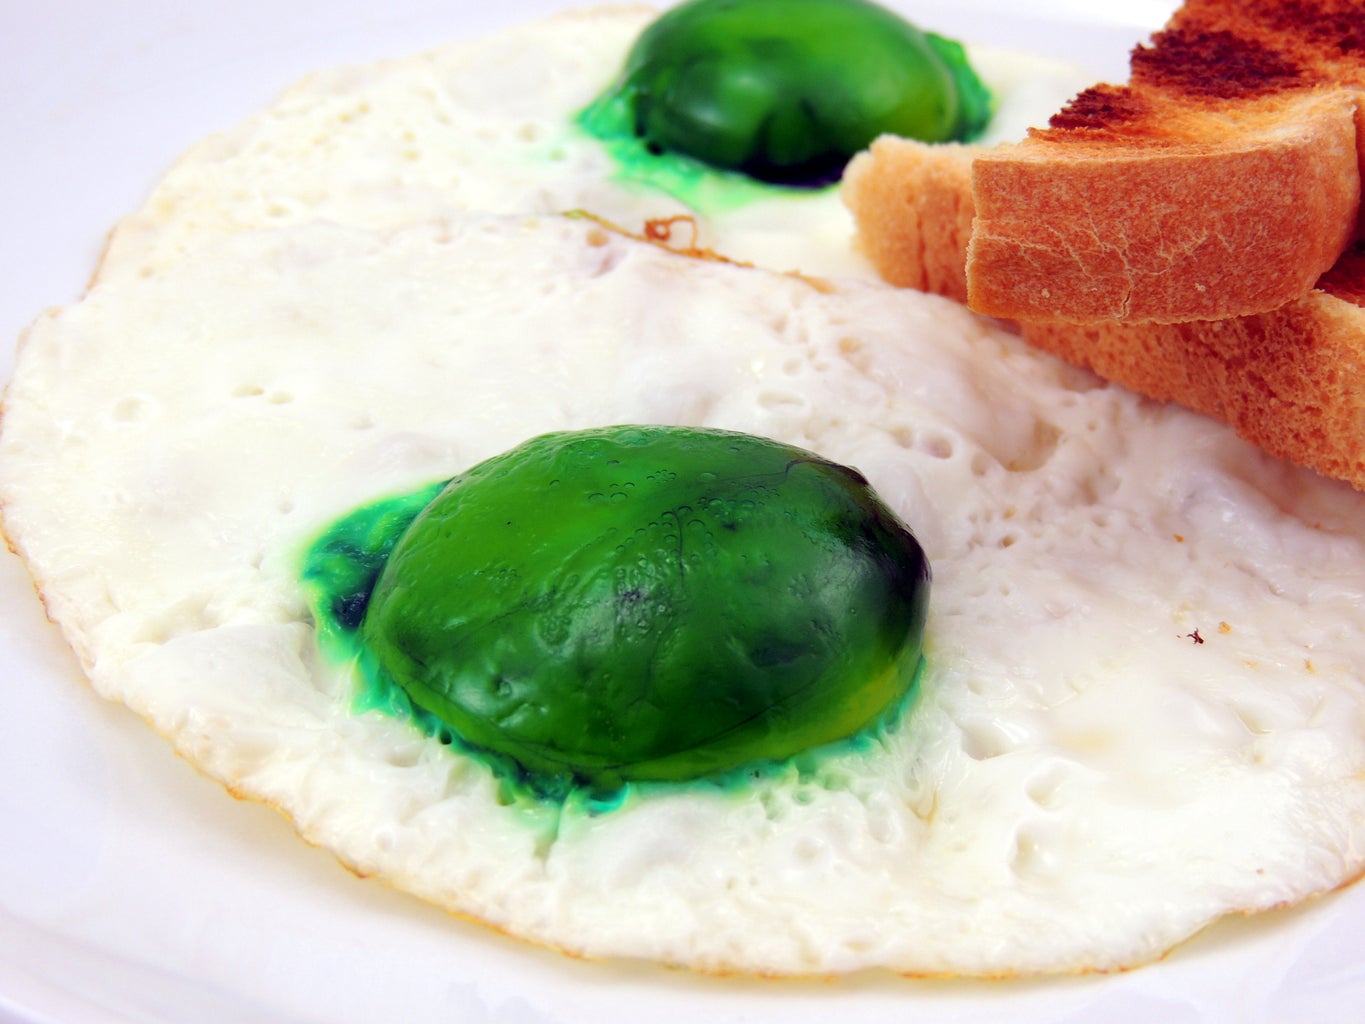
Step 4: Serve and Enjoy!


Plate your green eggs with some toast! I love dipping my toast into the yolks personally. The insides of the yolks will still be golden as the coloring is solely on the membrane. Once you start digging in is gets a little less weird to eat as the yellow yolk runs all over!
If your going for a "Green Eggs and Ham" Dr. Seuss look, serve it with some ham or Canadian Bacon!! You can even color the ham green before you heat it up!!

Participated in the
Halloween Food Contest 2016


