Introduction: How to Make a Customizable Punchable Keyboard Button


While you are at work or bored with playing games, don't you often have the impulsion to hit your keyboard?
Hit this punchable customizable key! Let off your unhappiness! In this Instructables I have made customizable punchable keyboard button made up of piezo element, ATmega32U4 based board, a high value resistor (1 Mega ohm) and some sponges.
To type, users simply hit or kick the key they want.
Step 1: Hardware Required:
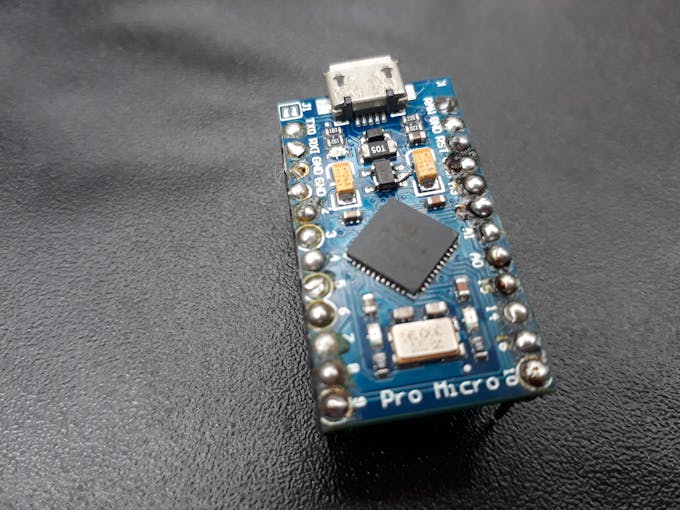
- Arduino Pro Micro
The Micro is based on the ATmega32U4 microcontroller featuring a built-in USB which makes the Micro recognisable as a mouse or keyboard.
You can use any microcontrolled which is using ATmega32U4 Chip.
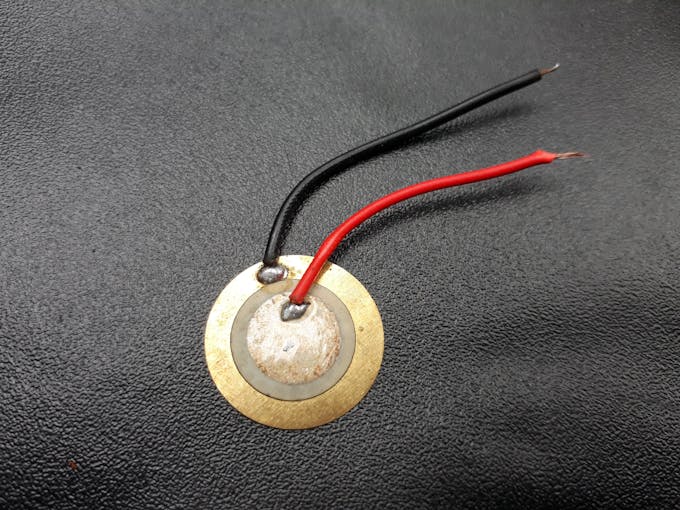
- Piezo electric disc
A piezo is an electronic device that generates a voltage when it's physically deformed by a vibration, sound or mechanical strain.
Piezoelectric disc can be found in the speakers in some musical gift card. If you have one you no need to buy a piezo element from shop, use screw driver and/or knife to pry the speaker case apart.Then remove the metal plate and lift the circuit board(they may be wedged in tight) so you can get at the piezoelectric disc underneath.
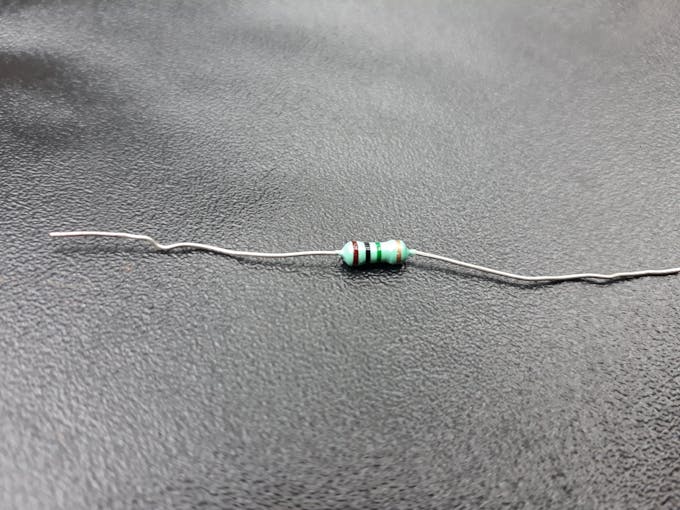
- 1 Mega Ohm resistor
This high value resistor limits the voltage and current produced by the piezo and to protect the analog input.
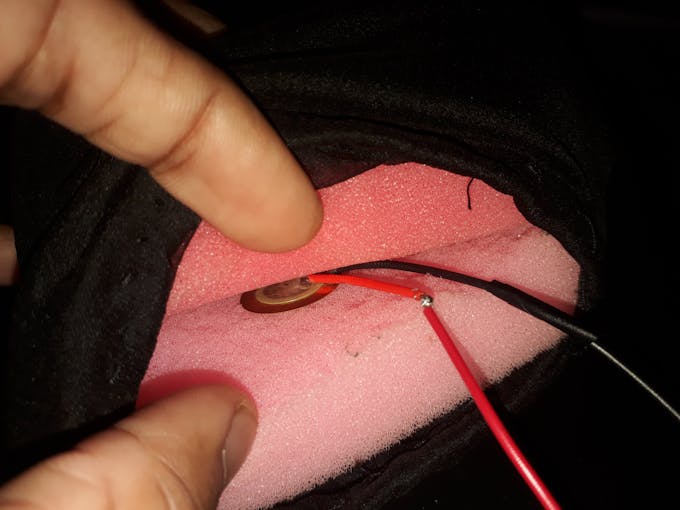
- Sponges
When force is applied on sponge it deforms and when force is released it gains it's original shape. The piezo element will be placing in between sponges and when ever some one hit on it, the generated voltage will be sending through analog pin of arduino micro.

Step 2: Circuit Diagram & Working

Working:
Piezos are polarized, meaning that voltage passes through them(or out of them) in a specific direction. Connect the black wire (the lower voltage)to ground and the red wire (the higher voltage) to analog pin 0. additionally, connect a 1 mega ohm resistor in parallel to the piezo element to limit the voltage and current produced by the piezo and to protect the analog input.
If the piezo's(act as knock sensor) output is stronger than a certain threshold, your board will perform keyboard operation based on program.
Step 3: Make an Enclosure to Cover Sponges:
Get a cloth and make a enclosure for sponges using needle and thread. I told to my mom to prepare one and she made a enclosure to cover the circuit and sponges.

Step 4: Insert Piezo Element Into the Sponge:
Step 5: Code:
Download code from below or get it from here

Step 6: Lets Modify!
- Connect as per the circuit and upload the code
- Simply hook it into your computer's USB port and this can perform different keyboard functions based on program.
Don't forget to modify the the code if you want to perform a different keyboard action.
Change only the following line of code for modification
Keyboard.write("ASCII Value");
Step 7: Why Is This Cool!
Why is this cool? Think about the possibilities for use:
- Gaming Shortcuts or Controls
- Open a commonly used application
- Go to a commonly used website
- Windows shortcuts like save a document or shrink all windows
- Enter your email address or commonly string
- Enter your complex password
- Panic button at work

Participated in the
Creative Misuse Contest


