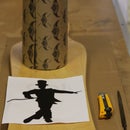
Introduction: How to Shape a Foam Mold for Building Skateboards
Designing your own mold is a fun and effective way to create your own custom skateboard! With Roarockit's Thin Air Press vacuum bag technology, a builder only needs to design/shape one side of the mold. This makes the process a lot easier and more affordable than having to perfectly match a male and female side of a standard concrete or wood mold.
Here are the tools you need:
- Utility knife with a sharp long blade
- Some sort of a saw. I used a Japanese saw, but a regular saw will do.
- Rasp or a surform
- Foam sanding block - cut this from a block of foam. Make it wider than the width of the deck, and glue 100 grit sandpaper or stick grip tape to one side
- pencil or black marker
- A straight edge like a combination square or 12" ruler
Step 1:
Once you have laid out the features on your mold (concave, kick/nose tails, drops), you are ready to shape the foam to your design.
The mold can be made out of foam, mdf or other stable and shapeable materials. The denser the material, the more it will hold up over multiple pressings, but the harder it will be to shape.
Let's get started:
Set the blade of the utility knife just above the depth of the side profile line and make a series of cuts across the foam, about 1" apart.
You can see the cuts I made on the tail of the deck in this photo. Make sure you do not cut below the profile line. Using a saw cut above the profile line as shown. If you don’t have a saw, the utility knife blade will work as well, turned on it’s edge.
Remove the excess pieces of foam.
A little messy looking but don’t worry, you will be smoothing this out with the sanding block.
Step 2: Concave
Using the surform, begin to shape the concave into the foam. Be careful not to shape past the concave lines you have drawn.
Important: Keep this profile FLAT between the two lines. Vacuum veneering works best when the mold planes are flat. A progressive curve is much harder for the vacuum process to bend veneer over.
Because the deck is inset into the foam about 1", you will have to extend the top line to the edge to make an even curve. Feather the edge with the surform.
Here is what it should look like when finished. Remember to not go past the lines and keep the concave flat and not rounded. Use your straight edge to check this from time to time.
Step 3: Sand Smooth
Now it’s time to sand using your flat sanding block.
Sand only cross ways across the mold, (90 degrees to the length of the deck) to keep the planes flat.
Again, do not sand below the template lines on either side of the mold. This will ensure a flat and straight profile.
Remember to check with your straight edge frequently to ensure you are making flat planes.
Finish your surformed concaves by sanding to the line and no more. It is easy to go too far. Both sides of the mold should look the same
Here is the finished mold with nose, tail and concaves shaped uniformly. You can still see the drawn template lines.
Step 4: Ready to Press!
That’s it for shaping a mold!
These steps apply to almost any deck shape you want to build.
Here are a few pictures of the pressing and of my final deck.
Enjoy!
Courtesy of Ted from Roarockit


