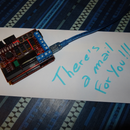
Introduction: How to Use MQTT in Arduino Without an Ethernet Shield
MQTT stands for MQ Telemetry Transport. It is a publish/subscribe,
extremely simple and lightweight messaging protocol, designed for constrained devices and low-bandwidth, high-latency or unreliable networks. The design principles are to minimise network bandwidth and device resource requirements whilst also attempting to ensure reliability and some degree of assurance of delivery. These principles also turn out to make the protocol ideal of the emerging “machine-to-machine” (M2M) or “Internet of Things” world of connected devices, and for mobile applications where bandwidth and battery power are at a premium.
Actually you can use MQTT with an Arduino board using Arduino Ethernet Client api. There is an Arduino library that do the job (http://pubsubclient.knolleary.net/). But to use it you have to use an Ethernet Shield or something similar.
An alternative is Ardulink MQTT (http://www.ardulink.org/how-ardulink-mqtt-works/).
Step 1: Ardulink and Ardulink MQTT
Ardulink MQTT is .an MQTT publisher/subscriber and you can use it to control an Arduino board. Ardulink MQTT is a command line application written in Java. So you have to install it on a PC ora a SoC like Raspberry PI and connect an Arduino board with an USB cable.
Ardulink MQTT is an Ardulink's module.
Ardulink is a complete, open source, java solution for the control and coordination of Arduino boards.
It is composed by several java libraries/applications:
- Ardulink Core
- Ardulink SWING that is a ready java SWING components collection able to communicate with Arduino.
- Ardulink Console that is a SWING application that can be used to control an Arduino board without programmer skill.
- Ardulink Network Proxy Server that is a command line application. It is a network client/server technology for remote control purpose.
- Ardulink Mail that is a command line application. With this application an user can control several Arduino boards sending just e-mails.
- Ardulink MQTT that is a command line application able to connect Arduino boards with an MQTT broker.
You can install Ardulink on your computer extracting the zip file distribution that you can download from this URL:
http://www.ardulink.org/download/
Since Ardulink is written in Java it works on several operating system. Ardulink MQTT uses the default Ardulink connection. It needs for RXTX serial library. RXTX isn't a pure java library so you have to install the operating system dependant shared object. For Microsoft systems you can find the right 32/64 bit dll into Ardulink distribution. For Linux or iOS systems you can refer to RXTX home page. Ardulink is compatible with Rasberry PI too. Please read this article on how install Ardulink with a Raspbian operating system: How to install Ardulink on your Raspberry PI.
Step 2: MQTT Broker
Ardulink MQTT is an MQTT producer/consumer messages client. So to use it you need for an MQTT broker. For instance you can use the open source MQTT broker named Mosquitto:
Step 3: Starting Ardulink MQTT
Type this command to start Ardulink MQTT from Ardulink's lib folder with your shell:
java -jar ardulink-mqtt-0.6.0.jar
You can specify several parameters. You can print the complete list running Ardulink MQTT with a -h parameter. The most important parameters are:
-a (--analog) N : Specify the analog pin number to listen to
-d (--digital) N : Specify the digital pin number to listen to
with another MQTT client, for instance, subscribe to this topic to receive all messages from Ardulink MQTT
home/devices/ardulink/#
subscribe to this topic to receive messages from Ardulink MQTT for PIN 7 state home/devices/ardulink/D7/value/get
publish to this topic to set a state for PIN 7 on Arduino connected to Ardulink MQTT home/devices/ardulink/D7/value/set
values (true/false)
There are a lot of MQTT clients. Here a very nice article to understand how to draw a graph from data incoming from Arduino:
https://pfichtner.wordpress.com/2015/10/03/soil-moisture-to-graph/
More info on:


