

Introduction: IPad Mini (2021) Cover With Pencil Flap


I bought a cheap cover for my iPad which worked really well, but didn't wrap around the pencil. This made me nervous, as I didn't want to lose it.
Supplies
Tools
- 3D printer
- clothes iron
- sharp knife for cutting leather
- metal ruler (also for cutting leather)
- clamps and strong boards for pressing (roughly 16" x 10")
- drill or dremel
- soldering iron (optional)
Materials
- ~1oz leather hide. 16" x 10". This needs to be thin and supple. I used this lamb skin
- 16" x 10" polyester micro suede fabric. This also needs to be thin and supple. I found mine at Joann's. It might be this stuff: Sew Classics Microsuede Fabric
- Sacrificial iPad mini case. The molds are designed specifically for this case: MoKo Case Fit iPad Mini 6th gen
- Iron on adhesive. 16" x 10". I used HeatnBond UltraHold Iron-On Adhesive
- Magnetic snaps. I used these magnetic snaps
- spray adhesive. I used 3M 77
- aluminum foil
- paper towels
- epoxy/super glue
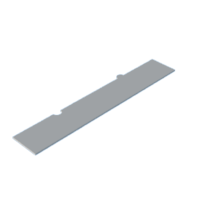
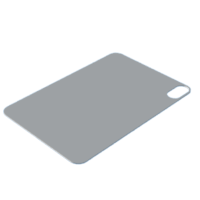
Step 1: Print Wet Molds

3D print these models, and use a soldering iron, or epoxy to fuse them together.
make sure the joints are smooth and even, as the leather will pick up any topology you have on them.


Step 2: Wet Mold the Leather

Dampen your hide with water. I wouldn't recommend soaking leather this thin since its quite delicate, and the dyes may bleed out. I used a spray bottle with water and misted it, rubbed it in, misted some more until i could *barely* see moisture come through on the top grain side.
Next, lay a piece of aluminum foil down on a board large enough for the 3D printed mold, followed by the mold, and then the damp hide - top grain facing down. the foil is to protect the leather surface from any grit/discoloration it might pick up from the board.
Press the hide into the mold to get an idea where the impressions are, then place the 3D printed panels into the impressions. getting the camera cut out into place can be tricky. It can be a bit easier if you slide that corner off the edge of your work surface, get it in place from the underside, then slide everything back to center.
Cover the hide with paper towels, and a second board, then clamp the whole thing.
Allow it to sit for a few hours, then change the paper towel, and re-clamp. let it sit like this till the leather is completely dry (+/- over night at room temp). Maybe change the paper towel a few times over the course the evening.
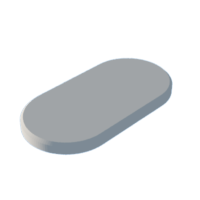
Step 3: Inset Cover Magnet
Take the moko case, and using a knife, *carefully* remove the lining (gray suede side). to make your life easier, get a sharpie and label each panel, and its orientation. I numbered them, marked them as 'top side' and added an arrow pointing to the left edge.
Remove the outer layer and mark the backside of the panels.
Take a pair of the magnet snaps, and remove them from the plastic sleeve they come in. Using one of the snaps, find and mark the dead center of the smallest panel.
Using a drill, or a dremel, cut a hole in the panel for the snap.
rough the sides of the snap with sand paper, or a nail file to give the glue something to grab, and superglue, or epoxy it into place. IMPORTANT: The mating side of the magnet should be face down while the panel is top side up. I had some luck making the hole just a tiny bit snug, and press fitting the magnet into place.
Tip: if you're using super glue, run some baking soda into any unfilled gaps around the snap, then hit it with the super glue. the baking soda will cause the glue to kick off almost immediately, and will add 'structure' to the bond. be sure to sand it flat / smooth.
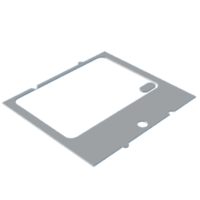
Step 4: Assemble Panels + Hide
Lay out some news paper or butcher paper, because this part will make a mess.
Using masking tape, mask off the leather hide, leaving only the panel impressions exposed. Leave the hide in 3D printed mold.
Lay the other snap magnet, mating side down on the butcher paper.
Lay the case panels bottom side up on the butcher paper, then spray the hide, the magnet and the panels with your spray adhesive. A light coat is sufficient.
Following the directions for the spray adhesive, join the hide with the panels and magnet, and place it back in to the clamped press while the glue sets. Use foil above and below, so you can peel it away easier in cases of overspray.
Step 5: Final Assembly
For this final step, place the hide on your work surface, still inside the mold, and follow the directions for your iron on adhesive to join the hide with the polyester micro suede.
For a good bond I got the iron to about 250 F (below the melting temperature of polyester), and pressed FIRMLY down on the iron.
You may see some darkening of the polyester. Assuming your iron isn't too hot, I think that is the adhesive seeping up. I use that as my cue to stop. Assuming you've been ironing / heating evenly, you should have a good solid bond.
Allow every thing to cool before checking the bond strength.
You're mostly done. the Final step is to trim everything down with your sharp knife and metal ruler.
Cutting out the camera hole neatly is the hardest part. I used a wood carving gouge to get the curve just right.


