Introduction: Interactive Black Inventors Display
Creating an interactive display is a great way to introduce your students to Makey Makey and Scratch. While this project focuses on black inventors, you can use this guide for a multitude of other topics and activities-just tweak it to suit your goal!
I've included a link to the project guidelines that you can easily make a copy of and modify to your content area.
I have the students work in groups of 2-3 for activities like this. Each member is responsible for contributing, recording, and designing a panel for AT LEAST one fact. This could easily be an independent project as well.
Background Knowledge of Students: Students have explored Makey Makey for two classes, and have used the Scratch Coding Cards for two classes. They have prior knowledge of both tools. Experience has shown me that this is a better approach than teaching the tools WHILE doing the project!
Supplies
- Makey Makey Kit
- Scratch
- Display materials (cardboard, card stock, other recyclable materials)
- Conductive materials to serve as buttons to activate the Scratch program
- Carboard techniques poster
- Guidelines (you can make a copy and edit as needed)
- Scratch project to remix
Step 1: Select and Research an Inventor
Scholastic's website has a fabulous "African American Inventors Page", from which I pulled these information sheets. I have limited time with the classes that are completing this project, so pulling and printing the info sheets from the website was more efficient than having them do the research. If you would like to focus more on the research aspect of the project, change as needed!
You may choose to assign students an inventor, have them choose, etc. I like to use the random wheel from Classtools.net for topic choices. Here is a link to the wheel with the inventor choices listed.
Step 2: Scratch-Record and Code Your Facts
Next, you will want to create a program in Scratch that will play your facts when the conductive buttons are pressed on your display.
I've created a screencast that shows this step in detail. Click on the thumbnail above for directions! (After I recorded the screencast, I decided to also add a "Stop all Sounds" button after each fact (see picture), so that the facts won't play over each other as new buttons are clicked.)
I've linked my project here if you would like to remix it.
Note: I mainly use Scratch for the coding and sound blocks with activities like this-if you would like to spend more time on Scratch, you could also have your students incorporate the sprites, backdrops, and other tools to create a visual display in the program as well. (for example-they could add sprites of the invention, import a picture of their inventor as a sprite, etc.)
Step 3: Create Your Display
You could go a few different ways with the display creation-one of the simplest methods (since it's a group project) would be to have each group member create a "panel" for their fact, then combine all the panels into one trifold type setup using scotch tape to hold the pages together. (see this in the next step)
If you would like to add an extra design challenge aspect to the project, you could require your students to use an attachment technique from the above poster (created by Sarah Wyman, art teacher at Festus Elementary School) when creating their display. I came across the poster, and this article on Pinterest.It really all depends on how much time you want to spend on the project, and what skills you want to focus on.
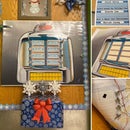
Above is a picture one way to set up your display-however, the sky is the limit! Decide how much freedom you want to allow when choosing a display option :-)
Step 4: Connect Makey Makey
Pick spots on your display to attach a brass fastener or any other conductive material to. Remember to also include a conductive button for "Earth"so the user can ground themselves as they select a fact button to press, and you may want to add another button labeled (and add this to your Scratch Code) "Stop all Sounds", to click before moving on to a new fact. This prevents the facts from playing over each other
You will poke the material THROUGH the display, and the Makey Makey wires will attach to the backside of the poster. This keeps your project neat and organized, and avoids seeing a million cords!
When the conductive material is pushed, your recording for that fact should play from your Scratch code!
I added an additional requirement-students have to make a play-doh EARTH button in the shape of something related to their inventor or their invention! I used a heart since Boykin helped advance the pacemaker.
Touch the heart with one hand while you tap the conductive buttons on your display to hear the facts!
I sometimes connect their Chromebooks to a Bluetooth speaker as they take turns sharing-the built in speakers on the Chromebook aren't fabulous.
Hope you enjoy making your display!

Second Prize in the
Makey Makey Contest


