Introduction: Job Site Radio Repair Step by Step
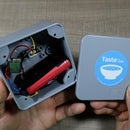
I've got this job site radio from the flea market but it wasn't working so I took it apart to investigate the flaw and try to repair it. When powered on, there is an LED that lights up red but there is no sound coming from the speaker and when I switch through the mods, nothing happens.
The radio supports Bluetooth and USB so if fixed, it will be a really nice addition to my workshop so I can have music while I work.
This Instructable is sponsored by Altium Designer and you can get a free trial and a 30% discount on the following link: https://www.altium.com/yt/taste_the_code
Supplies
- JCD8898 soldering station - https://s.click.aliexpress.com/e/_ApMTD2
- Desoldering pump - https://s.click.aliexpress.com/e/_AEzNje
- Desoldering wick - https://s.click.aliexpress.com/e/_A9xaNI
- B772 transistor - https://s.click.aliexpress.com/e/_AMqeVO
- Multimeter - https://s.click.aliexpress.com/e/_9RUZU0
- Wire snips - https://s.click.aliexpress.com/e/_AA7WeC
- Solder - https://s.click.aliexpress.com/e/_9hjFqc
- Screwdriver set - https://s.click.aliexpress.com/e/_AS4mbK
Step 1: Disassemble the Radio
We start the repair by first disassembling the radio enclosure. Since this is a job site radio, it comes with rubber pads on both sides that can cushion any impact to the side so we first need to remove those.
Once the rubber pads were off, there were 4 screws in the front that we holding the radio together.
Once those are removed, the radio can be separated and we get our first glimpse inside.
To have better access to the circuit boards inside, I also had to unscrew the power input module from the other half and with that, the two halves were separated enough so we can start inspecting the circuit.
Step 2: Investigate Any Obvious Flaws
Any repair starts with a quick search for any obvious flaws.
An obvious flaw is something that can be identified as an issue quickly without any measurements. Such flaws include broken wires, broken PCBs, any burnt components, signs of oxidation, etc. that can affect the functionality.
In the radio, some of the boards had some sort of residue that looked like water damage but there were no traces of water in the casing so it might have been something that stayed from the manufacturing process.
Anyway, I did clean it with some alcohol before trying the radio again but it did not make any difference.
Additionally, I noticed some solder joints on the board that looked like they were not soldered properly so I used my soldering iron to reflow them so they are nice and secure. Again, this did not make any difference in the operation of the radio so I continued with a more detailed inspection.
Step 3: Measure Components for Short Circuit
If nothing looks bad in the circuit, our next step is to measure components on the board looking for any that are short-circuited.
Every component has some sort of internal resistance when measured with a multimeter and there shouldn't be signs of a short circuit on things like capacitors, diodes, and transistors.
Sometimes, some PCBs include 0 Ohm resistors that can also fail, but they fail by going open circuit instead of short circuit.
In my case, there wasn't any component that was shorted or ones that were open so my next step was to supply voltage on the input side through the batteries connectors and trace and test the presence of that voltage in the PCB.
Step 4: Follow the Input Voltage Path
This is definitely a tricky process and one that requires some knowledge of how different components work.
I've supplied the 6V as declared on the input and I've then followed that voltage through the switch that's together with the volume knob and I also followed it to a regulator that reduced it to 3.3V that appeared to be working as expected.
The radio has one main IC that controls its operation and when I tested for voltage on it, I realized that the voltage was not reaching it. By following the traces, I saw that this IC is powered from a B772 transistor and when I checked the voltage on it, I saw that voltage is present there but the transistor stays off so I knew that I have found the flaw.
Step 5: Replace the Broken Components
Once I knew that the transistor needed to be replaced, I purchased a new one and I first removed the old transistor by adding some fresh solder to its pins and then removing that solder with a desoldering pump.
When the transistor is removed, we can insert the replacement transistor, making sure that we place it with the same orientation as the original one.
Once in place, we can solder its legs and trim the excess so it sits flush with the PCB.
We can now test the radio, and if the repair worked, we can continue to the next step to assemble the radio back together as one unit.
Step 6: Assemble and Enjoy
To assemble the radio, we first need to return the PCBs that we ook out in their designated places and align the knobs on the front with the actuators on the PCB. This was a bit tricky since I had to align the volume knob, the tuning capacitor, the mode select switch, and the input USB.
Once PCBs were in place, we can put the case together by reversing the disassembly process that we did at the start, making sure not to damage any of the wires that are inside.
The sound coming out of the radio was decent and if you want to check it out, make sure to watch the video below of the entire repair process.
If you liked this Instructable then, make sure to check my other ones and also make sure to subscribe to my YouTube channel.
Thanks for reading!

Participated in the
Anything Goes Contest 2021


