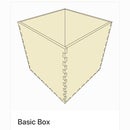
Introduction: Kerf Correction for Laser Cutting With MakerCase
This instructable shows how to calculate kerf when making a box. Kerf is the width of material removed in the cutting process. Compensating for kerf will insure that your joints have just the right snug-ness.
We use the free MakerCase box generator, but knowing how to calculate kerf will help with any multi-piece project.
Supplies
Caliper
Wood (or other material)
Laser cutter (or other cutting device)
Step 1: Cut a One-inch Square
First, do a test cut on your project material. The laser cutter's kerf will vary based on the material type, material thickness, and laser cutter settings, so you will need to do a test cut for each material stock that you use. If you need to adjust your laser settings for a new material, do this first before measuring the laser cutter's kerf.
For this example, our test cut is a one-inch square. If you cut a different size rectangle, just be sure to record the width. You'll need it for calculations in step 3.
Step 2: Measure the One-inch Square
Measure the one-inch square using calipers. Here, the reading on the calipers is 0.995 (or would be in the battery didn't just die!).
Step 3: Calculate Kerf
The laser cutter's kerf will be the difference between the known size and the actual size of the one-inch square.
Calculate kerf using the formula below.
kerf = width of square - width of square as measured with the caliper
kerf = 1 inch - 0.995 inches = 0.005 inches
0.005 inches is the laser cutter's kerf when cutting this material.
Step 4: Set Box Dimensions and Kerf in MakerCase
In step 3, we calculated kerf to be 0.005. This value represents the full width of the laser beam. However, the laser beam travels along the center of the cut line, so only half of the laser beam falls inside the part. Therefore, you only need to offset each cut line by one half the laser beam's kerf value.
Go to Makercase.com and choose the basic box generator. Enter desired dimensions. Then, click the green "download box plans" button. A window pops up with plans. Select the "Kerf and Corner Compensation" tab.
To determine the kerf compensation value in MakerCase, divide the kerf value by 2.
In our example, this is: 0.005/2 = 0.0025. Enter this value (0.0025) in the kerf field.
Click either the SVG or DXF button, depending on which format you'd like your plans.
Step 5: Cut Box
Send plans to the laser cutter and cut. Fingers crossed!
Step 6: Assemble Box
Fit box sides together. If joints are too loose or too tight, adjust kerf and re-cut.
Too tight --> Decrease kerf
Too loose --> Increase kerf
Step 7: Kerf Compensation in Other Programs
If you're not using MakerCase or if you are modifying your MakerCase design in another program, you can still compensate for kerf.
Many design programs, such as Adobe Illustrator, Inkscape, and AutoCAD, have an offset tool for creating new paths offset a fixed distance from a selected path. To compensate for kerf, offset paths by one half the kerf value.
The offset changes depending on whether the path is the outer edge of the object or on the inside of the object (such as a hole in a part).
- For outside edges, the offset direction is to the outside, so the offset path is larger than the original.
- For inside paths, the offset direction is to the inside, so the offset path is smaller than the original.


