Introduction: Laser Tripwire Home Alarm System


If you are like me and love science fiction stuff, then you'd probably be fascinated by the laser triggered alarm systems. If you want to build one for your room or your home, then look no further.
In this Instructable, I'll show you how to make your own Laser Alarm System . It's a simple fun project which helps you learn more about how an LDR works.
Step 1: Components Required


For this Project, you will need:
- Laser Source.
- An LDR (Light Dependent Resistor).
- Arduino Uno.
- Resistor 10k .
- Buzzer.
- Jumper Wires.
- Bread Board.
- Enclosure (Optional).
Step 2: How It Works

- The concept is quite simple. The Laser is incident on the LDR.
- The values of the LDR while Laser is incident on it is remembered by the Arduino.
- When someone passes through the laser, the LDR value changes and it triggers an alarm by setting off the Buzzer.
- It will continue till you press the reset button on the Arduino Manually.
- If you are interested in knowing how the LDR and the Buzzer works, check out my previous Instructable.
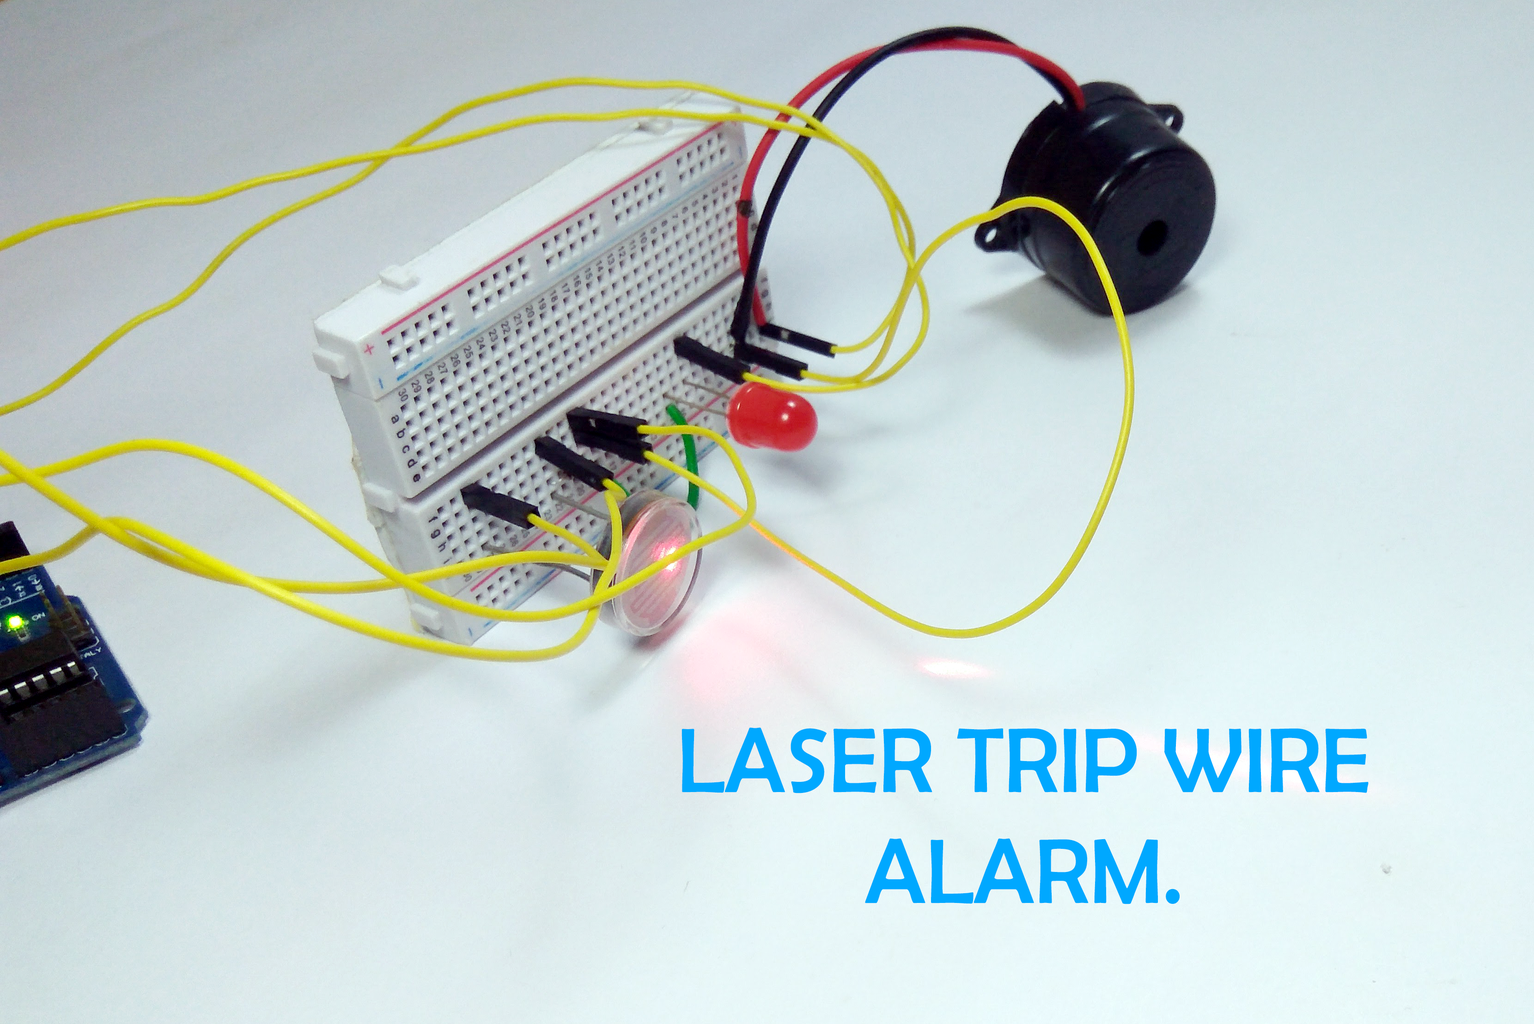
Step 3: The Circuit


Follow the schematics and build the circuit on a BreadBoard. The connections are as follows:
- Connect the LDR such that A0 pin receives the variations in LDR values.
- Connect the Buzzer to PWM Pin 9.
- Connect an LED to blink when the alarm is triggered. Connect it to Pin 3.
Step 4: The Code
Before you use the actual code for the alarm, use the AnalogRead code for getting the values of the LDR while the laser is incident on it. Use this as the threshold value in the Alarm Code.
const int buzzerPin = 9;
int led = 3;
void setup() {
  Serial.begin(9600);
  pinMode(buzzerPin, OUTPUT);
  pinMode(led, OUTPUT);
}void loop() {
  int sensorValue = analogRead(A0);
  Serial.println(sensorValue);
  while(sensorValue < 800){
    tone(buzzerPin, 50);
    delay(50);
    noTone(buzzerPin);;
    digitalWrite(led, HIGH);
    delay(100);
    digitalWrite(led,LOW);
    }
  delay(100);
}
Step 5: The Result

Once you have verified the code, upload it to the Arduino. That's it . You have successfully set up the Laser Tripwire which is waiting for someone to pass through it.
You could always get innovative and make the trip wire do much more, like trigger a camera to capture a picture when the alarm is set off.
That's All Folks !! Follow me for More DIY stuff !!

Participated in the
Makerspace Contest 2017

Participated in the
Home Improvement Contest 2017


