Introduction: Learn SelfCAD- an Online 3D Modeling Software: Shape Generator Tool


So what’s cool about this tool is that you can keep increasing segments and alter them uniquely.
Each time you add a segment you can alter many things on it and play around with all the different features to slowly build a tower of your finished project.
Also the program automatically duplicates your first segment as your second so you can zero it out and start fresh or base your next piece off of your previous one which could be really helpful.
For the bevel feature you can choose a top and bottom level and then the computer will figure out the rest for you based on the weight you choose.
The same idea is used for the position offset by creating a transition area of smoothness.
Once you have segments, at any point you can toggle back or forth by using the arrows on either side of the segment drop down and change other parts to keep adjusting for other parts which I think is a really cool feature.
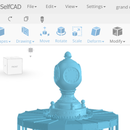
Step 1: Shape Generator Tool

Under 3D shapes you’ll find a shape generator, called “shape” that is the only tool we will be using for this project!
Step 2: Segment 1

Now that we understand some basics let’s start modeling our bishop and you’ll see why something with so many levels like a bishop is the perfect example to learn this tool.
We’re going to give it a base that’s thin and rounded.
Step 3: Segment 2


Next to where it says segments there is a plus sign, click on that to add another segment. Now let’s make it curve up a bit.
Step 4: Segment 3

Make another segment for a flat bump to even things out. At this point you can really start seeing that when you are one of the segments it’s highlighted so you can recognize clearly what you’re working on.
Step 5: Segment 4

Keep making a new segment between each step. Let's finish up the body of our bishop and make it tall, and smooth so we can start working on our neck.
Step 6: Segment 5

Ok! We’re doing great. Let's make the base of our neck.
Step 7: Segment 6

Let’s add a few parts to the base of our neck to make it look intricate as many bishops do. Also keep in mind you can omit or add any segments you want or customize it to be unique. This is YOUR bishop! You can also decide later on or as you go to change things here or there because of the cool toggle feature.
Step 8: Segment 7

To finish up the neck I’m going to smooth it out again and we’ll get started on the head!
Step 9: Segment 8

Let’s do a straight part to make this seem more intricate so you can really brag to your friend’s when you show them what you made. The more straights and curves and layers in general will keep adding to the seemingly complications of this piece but we now know it’s just an extra few clicks!
Step 10: Segment 9

Let’s give your head a band on the bottom. See you’re really getting the hang of this now!
Step 11: Segment 10

Ok this is the part that makes your bishop look like a bishop. (Sorry I forgot to take a picture of this step and went back to do it so you can get the measurements if you want).
Step 12: Segment 11

And the point….
Step 13: Segment 12

Now let’s make the ball on top.
Step 14: Segment 13

Now to curve the top and then we’ll be done!
See wasn’t this easy? Doesn’t it make you anxious to start modeling the rest of your chess pieces and seeing how you can make this set unlike any other?
Have fun and send me pictures of the cool pieces (chess and otherwise) you were able to create with this tool!
For beginners or masters at the game of chess, I hope modeling and printing your own pieces gives a nice spin to the game that makes you smile. Enjoy and have fun!