

Introduction: Light Up Dream House


Today's build is a Light Up Dream House using the Circuit Playground Blue Fruit, Neopixel LED strip, a potentiometer, and external buttons. The lights are dimmable and, with the push of a button, can enter party mode with a flashing light display.
Attachments

Supplies
- ⅛ inch Baltic Birch Wood
- Wood Glue
- Neopixel Light Strand 2 inch
- Adafruit Circuitplayground Bluefruit
- Laser Cutter
- Battery Pack with 3 AAA batteries
- Potentiometer
- External Buttons
- Wires and Alligator Clips
Step 1: Designing the House
Designing your dream home is the first and in my opinion the most fun step of this entire build. You can use a variety of methods to help with drafting your home floor plan. There is always the old fashioned way with pencil, graph paper, and a trusty ruler or t-square. You can also use CAD software as well. One consideration when designing that I made was deciding how the wiring for the lights would be concealed within the walls of the Dream House. To solve this there is a support that goes through one corner of the house allowing the wiring to be connected to the CPB at the base of the house. Lastly, since a highlight of this project is the light display I choose to design a home with an open floor plan, high ceilings, and large windows to allow the outside observer the best chance to appreciate the lights.
Step 2: Creating the Files in Adobe Illustrator
Translating the design onto a usable Adobe Illustrator file for use with the Trotec Laser Cutter was easy. I decided on a scale where 1 inch = 3 feet. I started with working on the floors and ceiling making sure to include holes for the lights and wiring. For the exterior walls I included window and door trim which elevated the quality of the build. Be sure when designing your own dream house to make allowances for the width of the material you are building with. I took advantage of the web app Makercase (https://en.makercase.com/#/) to create a simple box to serve as the base for this project and included holes for the potentiometer and external buttons. The attached files below can serve as an example for what you may desire to do with your own project.
Step 3: Writing the Code
Attachments
Step 4: Laser Cutting and Assembling

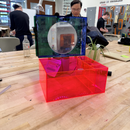
Using a laser cutter and ⅛ inch baltic birch, the build began to come together. I initially arranged the pieces together and held it together using masking tape to ensure that the pieces all fit well. I secured each of the Neopixels in the strand to their openings using masking tape as well. After I was happy with the build, I glued all the pieces together with a simple wood glue. I attached the strip, external buttons, and potentiometer with screws or alligator clips. I used play-do and masking tape to help secure them to their respective holes in the base.


![Tim's Mechanical Spider Leg [LU9685-20CU]](https://content.instructables.com/FFB/5R4I/LVKZ6G6R/FFB5R4ILVKZ6G6R.png?auto=webp&crop=1.2%3A1&frame=1&width=306)


