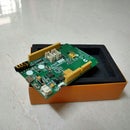
Introduction: LinkitOne Sensor Data Logging Using GoBetwino
IoT projects usually involve connecting to the internet and posting data to a cloud service. However, several offline data logging applications can be developed using the MediaTek LinkitOne platform and GoBetwino, a program for Windows. Read more about GoBetwino here.
Basically, GoBetwino is an interface for connecting Arduino (or Arduino platform-based) hardware. It can execute certain commands on the computer by Serial Messages on the Arduino.
In this instructable, we take a look at initiating data logging from various sensors connected to the LinkitOne using GoBetwino.
For this tutorial, we have made use of Grove sensors - Temperature and Pressure. However, you can make use of any sensors you need.
Step 1: Components
1. MediaTek LinkitOne (obviously).
2. Grove Kit, we are using the DHT11 temperature sensor and the pressure sensor.
3. GoBetwino installed on your Windows PC.
Step 2: GoBetwino Setup and Assembly
Install GoBetwino on your Windows machine. Download it here:
http://mikmo.dk/gobetwinodownload.html
Assembly
Connect the sensors to your LinkitOne either directly or using the Grove shield.
Connect the LinkitOne to your PC using microUSB.
Step 3: Programming
GoBetwino makes use of Serial Print messages to execute commands and log data. Let us start with a basic Arduino program to check if GoBetwino is functioning properly.
void setup()
{<br>Serial.begin(9600);
}<br>void loop<br>{<br>Serial.print("#S|LOGTEST|[");<br>Serial.print("hello!");<br>Serial.println("]#");<br>delay(1000);<br>}<br>
Let us go through this code line-by-line. In the loop function, we use multiple Serial print statements. The first print statement says "#S|LOGTEST|[", this specifies Gobetwino to start logging data till it encounters a "]". The second print statement is "hello!". This being a test just sends the string "hello!" to our data logger. Next is a printline statement which closes the gobetwino command.
Burn this code to your Arduino and then change the port to see the Serial monitor. Here you will see the raw message being printed. Now fire up Gobetwino and go to settings and select the serial monitor port. Make sure you change back to programming port in the Arduino IDE before opening Gobetwino.
Now you will see Gobetwino processing every LOGTEST command. If you keep on seeing a series of 0s in the bottom window, don't panic! That's just Gobetwino doing its job!
In the top window, the software also specifies the txt file where it is storing the data logs. Go and check if it is being stored correctly.
Once this is done, we can move on to logging the sensor data!
Step 4: Logging Sensor Data
Let us start with logging the temperature data first and then move on to different sensors.
I am using the Grove temperature sensor here, connecting via the Grove Shield.
The temperature sensor is DHT22 based, so make sure to include that library while compiling.
On the same lines as previous step, we just replace "hello!" with the temperature value in the code.
This code should log the temperature values in your Gobetwino file!
<p>#include <dht.h><br></dht.h></p><p>#include "DHT.h"</p><p>#define DHTPIN 2     // what pin we're connected to</p><p>#define DHTTYPE DHT22   // DHT 22  (AM2302)</p><p>DHT dht(DHTPIN, DHTTYPE);<br><br>void setup() </p><p>{
    Serial.begin(9600);
    Serial.println("DHTxx test!");</p><p>    dht.begin();
}</p><p>void loop()
{

    float t = 0.0;
    float h = 0.0;

    if(dht.readHT(&t, &h))
    {

        Serial.print("#S|LOGTEST|[");
        Serial.print(t);
        Serial.println("]#");

    }

    delay(2000);
}</p>
Step 5: Add Sensors and Enjoy!
Similarly, add more sensors as per your requirement and log data for fun or analysis or whatever you need it for!
Hope this Instructable was helpful! Please comment and let me know of any suggestions, queries or comments! Thanks, happy IoT-ing! :D


