

Introduction: MHD/Magnetohydrodynamic Submarine


Last year, I was learning about the Lorentz force in my physics class and there was this small paragraph about the movie "The hunt for Red October". It's a movie about a silent submarine working on the MHD (magnetohydrodynamics) principle. The submarine has no propellors, instead there is a large tube throughout the vessel. In the middle of the boat, there is a coil and some electrical conduits. If you place the two parts orthogonal formation, the fields of this components will produce a force . This force will be used as a propellant and this way the submarine can move.
Supplies


Hardware
- PVC-pipe ⌀120mm
- PVC-pipe ⌀32mm
- female-female connector for the 32mm pipe
- PVC-glue
- Copper tape
- Strong magnet (you can get this from a mixer, vacuum cleaner, ... anything with a DC-motor or you can buy a pair on the internet)
- x5 electrical wire (+- 2m)
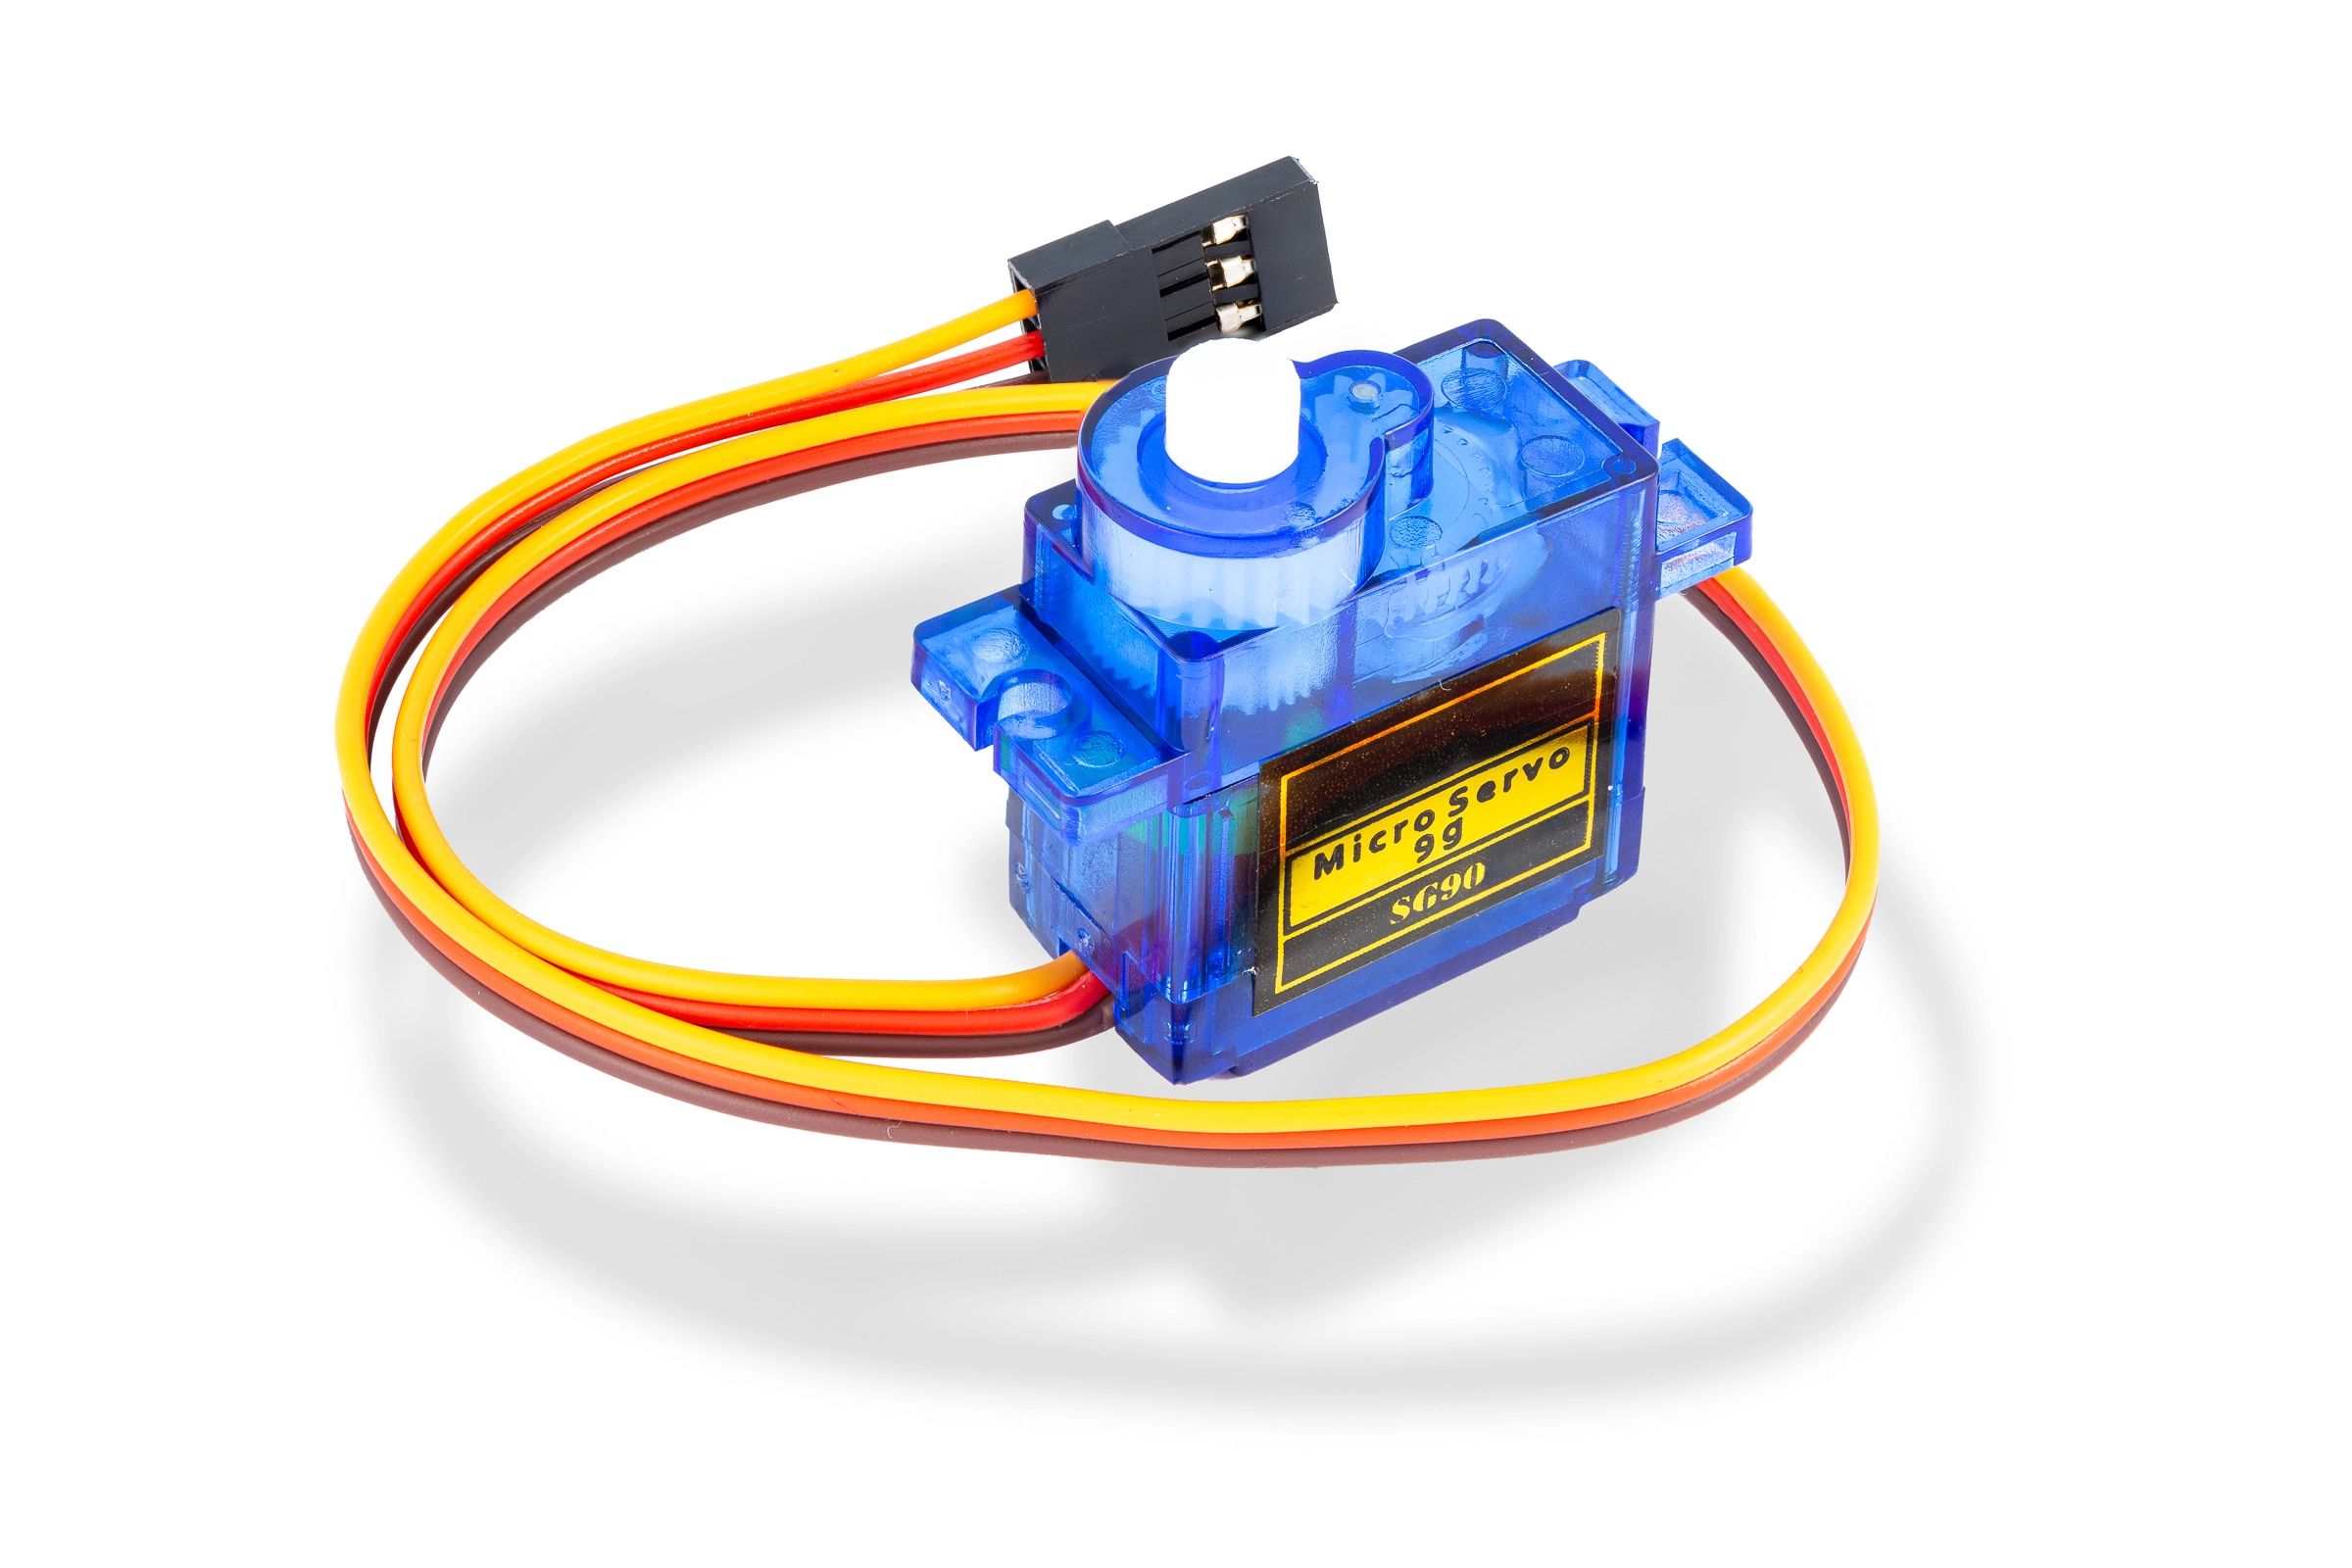
- Servomotor
- x2 double way switch
- Potentiometer
- Arduino Uno
- Breadboard
- Jumperwires
- Luster clamp
- STL-files for the front and back of the submarine
- STL-file for the stir
- STL-files for the control box (you can also use a wooden box or something else for this box)
- Silicone sealant
- Superglue
- Double-sided tape
- 9 kilo regular kitchen salt
- Tap water (a lot of water...)
- Spray paint
- 2 small screws from an old printer, radio, ...
- Thin metal sheeting (I used some thin copper plates)
- Metal wires
Machines
- Computer ( I assume you have this, because you're looking at it right now)
- Drill
- Drillbits (I can't really say what diameters you will need because this depends of your materials)
- 3D-printer with filament
- Screwdrivers
- Pliers
- A plastic box that is big enough for the submarine to fit in and sail
- Printer


Step 1: Cutting the Tubes
Cut the large tubes to the desired length. I used a length of 30 cm, longer is possible. Try to cut this tube as straight as possible. For the small tube, cut it to 60 cm. This is to long, but we will make it to the perfect length if we have the total submarine completed.
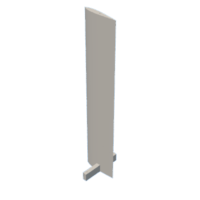
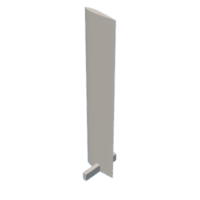
Step 2: Print the Top and Bottom
In this step, we're going to print the top, bottom and stir. I used the Ender 3-Pro with simple PLA-filament.
For the top, you have to print it with the smallest part at the bottom, this way I didn't need support. I printed everything at 20% infill. Don't use the concentric infill for the top because it makes it unstable.
Step 3: Electronics of the Stir-system
For the stir, we use an Arduino. We use a potmeter and connect it to a servo with a simple program and an Arduino Uno. The program I used is attached to this step. You can use a breadboard to get a better and more organized view of your project.
Attachments

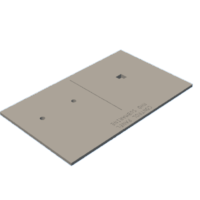
Step 4: Print the Control Box
Print the box and the cover. The files are attached and I used the same printer as in step 3. 20% infill and I used support. It could be you need to make an extra hole in the back. It depends on the thickness of your cables. Use some double-sided tape to stick the cover to the box once your done with the internals.

Step 5: Internals of the Box


Put the Arduino, breadboard and other board in the box. You can use the picture above as an example. Use one hole for all the input-cables: the Arduino-cable and the 2 wires for the power. The other hole will be used for the output-cables. These cables will go into the submarine.
The 2-way buttons need to be put into the right side of the cover. You will have to use some heat to bend the pastic to get the buttons in. You have to connect the buttons following the schematic overview attached to this step. Use some simple wires for this connection. The 2 wires that come out for the power output have to be connected to thicker wires which go into submarine. Use some luster clamps for the connection.
The input cable for the 2-way buttons are attached with some luster clamps to some thicker cables which can be put in the lab power supply. The current from the supply is adjustable to choose the right current.
Connect the jumperwires to the Arduino and connect these to the cables for the output into the submarine. You can use luster clamps and/or a breadboard for this connection.
Stick the potmeter to the cover with some glue or double-sided tape and connect the jumperwires from the potmeter through the cover to the Arduino in the box.
Step 6: Make the Motor of the Submarine


Saw the tube in the middle and cut 2 stripes of the copper tape. Stick both of the stripes length-wise into the tube and leave some tape out for the connection with the power supply from the thick cables. This tape both have to be applied in 1 piece of the tube, the second part of the tube doesn't need tape. Glue the 2 pieces together with the female-female connector. Make sure the side with the copper tape is glued on the connector.
Glue the 2 magnets to the tube. The magnetic field has to be perpendicular to the electrical field of the copper tape. The fields have to cross each other, this will give the Lorentz force.
Step 7: Connect All Cables in the Submarine


Make some holes at the end of the large tube to put the servo in the hole. You have to adjust the hole to the form of the top of the servo. Only the turning point of the servo has to be out of the submarine, the body of the servo has to be in the submarine.
The output cable has to be long enough. I used +- 2 meters of cable. Put some zip-ties on the cables to keep them together and to make it look cooler. Make a hole in the middle of the large tube and make it big enough to feed all the output cables through. Connect the cables from the 2-way buttons to the copper tape and the cables from the Arduino need to be connected to the servo using some luster clamps.
Make sure the cables are already through the hole in the large pipe when you connect everything to the inside of the submarine.
Step 8: Assembling All the Parts
Make sure all connections inside the submarine are good and secure.
Put the back of the submarine in place. Place the small tube with the motor attached to the cables onto the back and make sure the small tube is aligned with the back. Put the front over the small tube and place it in place on the large tube.
Saw the small tube so that it is even with the front and back piece.
Step 9: Complete the Stir


Take some metal wire or a needle and heat it with a torch or lucifer. Make the holes in the stir a bit larger with this hot metal and make sure the cold metal wire can move free through the holes. Connect the arms of the stir parallel with the arms of the servo and stick the metal wire through the holes in both arms.
Drill some small holes through the metal sticks made out of the metal sheeting and connect the sticks to the stir with some small screws. Do this for the sides of the stir. Glue the sticks to the large pipe, so that the stir is hanging behind the exhaust like the stir of a real boat/submarine. Check the picture that's attached to this step for a good look of the stir-system.
Step 10: Make Everything Waterproof


For this process, I used some silicone sealant. You just have to fill every hole and seal every crack. Don't forget to seal the connection point between the small tube and the front and back piece.
Step 11: Make the Salt Bath
You will need 300 grams of salt per liter of tap water. This is the perfect saturation rate for the salt. More salt will give supersaturation. Mix the salt with a stick. I used 9 kilograms of salt which corresponds to around 27 liter water.
Step 12: Add a Cool Name

I used an industrial font for the name of my submarine. You print the name and cut out the letters. Spray paint it on the boat. I used a vinyl-cutter to cut my name and stick it on the boat.
Attachments

Step 13: Do Not Test, I Does Not Work
This project was my main/final project in last year of high school. It didn't work. You can try this at home but you won't get a satistying result.
Let me know if you succeeded in making a working submarine, you can contact my on my socials:
Instagram: @thomasssskkke
Facebook: Thomas De Mulder


