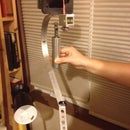
Introduction: Mag-Lite LED XL50 PVC Holster
Here's a simple and clean looking holster for a Mag-Lite LED XL50 from easy to find materials.
Step 1: Tools & Materials
Materials:
-1" PVC pipe (At least 3 1/2" with squared off ends)
-2 1/2"- 3" by 1/2" wide metal belt clip from a pocket knife with mounting hardware
Tools:
-Drill with 3/16" drill bit & a bit small enough for a starter hole for the clip hardware
-Measuring tape or ruler
-File & sand paper of various grits (I used Never Dull as a final polish with great succes)
-Dremmel with cutting wheel
-Pipe cutter
-Marker, pen, or pencil
-Thin bladed saw of your choice
-Screw driver for whatever type of fastener your clip is attached with
-Razor knife
-Combination square (Not pictured)
Step 2: Marking & Cutting the Holster Blank
For this step, the only mark you'll need to worry about is the 3 1/2" mark. You'll want to make sure that both ends of the holster blank are square. To do this, I cut both ends of it with a pipe cutter. The pipe cutter won't cut all the way through the PVC which is where the saw comes into play. You could make the cuts with a miter saw, which would be a lot easier, but the pipe cutter leaves a slightly rounded edge on the ends of the PVC which in my opinion, looks a bit more proffesional. If you're using a short piece of PVC, you can hold off on cutting the blank free from the rest of it. It'll give you something to grab onto for making the inside cuts. Once the blank is cut, de-burr and sand both ends clean of any saw marks.
Step 3: Inside Cuts
Now you'll want to make your 1/2" & 2 3/4" marks. Next make two parallel marks 1" across to mark the back of the holster. Once you have your marks, use the pipe cutter to start the inside cuts. You'll want to start the cut on the outside of one of the 1" marks at the 1/2" or 2 3/4" marks and work your way around to the other 1" mark without going over either 1" mark. Work your way back and forth until you bottom out the cutter while being careful not to cut into the back. Chuck the 3/16" drill bit into the drill and drill out the four corners of the inside piece staying on the waste side if the PVC. Don't go over your marks, you want to end up with a clean, rounded corner. With a cutting disk on the Dremmel, cut along the waste side of the 1" marks as cleanly as possible without cutting too far into the drilled out holes, you can finish the cut with a razor knife. Now saw off along the other two marks to completely remove the waste.
Now, on the 1/2" ring, you need to make a relief cut to allow the Mag-Lite to clip into the holster. I opted to cut off a 1" piece from the front to mirror the back and rounded the corners of my cut with a file. Once all of your cuts are made, square off all your cuts with a file and sand off any saw/file marks.
Now, on the 1/2" ring, you need to make a relief cut to allow the Mag-Lite to clip into the holster. I opted to cut off a 1" piece from the front to mirror the back and rounded the corners of my cut with a file. Once all of your cuts are made, square off all your cuts with a file and sand off any saw/file marks.
Step 4: Install Belt Clip.
To install the clip, I first sanded a 1/2" flat strip along the back of the holster. Remove the clip from your knife and line it up on the back of the clip. Mark your hole locations and drill out with a bit small enough to allow the clip fasteners to cut their own threads. Install the clip and check to make sure that none of the screws stick out into the inside of the holster. if you need to shorten any of the screws, remove the screw and hold it with a pair of pliers and shorten it with a sanding drum on the Dremmel. Be careful not to over tighten the screws, you don't want to strip out the holes.
Step 5: And... We're Done!
I've been using my holster for about two months now without issue. The entire build took about 2 hours. The holster holds the Mag-Lite quite securely and can be modified to work on different applications. Enjoy!
If I won the Zing, I would use it to make some of the more intricate projects I'm currently unable to accomplish. Maybe with the Zing doing some of the work I'll remember to document some of my many projects. ;)
If I won the Zing, I would use it to make some of the more intricate projects I'm currently unable to accomplish. Maybe with the Zing doing some of the work I'll remember to document some of my many projects. ;)

Participated in the
4th Epilog Challenge


