Introduction: Making a Combo Whistle/Watertight Survival Kit


I always carry a Leatherman and Flashlight in a hip pouch. I was looking at Altoids survival kits and wanted something durable and small I could carry on my person at all times. I had very limited space to work with and had to get creative. What I made is a survival whistle that doubles as a watertight storage container.
There are instructions on how to make the whistle and then a list of everything I carry on my person.
There are instructions on how to make the whistle and then a list of everything I carry on my person.
Step 1: Main Body Part 1


#1 Start with a 5/8" pipe and cut off a piece 5" long.
#2 Drill all the way through the pipe with a 15/32" bit.
#3 Then drill the ends of the pipe down 1/2" with a 1/2" drill bit.
#2 Drill all the way through the pipe with a 15/32" bit.
#3 Then drill the ends of the pipe down 1/2" with a 1/2" drill bit.
Step 2: Main Body Part 2


#4 The 1/2" drilling from the previous step will align the tap perfectly strait into the 15/32" hole. Use a 1/2x13 tap on one side of the pipe a few threads and the other side about an inch. This step does not need to be exact.
#5 Cut 1/2" off both ends of the pipe to remove the alignment holes.
#5 Cut 1/2" off both ends of the pipe to remove the alignment holes.
Step 3: Main Body Part 3


#6 1" from the end with threads cut 1" deep cut a groove at 90 and 45 degrees. Clean and deburr with hand files. Leave the sharp edges on the inside of the groove.
Step 4: End Caps


#7 Cut a groove in the end of a 1/2x13 Bolt. These grooves are to remove/install the end caps with a flat head screwdriver.
#8 Cut about three threads worth of material of the end of the bolt. Repeat steps 7 and 8.
#9 Grind part of one of the end caps down as shown in the picture. Try to grind just a little past the threads, you can take off more material later on.
#8 Cut about three threads worth of material of the end of the bolt. Repeat steps 7 and 8.
#9 Grind part of one of the end caps down as shown in the picture. Try to grind just a little past the threads, you can take off more material later on.
Step 5: Fitting and Fine Tuning

#10 Screw the whole end cap in the end opposite the cut groove.
# 11 On the other end screw the ground down end cap down till it reaches the groove as shown in the picture.
You may have to cut the threads deeper at this point if you didn't cut them deep enough on step #4
Blow on the whistle, if it makes no or little noise try grinding more material off the end cap. Too much and it will not make noise either. My first cap didn't work and I had to make a second one. After getting the fit correct, remove the ground down cap, this will be used as an end cap later on.
Step 6: Protective Finish

#12 Derburr, remove the rough edges, sand and degrease.
#13 I used gun bluing to finish mine, paint would work as well.
#13 I used gun bluing to finish mine, paint would work as well.
Step 7: Sealing the Groove


#14 Put a little oil on the shank of the 15/32" drill bit and line it up with the groove on the whistle.
#15 Put caulk in the groove and let sit overnight then remove the drill bit.
#16 Optional: Put clear packing tape over the caulk to protect it from rubbing.
#17 Fill with whatever you want install the end caps and seal with more caulk.
To use the whistle you will need to remove the items and caulk then install the end caps per #10 and #11.
The next three pages are what I put in the whistle, in my hip pouch, and what I have on my person.
Step 8: Inside the Whistle

One plastic sandwich bag cut below the part that seals, tightly wound and inside a piece of paper. Storage container or makeshift water bowl for water purification.
12 Yards of braided fishing line with two fishhooks wound near the outside. Many uses such as fishing/snare lines.
Two needles to go with the fishing line. Clothing repair/stitches.
Two one liter water purfication tablets crushed and sealed in pieces of a drinking straw.
One 3" square of aluminum foil. Signal mirror.
Two neodymium magnets and a small piece if thin string. North pole of magnet painted white. Makeshift compass.
Matches and striker.
I packed little pieces of a cotton ball in every little gap to maximize space. Also would serve as fire starting material.
The bag and foil to the right are to show the size of the rolled and folded items.
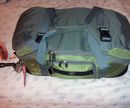
Step 9: Hip Pouch

Molly dual pistol pouch.
One Firesteel magnesium/steel toggle sewn into the closure flap. Backup fire starter.
Leatherman wave multitool. Served me well for a year in Iraq and two in Afghanistan. I would highly recommend for everyone to have one.
Leatherman piranha. Fits nicely behind the multitool. Scraping, prying, makeshift wedge for splitting small pieces of wood.
The Whistle.
Streamlight Protac 1AA, with a lithium battery: Very powerful flashlight for its size. Served me well overseas.
Six safety pins between the two slots in the pouch.
Step 10: On My Person

Finally everything I take with me whenever I leave the house.
Nalgene Bottle. I have a reverse osmosis unit at my house and always fill the bottle and take it with me. I don't always carry it on my person but usually have it close. Cheaper than buying a bottle of water.
Cell Phone. Gps and the ability to call emergency services if you have signal.
Pouch.
Belt.
Wallet. Emergency contact card with list of medications taken and drug allergies. Red cross card with blood type. Photo ID so they can identify my body easier. Most people never plan for being unconscious, the more information you can give emergency responders the better.
Keys with backup flashlight and knife.
Firearm and speedloaders. I have a conceiled carry permit. Laser on the firearm could be used for signaling. Depending on where you live this might not be possible.


