

Introduction: Mini Bulb (E10) Expanded to Goliath Size (E40)


Hi everybody!
When I first saw the announcement of the "Big vs Small Challenge" at the instructables newsletter a small project which I started in 2019, came to my mind and I decided to launch it now especially as my entry to this contest.
Before I start explaining the different steps , please take a look at this small video:
Well, when my youngest son asked me some years before how such a small lightbulb for flashlights works. I lfirst looked at the explanation at wikipedia and I saw that this Miniature Edison Screw E10 has much more bigger "brothers". So I decided to blow this small light bulb a little bit up to "Goliath-size" (E40) using only parts from the scrap . And this big version should be driven with same voltage like the small bulb: means 1.5 volts DC.
Before I start the description please note that you should take care of you. Use gloves and eye protection when working with glass or metal parts, and just use only the right voltage of 1.5 volts in this project. Do not wreck your health!
And now follow the steps and enjoy it.
Ah, and If you like it please vote for me ;-))
Step 1: Where Do the Parts Come From?


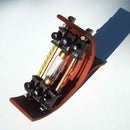
At my steampunk workshop I also have a lot of original material of ancient machines, radios, telephones and lightbulbs, all kinds of electrical parts like switches and so on produced around 1900 t 1930 and of course modern parts too.
First I took a broken 1.000 watts light bulb to get the edison socket E40 .
Then I took a broken "modern" LED light bulb to get the acrylic glass dome which fits perfectly in direct way into the Edison "Goliath"-socket. Obviously nothing in the measures of lightbulbs has changed through the centuries;-))
Third I took an old original lantern socket from 1921 to get the Goliath socket holder. It has been in a really bad condition and it needed a lot of work and time to reactivate it.
At last I took a ligtht bulb with curved LED filament in which only one caoacitor had collapsed but the filament was still running.
As you know from a lot of other projects I´ve already presented here you can drive such LED filament bulbs with a flash unit of a disposal camera. Now nearly all parts needed had been come together. Only a small slice of plastic was missing for holding the filament tube and for insulating reasons. This small slice I took from an old bathtub armature from the plumbers scrapyard. As you see this is a 100 % recycling project too.
Step 2: Preparing the Curved LED Filament


When you want to take the curved LED Filament out of its glass cage please wear saftey gloves and eye protection.
I always use a spring center punch to open the bulb. Only less power is necessary and the glass breaks easily as you can see at the pictures .With a side cutting pliers you can trim the middle tube (also made of glass) which holds the curved filament so it will fit in the center of the insulating sclice. Fix it there with epoxy resin.
Step 3: Electronic Things


Here comes a small summary how you can drive a filament LED with a flash unit of a disposal camera. More detailed informatinon you will find in this project.
The flash unit transforms the 1.5 volts DC from the battery to more than 330 volts AC. If you combine it with a resistor and the filament LED this filament will shine very bright.
The most important thing is that you have to try out by testing which amount of resistor will be necessary to let the LED shine bright and not break down. This resistor is always needed to prevent a short cut. In this project I used a 46 k ohms resistor and if you look at he explaining pictures you will find out that I used ther another resistor with 210 k ohms for this reason.
As you can see at the pictures too you can cut the pcb smaller wtith a side cutting pliers as shown so it then will fit in the Goliath socket. Take care that the small pcb doesn´t get in electrical contact with the brass made socket to avoid an electrical shock of high voltage. In this case only this small plastic slice which holds the filament was needed. And of course you should use shrinking hoses to insulte the wires of the filament after soldering to the wires from the pcb.
Step 4: Assembling the Big Goliath Bulb


After preparing the pcb just solder it with the resistor and the wires of the LED filament and then you can test it. Now you solder the wires for the power supply with 1.5 volts DC to the Bulb socket. Minus (ground) comes to the threaded casing and plus goes to the bulb base. Then place the electronic and filament insde the socket and fix the acrylic class dome with epoxy resin. And that´s it.
Step 5: Prepare the Historical Goliath Bulb Socket


As I reportet in the description of step one I had to reactivate this very old and stylish E40 bulb socket . After unscrewing all parts I had to wash away the dirt, polish the metal parts and cover them with zapon lacquer. Then I screwd all parts together again and started the same with an old battery testing tool from 1920 made by DAIMON a former producer of metal flashlights in Germany. Now both bulbs the small ands the big one can be driven with the same battery source at the same time
I hope you enjoyed my description and please vot for me
Yours Aeon Junophor

Participated in the
Big vs Small Challenge


