Introduction: Modern/Vintage Inclined Table Lamp
Hi All
This project was first born when I've found this acrylic 2" tube in my scrap pile. The inspiration was this instructable: https://www.instructables.com/id/Concrete-LED-Ligh..., and I immediately thought of something that will light up.
The vintage comes from the wooden, dark stained base and the modern comes from the very cool cylindrical LED lightning.
During the build my wife called this the "bang" project, but she really liked the outcome :). If you do too, consider voting for me in the Lights contest, thank you.
Let's begin.
Step 1: The Basic Idea, Gather Your Materials
The basic idea of this lamp is to mount the lit up tube at angle on a wooden base.
For that we will need several components:
1. Log or nice looking wood base, I've just found one.
2. Acrylic tube - I'm using 2" OD tube, but this project can be scaled up or down depending on availability.
3. LED strip - I've used this one: https://www.banggood.com/5M-WhiteWarm-White-5630-...
I've ordered both white and warm white, in my opinion warm white suits better, but you may choose differently. This strip is 5m long, about 4m goes into the lamp.
4. Switch - this is what I used: https://www.banggood.com/Touching-Type-Sensor-Dete...
Any one will work, but this one is touch type, glows blue in the dark and allows dimming of the LEDs, very cool.
5. 12v adapter, in my case I used one from an old printer/router/something, but if you need one, here are two options:
https://www.banggood.com/AC-100-240V-To-DC-12V-3A-...
https://www.banggood.com/US-EU-100240V-Converter-A...
Tools needed:
1. Some way to cut the wooden base.
2. Hand sander or belt sander.
3. Dremel tool
4. Soldering iron.
5. Your choice of wood stain, filler, epoxy, clear coat.
6. Hot glue gun.
Step 2: Prep Your Wooden Base
First of all, let's cut the base from the log.
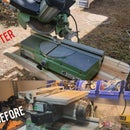
I did not have a table saw or something more appropriate than miter saw :) This is not ideal, but with angles/sides/approaches adjustments the base was cut!
As you can see it was not a clean cut, this is why a heavy sanding was required.
After couple of sanding hours and several sheets of sanding paper later, the base was clean and flat.
Notice any cracks that you might have and fill them up. I did fill in with glue and wood-dust first and then wood filler on the outside, just to make them structurally sound.
Step 3: Tube Cavity, Finishing Up the Base
Now with a dremel router tool cut an oval cavity that the tube will go in. The tube was precut at angle.
I did an undercut with the dremel in wood in a way that it will hold the tube by itself, very convenient for the gluing process.
Next, drill the hole for the switch and channel for the wiring at the bottom. I've fitted a female DC jack for the 12v adapter. This way the lamp and the adapter are independent.
Step 4: Sand the Tube, Print the Cover, Test Fit Everything
Now, the tube needs to be sanded, it serves several purposes.
Clears all the outside stains, hits and scuffs from the tube, dissipates the light and gives it this "milky" look.
I've sanded it with 100grit and 320grit sandpapers, came out really nice.
I was first thinking of doing the upper cover from wood, but quickly ditched the idea, i don't have a way of doing it clean enough for the final outcome.
Fortunately, I have an access to 3D printer, so I printed it. The CAD is very basic and the .stl file is attached. It was printed on an Ultimaker with gray PLA filament. Came out clean and blended in.
Attachments
Step 5: Stain and Clear Coat the Wood
Stain to your liking.
Put a clear coat, I used Minwax Polycrylic. Very nice.
Step 6: Wrap the LEDs, Solder and Glue in the Tube
For the LED strip to hold, I used a white cardboard wrapped in a tube.
Test fit and wrap the LED strip without spacing, it is glued with its own adhesive backing.
Solder the leads, test fit and glue in the tube.
Hot glue the cover.
Step 7: Solder the Leads, Clean Up the Bottom
Solder the leads to the switch, the DC input jack and the LED strip.
Hot glue them in the bottom channel.
Finally I applied a piece of felt on the bottom with 3M77. It covers the ugly channel and makes the base more stable.
Step 8: Finished! Enjoy Your Creation!
Enjoy,
Dani.


