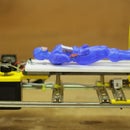
Introduction: OBSTACLE AVOIDING AUTONOMOUS CAR


Friends this is new version obstacle avoiding card with new features like LED Head lights with complete step by step details and video
so friends have a look and comment you like it or not.
so let see how to make this obstacle avoiding car by own.
Step 1: Video
guys have a look to video, this will help you to visualize how to make this autonomous obstacle avoiding car
Step 2: Material Need


Major item list with purchase link
DC GEAR MOTOR-----------------------1 set
TWO WHEELS----------------------------1 pair
HC-SR04 ULTRASONIC SENSOR--------1 no.
ARDUINO NANO-----------------------------1no.
L293D IC---------------------------------------1no.
MINI BREAD BOARD---------------------1no.
9V Battery-------------------------------1no
Jumper wires------------------------20 to 25 pc
ON/OFF switch---------------------1no.
Acrylic sheet-----------------------1no
Double side tape-----------------as required
Step 3: Preparing Chassis


let see how to prepare chassis of the car
- This car is very simple don't need to buy any car chassis from market you just want a Acrylic sheet piece of size approx 5 X 12CM about 4 to 5 mm thick
- Stick the DC gear motor on the acrylic sheet as shown in image with the help of double side tape
- stick some hollow pipe or straw piece to the other end of the acrylic sheet
- Bring wheel from some old toy and pass its shaft from that hollow tube so that this wheel became rotate freely
- Place the wheel of dc motor to shaft of the motor.
- stick Ultrasonic sensor at the front end of the car with the help of double side tape as shown in imgae
Step 4: Electrical Schematic & Arduino Code


Connect all the electrical connection as shown in image, do this carefully because a sing mismatch of polarity can burn your arduino or L293D IC
also find the attached Arduio code download this code and upload to your arduino
as you can see in code at line number 35 [if (distance >= 15)] you can change whatever distance you want as safe distance here i kept 15cm is the safe distance you just have to replace 15 with you safe distance cm
So guys hope you find this interesting
please connected if any doubt
till tan by friends coming soon with new project


