

Introduction: Organising a Tool Wall


I have a lot of power tools, some corded which I keep in cupboards and my battery ones, which always seem to end up left on the side or workbench.
I seem to spend a lot of my time looking for a tool I have just put down
To be more efficient I thought that I would wall mount them
This is not exactly fine cabinet making, more a simple rustic solution to a problem
Supplies
The Power tools (Drill,Driver,Jigsaw)
Drills
Holesaw
Screws
Mitre Saw
Step 1: The Space and Materials


I have a blank space on my shed wall and all these battery tools, a quick rummage in the recycled woodpile yielded a couple of 6 x 3/4 boards (rescued from a dismantled packing case)
Step 2: Circular Saw


Using the Mitre Saw I cut a length of board long the same length as my Circular Saw.
I then marked the location of the blade and guard and cut a slot by drilling the ends then cutting out with the Jigsaw.
I then cut a back and end from the board and attached with screws
Step 3: Jigsaw

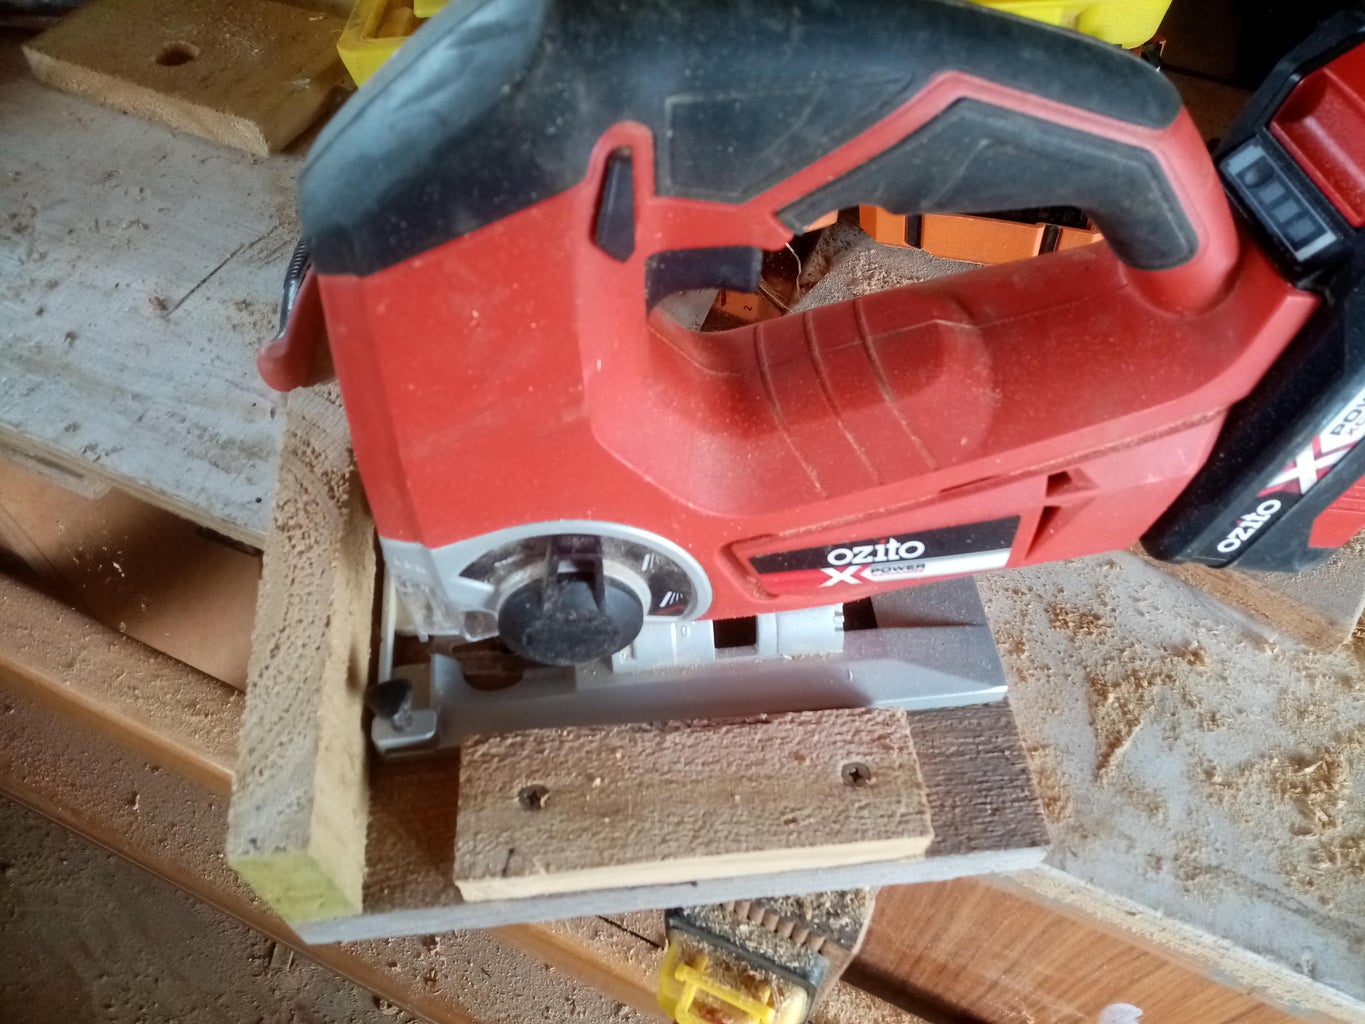
Next I cut a length of board same as the Jigsaw, drilled a hole for the blade and put on the back and side plus a retainer to keep ti steady as it's a bit top heavy
Step 4: Reciprocating Saw


For the reciprocating Saw cut a locating slot in the end board as shown
Step 5: Angle Grinder

Using the Jigsaw I cut a large circular hole to allow the grinding disk and guard to fit through
Step 6: Drill and Driver


For the Drill and Driver I cut a slot in the baseplate for the handle to sit in and a hole in the end plate with a holesaw/drill to accept the chuck
Step 7: Mounting

On completion all the holders were attached to the shed wall

Participated in the
Woodworking Contest


