Introduction: PLINKO
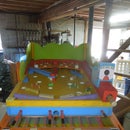
Plinko is a game of chance played with discs (referred to as ‘chips’) on a nearly vertical board, slightly angled to allow discs to stay on board, populated with offset rows of pegs.
The player chooses one of the slots (8 on this board) in the top of the board, lays the disc flat against the board and drops the disc into it, and watches as the disc bounces down the board in a maze of pegs. Each time the disc encounters a peg, it will either bounce left or right.
This Plinko game has values 1-2-3-4-5-4-3-2-1 in 9 segregated channels at the bottom of the board. The goal is to score as high as you can with the number of discs you use, which is up to your own personal game rules.
By choosing what you think is the correct slot to begin guiding your disc to the desired value or prize is the fun.
You can set your own values or prizes for your own game, even change them as often as you like.
The size of a Plinko game is dictated by the diameter of your discs.
My selected discs were 2+ ½ “ in diameter, which determined my board size of 32” wide by 62” tall.
Thickness of the discs somewhat determines their bounce ability against the pegs … I used both ⅛” and ¼” … the thinner the bouncier, the thicker the more directed bouncing. I like both.
Disc ordering source : ZLazr.com, Houston, Tx – 832-798-3000 … 1/16” to 3/8“ thick and up to 12” diameter in colors
Supplies
THE MATERIALS :
The materials needed for this particular project were as follows :
(1) ½” x 4’ x 8’ Birch, Maple or Oak plywood is preferred, but sanded Pine is acceptable
(1) Sheet of clear plastic 30” W x 36” L x ¼” Thick
(4) metal clips (to hold plastic onto game)
(1) 2x6x8’ Board (for side arrows)
(1) 2x4x8’ (for miscellaneous)
(100) ¼” x 1+½” Wood Pegs (dowels)
(12) ¼” x 2+ ½” plastic discs (colors are your choice)
(1) box 1+½” finishing nails
(1) Tube Wood Glue
(1) Quart white paint (semi-gloss)
(7) Pints of different color paints (semi-gloss)
TOOLS NEEDED :
Hammer ..... Drill ..... ¼” drill bit .....
Ruler : tape measure ..... Ruler : Straight Edge ..... Ruler : Square .....
Wood Clamps ..... Paint Brush : 2” ..... Paint Brush : small
Paint Brush : very small ..... Jig Saw ..... Router .....
Sander --- (with 80, then 120 grit sandpaper) ..... Table Saw or Circular Saw
Step 1: HOW TO BUILD PLINKO :
My PLINKO specifications are listed below.
This will guide you in building your own Plinko game, whether it be the same size, smaller or larger.
The hardest part about making Plinko is outlining where the Pegs will go. The Peg Measurements below will help with this.
Make sure your discs will slide thru all peg locations before drilling.
The rest is relatively quick and easy.
A Plastic Shield is not necessary, but desirable since the discs do tend to jump around, and the plastic shield keeps them on the board.
This size Plinko Board is a nice size, and is a replica of a school fair Plinko Board that I restored.
1/4” Pegs (dowels) are not really necessary either … finishing nails can be used, wherein they ‘ping’ when the discs run down the board.
PEG SPACING :
As listed in the specifications below, spacing for this particular board is approx. 3¼” from both other Pegs as well as the side boards. This was determined by the disc diameter used (2½”), which basically required ¾“ gap to allow the discs to freely navigate the Pegs. Smaller or Larger Plinko Boards should decrease or increase this clearance gap as needed.
Step 2: MEASUREMENTS :
Measurement Abbreviations : L = Length; W = Width; H= High, T = Thick; D = Deep
Height … 62”
Width … 32”
Board … ½ “ Thick
Top Arc … 30” across … 2” W inside arrow … 4+ ½” W outside arrow
Plastic Shield : … 30” W x 36” L x ¼” … starts 5+ ½ “ from Disc Catch Board
Arrow : # … 6
Arrow Length (each) … 6”
Arrow Length (total) … 36”
Arrow Top … 3” to 1st arrow
Arrow Bottom … 9” from last arrow
Arrow Side Boards … 48” L
Arrow : side to Neck … 2”
Arrow : side to Point … 4+ ½”
Arrow : Point to Point … 6”
Feet … 2+ ½” H x 4” L x 1+ ½” D
Disc Catch Board … 1+ ½” H x 32” L x 1+ ½” D
Value Spacers … 4+ ½” H x 1+ ½” D
Value Numbers : … 3+ ½“
Pegs : Dimensions … ¼“ Thick x 1+ ½“ L
Pegs : Drill Depth … ⅜” (try not to drill through board)
Pegs : # … 93
Pegs : 6 wide … 6 rows … at arrow points
Pegs : 7 wide … 7 rows … at arrow necks
Pegs : 8 wide … 1 row … last row on bottom
Pegs Start : … from Arrow Neck … 4+ ¾“ ... from Arrow Point … 3+ ½“
Peg Measurements (from side-to-side) :
Spacing is approx. every 3¼” form both other Pegs and the side boards.
7 Pegs in a Row : … 6½, 9¾, 13, 16¼, 19½, 22¾, 26
6 Pegs in a Row : … 7¾, 11, 14¼, 17½, 20¾, 24
8 Pegs in a Row … 4¾, 7¾, 11, 14¼, 17½, 20¾, 24, 27¼


