Introduction: POWER Pi
This is Power Pi, a lightweight, integrated Raspberry Pi Dock that powers the Pi wirelessly thanks to an internal lithium cell battery pack.
In essence, this setup is a Raspberry Pi Case with an integrated power module.
The goal of this project was to create a straightforward but effective configuration that enables us to utilize the Raspberry Pi as a tiny desktop for performing XYZ tasks, in my case, running Doom on an emulator OS.
The entire body of the device was built around a Raspberry Pi 3B+ with a custom power management board. The bottom section of the device houses the power management circuit, which is powered by lithium batteries, and the Raspberry Pi is placed on top of it.
This Instructables is about the whole built process of this Power Pi Cube, so let's get started with the built process.
Supplies
These were the materials used in this built-
- Raspberry Pi 3B Plus
- Power management board (got from PCBWAY's GIFTSHOP)
- 3D Printed Parts
- HDMI Cable
- M2 Screws
Step 1: Design
The project's design was relatively simple to create; we began by looking for a 3D model of the Raspberry Pi and creating an actual model of the power management board.
The power management board that houses the circuit was initially given a base, which would serve as the project's bedrock.
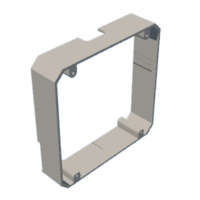
We added a second layer, the middle section, which consists of a straightforward box-like structure with grills on the bottom and serves as a holder for the Raspberry Pi. We added openings on two sides—one at the USB and Ethernet section and another at the micro USB, HDMI, and A/V jack section—so that users can easily access the Raspberry Pi I/O.
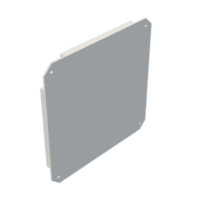
There is a lid that covers the central portion and has a slot for a rocker switch. I added a logo on the lid that says POWER Pi in all caps to improve the appearance.
This model was created so that anyone may modify it however they choose. We can even add a new layer to hold a module or even a small screen.
The 3D Model is attached, so feel free to make any changes.
Attachments
Step 2: Power Module
I purchased this superb circuit from PCBWAY Giftshop.
This circuit is a Power Management Board that contains four lithium-ion cell holders, each connected in parallel with a Power management IC.
This board basically boosts 3.7 volts of Li-ion Cells to 5 volts for powering XYZ stuff through the USB Port or multiple CON2 Ports provided onboard.
We can get a wide range of outputs from this device, from 3.3V to 5V.
What makes it special?
- Battery protection (overcharge or over-discharge)
- Miniature USB port input
- Type a USB output.
- 0.5 A current charging.
- 1 switch controls USB output /5 ~ 8 V input voltage.
- Output of 3 V and 1 A and output of 5 V voltage 2 A.
- LED indication (green, red for charging)
- 3 V output port.
- The 5 V output port should be careful with "+"and "-", and the direction you should follow is "+" and "-" on the PCB.
Step 3: PCBWAY Giftshop
As for sourcing this component, I got this circuit from PCBWAY's Giftshop
PCBWAY gift shop is an online marketplace where you can get a variety of electronics modules and boards for their genuine price, or you could use the PCBWAY currency, which is called beans.
You get beans after ordering something from PCBWAY as reward points, or you can also get them by posting any project in the PCBWAY community.
Check PCBWAY out for getting great PCB service from here: https://www.pcbway.com/
Step 4: 3D Parts
Printing all the Power Pi components, including the Circuit Holder, Raspberry Pi Holder, Bottom Lid, Middle Section, Top Lid, and Power Pi Logo, is the first step.
Yellow and RED PLA was used to print all parts with a 0.4mm nozzle through a 0.2mm layer height and 20% infill.
Here's a tip: if you have stringing issues, use a lighter flame to melt the strings away. However, act quickly because flames can also damage prints.
Step 5: Power Module Assembly
- The Middle Part is mounted first with the circuit holder, and then the Power Module is added in the Circuit holder section to begin the assembly.
- We then secure the circuit in its place using four M2 Screws
Step 6: Raspberry Pi Holder Assembly
- The Raspberry Pi Holding Part is then placed on top of the previously put together circuit holder, and four M2 screws are used to join the two components.
- The Raspberry Pi is then secured in the Pi Holder using four more M2 screws.
Step 7: Connecting Power Module With RPI
- Using a soldering iron, we add the positive wire of a CON2 Wire harness to the circuit's 5V + and connect the harness's negative wire to the circuit's GND in order to power the Raspberry Pi from the Power management circuit.
- The Raspberry Pi's GPIO 5V and GND are then connected to the CON2 wire harness connector; doing so will enable us to power the Pi via the GPIO Port.
Step 8: LID Assembly
- The top lid assembly is simple; first, we connect the Power Pi logo to the middle of the lid with super glue.
- Rocker switch is then set in its spot and pressure-fitted there. Rocker switch remains in this position.
- With a soldering iron, we next connect the switch's two wires to the circuit's push button; the wires are soldered in parallel with the switch. (In essence, we are expanding the switch that is already in the circuit here)
Step 9: Putting Things Together
- Four M2 screws are used to firmly attach the lid to the central body after the wire has been connected.
- The bottom lid is attached to the main body using four M2 screws in a similar manner.
Step 10: RESULT
Now that the POWER Pi is prepared, we can proceed to the final step, which is to install the OS on the SD card and start the computer.
Step 11: RECALBOX OS
I used RECALBOX OS to run this setup.
Why Recalbox OS, Why not Retro Pi or another OS?
well, the answer here is simple, Recalbox is an easy-to-use OS that comes with a lot of Free games pre-installed.
Also, it's small and can run on low-spec Raspberry pi systems.
Installing it is also very easy
- Download the Raspberry Pi imager.
- Select the right OS for your device, which would be RecalBox
- select your system which is RPi zero
- Raspberry pi imager will do the work of downloading and installing RecalBox on the memory card.
After installing the RecalBox os, you need to plug your Raspberry Pi setup into a keyboard, as the first boot always requires a keyboard.
After plugging the setup into an HDMI monitor and booting it, the RecalBox works like a normal emulator.
Step 12: DOES IT RUN DOOM?
Here's the crucial question: Does it run doom?
Yes, it does run doom.
The Raspberry Pi 3B+ is powerful enough to handle doom.
This system is functional and is powered by the lithium cells that are the on-board power source.
This configuration is completely portable and wire-free in a sense because the Mini HDMI screen is powered through the USB port on the power Pi.
This configuration is portable because we don't need an AC adapter to power the PI or screen, so we can take the Pi everywhere we go.
The best thing about this arrangement is that it can be used with either the older RPI 3B+ or the more modern 4B+ and still function.
Do leave a comment if you need any help regarding this project.
This is it for today folks.
Thanks PCBWAY for supporting this project, you guys can check them out if you need great PCB and stencil service for less cost and great quality.
And I'll be back with a new project pretty soon!


![Tim's Mechanical Spider Leg [LU9685-20CU]](https://content.instructables.com/FFB/5R4I/LVKZ6G6R/FFB5R4ILVKZ6G6R.png?auto=webp&crop=1.2%3A1&frame=1&width=306)


