Introduction: Programming the ESP8266-12E Using Arduino Software/IDE
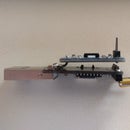
The ESP8266 is like an Arduino with a builtin WiFi, the MCU and WiFi circuitry are in the same chip. Consider Arduino + WiFi Shield = ESP8266. In this instructable I will provide a step by step guide to procure and programming an ESP8266-12E WIFI Development Board. You will also learn how to install and update the Arduino software/IDE in the Windows environment to program your ESP8266-12E. We will then write a DoubleBlink sketch to brink the two on board LED.
Step 1: Purchasing the Board
I bought the NodeMcu Lua ESP8266 ESP-12E + WiFi Motor Drive Expansion Board from a supplier in China. They arrived within two weeks. It was cost effective to buy the ESP8266-12E board with the Motor Drive Expansion Board. I paid $11.64 for the pair. More about the programming of the Motor Drive Expansion Board in a later instructable.
For the purpose of this instructable you only need the NodeMcu Lua ESP8266 ESP-12E WIFI Development Board. There are several benefits of using this development board rather than the module, the chief among them is - being able to use it right out of the box. It comes with the necessary circuitry to manage the voltages. The on-board USB to UART makes interfacing with computers a lot simpler.
The ESP8266-12E boards arrived in an anti-static bags. There was no USB cable. This board has a micro USB connector. I tried connecting the micro USB cable that came with my android charger. That did not work because it is not a data cable. I had some spare micro USB data cables sitting around and found one that worked.
Step 2: Installing the CP120x Drivers
From this step onward make sure your ESP8266-12E is securely connected to your computer.
I have a Windows 7.0 laptop that I used to test and program the ESP8266-12E. When I first hooked the ESP8266-12E to the computer the “New device found - installing drivers” message showed up. By default Windows could not find the drivers and kept on looking and looking and looking. I killed that search!
To install the drivers, open the Window's Control Panel and clicked on the Device Manager. There you will find the USB controller that exists on your ESP8266-12E board. It is the CP120x USB to UART Bridge Controller chip. Right click on the CP120x USB Composite Controller (it has a tiny yellow caution symbol) under Other Devices.
I googled “CP1201 USB to UART drivers” and found the drivers here. This web page also has good instructions on how to install the drivers.
Download the zip file cp210x44.zip and unzip it. Your Windows drivers are in the YourDownloadDir/cp210x44/x86 directory. To install the drivers right click on the “CP120x USB Composite Controller” line in your Device Manager and in the popup select “Update Driver Software…” and take it from there on. From here on the process to install the USB to UART drivers is obvious.
Once the drivers are properly installed the caution symbol will disappear and the “CP120x USB Composite Controller” entry would have moved under “Universal Serial Bus Controllers” and also “Ports (COM & LPT)”. Your driver is installed!!!
Step 3: Installing Arduino Software/IDE
I downloaded the most current Arduino software (Version 1.6.5) from here. It is a Windows installer exe file so double clicking on it will start the installation including the installation of several peripheral drivers. You can find detailed instructions to install the Arduino software here.
Once the Arduono software is installed, I tested the install by connecting an existing Arduino Uno that I had and uploaded the Blink sketch. All systems worked as they were supposed to.
Step 4: Where to Find the Preferences Dialog
You will need to familiarize yourself with the “File | Preferences” dialog box. We will need this info later.
Step 5: Where to Find the Boards Manager Dialog
You will also need to know about the “Tools | Board:… | Boards Manager” dialog box. You have an older version of Arduino software if you cannot see “Board Manager” in the menu. Go update your software.
Step 6: Telling Arduino Where to Find the ESP8266-E12 Library
The ESP8266-E12 board can be added to the Arduino software/IDE by installing the necessary libraries. This community supported Github page: Unofficial list of 3rd party boards support has the information needed to get your Arduino software to support the ESP8266-E12. Search/look for “ESP8266” on this webpage. Look for the URL shown in the image above. Copy and paste that URL into your Preferences dialog and select OK. Do not click on the URL.
Step 7: Installing the ESP8266 Board Via the Board Manager
Open “Tools | Board:| Boards Manager” dialog box. Somewhere in there you will see the entry “esp8266 of ESP8266 Community” select that. The Install button will appear, click the Install button. Wait for a while… This process will take some time to download and complete. After the install I shut the Arduino program and restarted it.
Step 8: Determining the COM Port ESP8266-12E Shows Up On
If not connected connect the ESP8266-E12 board to your computer. Give it a couple of minutes to settle down. Go to Device Manager and click on “Ports (COM & LPT)”. There you will find the port number that your ESP8266-12E is connected on. In my case it is COM17. Make a note of that, we need this info later.
Step 9: Selecting the ESP8266-E12 Board
Now fire-up your Arduino software, you will see the boiler plate sketch. Go to “Tools | Board:…” and select “NodeMCU 1.0 (ESP8266-12E Module)”, in my case I had to scroll way down the menu to find it.
Step 10: Configuring COM Port
In Step 8 we had determined the COM port ESP8266-12E appears on. To select the COM port, go to “Tools | Port:” and select the COM port,in my case it was COM17.
Step 11: Configuring COM Port Speed
To select the speed of communication between the ESP8266-12E and the computer.
Go to "Tools | Upload" Speed: and select 115200. We are ready to upload our first sketch.
Step 12: Test Drive the Setup
I prefer test driving the complete setup using the boiler plate sketch.
To upload the boiler plate sketch go to "Sketch | Upload" or use the shortcut key Crtl+U or click on the right arrow button next to the check mark. A successful compile and upload means all systems are working and we are ready to go prime time. We can pat yourselves on the back for a job well done.
Step 13: Writing the First Sketch: DoubleBlink
The NodeMcu ESP8266-12E WIFI Development Board has two LED connected to the digital I/O pins. One LED is on GPIO 2 and the other is on GPIO 16. The sketch DoubleBlink.ino will alternate the blinking of these LEDs. Save your sketch and upload it to your ESP8266-12E. The two blue onboard LED will blink alternately.
DoubleBlink.ino
const short int BUILTIN_LED1 = 2; //GPIO2
const short int BUILTIN_LED2 = 16;//GPIO16
void setup() {
pinMode(BUILTIN_LED1, OUTPUT); // Initialize the BUILTIN_LED1 pin as an output
pinMode(BUILTIN_LED2, OUTPUT); // Initialize the BUILTIN_LED2 pin as an output
}
void loop() {
digitalWrite(BUILTIN_LED1, LOW); // Turn the LED ON by making the voltage LOW digitalWrite(BUILTIN_LED2, HIGH); // Turn the LED off by making the voltage HIGH delay(1000); // Wait for a second
digitalWrite(BUILTIN_LED1, HIGH); // Turn the LED off by making the voltage HIGH
digitalWrite(BUILTIN_LED2, LOW); // Turn the LED ON by making the voltage LOW
delay(2000); // Wait for two seconds
}
Disconnect the ESP-8266-12E from your computer and connect an external 5V power source. I connected it to the power bank that I use to charge my phone. The LEDs will start blinking. I also connected the board to a couple of stacked CR2025 button cells which I taped behind the board and wore the contraption as a necklace.
HAPPY IoTing!!!
I enjoyed working with this tiny board. Time permitting I will write more Instructables sharing what I have learned.
My next Instructable is Programming a HTTP Server on ESP-8266-12E .


