Introduction: Propeller-Powered Car - Engineering Project for Kids
Fast and fun, the propeller car is a hands-on lesson in air-powered thrust and inertia. Small, lightweight wheels have less inertia than big ones, which lets the car reach its maximum speed quickly!
Just wind it up and watch it race across the floor up to 30'!
You can find the lesson plan, 1-page project sheet, and more project ideas at STEM-Inventions.com
Step 1: Materials
I created a kit that has enough supplies for 10 propeller cars here, or you can source the parts individually:
Plastic propellers (Larger pack)
Hot glue gun with safety nozzle
When you make a purchase through these links, I may earn an affiliate commission at zero cost to you.
Step 2: No-Glue Variation
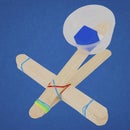
The no-glue variation uses the same building system as the Geometric Shapes lesson. The low triangular frame is built by using a normal craft stick and two smaller pieces, each approximately 1/3 the length of a normal craft sticks.
The tip of the propeller is taped, which keeps the metal hook in place and allows the user to wind the propeller counter-clockwise. Winding the propeller counter-clockwise propels the car in the direction of the narrow end of its triangular frame.
Step 3: Tips and Troubleshooting
- Remove any thin strands of dried glue before operating the car. "Hot glue strings" get tangled in the axle or propeller shaft.
- Make sure the skewers (axles) are straight. These are mass produced and can be severely warped.
- More rubberbands isn't always better. Too much energy can cause the car to spin wildly out of control.
- Wide-set wheels are more stable than narrow ones. A narrow car may flip over from the torque generated by the rubber band.
- The rubberbands may become loose over time. You can breath new life into old bands by unhooking them and tying one end into an overhand knot. Now the remaining band is shorter (and tighter) than before.
Please be sure to take video or photos if you do this project with your class and post it in the comments :)
Have fun teaching!

Participated in the
Education Contest


