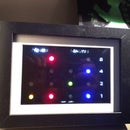
Introduction: Quiz Game Buzzer Bluetooth Edition
So I made this Quiz Buzzer a while ago...
https://www.instructables.com/id/Quiz-Game-Show-Bu...
After using it for a while I got some feedback and decide to improve on it.
To see the code... it should work well...
Step 1: The Circuit Prototype
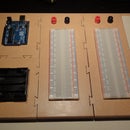
Here's the new circuit prototype with all the new pieces.
Step 2: Connectors
First I changed the connectors for the button boxes so they wouldn't be locked to the box.
I also used smaller wires so it's not as bulky when stored.
Step 3: Sounds
I added an amplification circuit for the sound because it wasn't loud enough.
https://www.sparkfun.com/products/11044
I also added a volume button so it can be adjusted according to the loudness of the environment.
I used the ??? chip which offered all the possibilities I wanted.
Step 4: Code Optimization
I optimized the code in the micro controller, especially how the inputs were read, using the register directly instead of checking each input one at a time.
You need to check for the correct bit in the registry as see in the code example below...
B00000001 for A0
B00000010 for A1
B00000100 for A2
etc...
And you can check for more than one input at the same time
B00110000 for A5 and A6
This made the code faster, but also reduced greatly the risk of always having the same team answering.
void setup()
{ DDRC = DDRC | B00000000; // set PORTC (analog 0 to 5) to inputs bitsPortC = 0;...
}
void loop()
{ bitsPortC = PINC;...
if (bitsPortC == B00000001)
...
}
Step 5: Mobile App
The biggest part of all those modifications was to add an HM-10 Bluetooth chip to the circuit.
Along with this, came an Android application to control the box from a mobile phone. The mobile application can basically see which team is active (the LEDs in front of the device), the score and it decides if the answer is right or wrong.
Step 6: Settings
With the mobile application came, the possibility to customize the experience a little bit with settings... muting the sounds, adding a difficult mode where a wrong answer removes a point, choosing if people can answer at all time or if the game master needs to tell the machine it is "Ready"... to avoid people mashing the buttons and not knowing the answer.
Step 7: Conclusion
It was a lot of fun to learn how to program all this so it works on Bluetooth... Bluetooth Low Energy to be precise.
Now I'm looking forward to apply this knowledge to other projects.


