Introduction: Remote Button Pusher for the Ultimaker S5
Hey there!
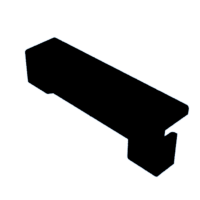
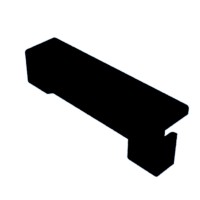
This device is a remote button pusher. It uses an off-the-shelf “fingerbot” along with a custom 3D-printed extension arm to press a capacitive touchscreen.
About us: 219 Design is an interdisciplinary product engineering firm based in Silicon Valley. Our team of mechanical, software, embedded, and electrical engineers are trusted by cutting-edge product development teams at companies ranging from startups to industry leaders such Auris, Carbon, Norlase, Xerox, and Google.
We often find ourselves both rapidly prototyping using 3D printing and collaborating with remote teammates. We made this little pusher specifically to speed up one task in that process. We made the pusher so that we could remotely press the “confirm removal” button on our Ultimaker S5 3D printer, to make our iteration cycles a little faster.
Supplies
- remote button pusher MOES Fingerbot ($30)
- Tuya Hub gateway ($20)
- printed arm. Public Link to Onshape CAD document
- foam - just a little piece of something squishy
- copper tape
- aluminum base
Note: the MOES fingerbot battery did not last very long. Maybe a month or two.
Step 1: Setup MOES Fingerbot and Tuya Gateway
Follow the MOES and Tuya instructions for setup.
We think the Tuya gateway needs to be connected through the Moes app rather than a Tuya app.
We connected the Tuya gateway to a separate guest wifi network for an extra layer of data security.
Step 2: Print Extension Arm
Our Onshape arm is still an early iteration that worked. Feel free to modify it for more flexible bending.
Public Link to Onshape CAD document
This extension arm is also linked on Thingiverse
Step 3: Slide the Extension Arm Into Fingerbot’s Pusher L
Slide the extension arm into fingerbot’s pusher L.
Attach foam or something compressive to the end of the arm so that it's more gentle when it touches the screen.
Step 4: Make Capacitive
Attach metal chunk to bottom of the fingerbot.
- We used an aluminum chunk. We cut a square of ⅛” aluminum sheet from a piece we had around the shop. We cut it to match the size of the fingerbot, and filed the edges.
- Any metal would work.
- We used the adhesive pads that came with the fingerbot for attachment.
Add copper tape from the touch point (foam) to the metal chunk to electrically link the two.
- We further secured the copper tape with UV cure glue.
This step is needed for capacitive touch screens. Resistive Touch vs Capacitive Touch
Step 5: Attach to Ultimaker
Bring up the target “confirm removal” screen on the Ultimaker to line up the position.
- Remember to leave room for the fingerbot’s arm to move.
We used the adhesive pads that came with the fingerbot for attachment.
Step 6: Activate the Button Through the MOES App
Step 7: Other Notes
We used this setup to remotely press a button the Ultimaker S5. Other people have had frustration with this mandatory "confirm removal" button, but there are also other software-based solutions. We haven't tried it, but if you are looking to adjust your Ultimaker S5, the Ultituner app looked promising. In this case, we decided to fix the problem with hardware.
Our extension arm is quite specific for pressing the Ultimaker S5's angled screen. However, we are hopeful that this setup of MOES finger bot + printed part + capacitive base might be helpful to other folks that are looking to remotely press other capacitive screens.
Please reach out if you find this helpful!
getstarted@219design.com


![Tim's Mechanical Spider Leg [LU9685-20CU]](https://content.instructables.com/FFB/5R4I/LVKZ6G6R/FFB5R4ILVKZ6G6R.png?auto=webp&crop=1.2%3A1&frame=1&width=306)


