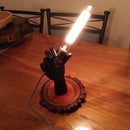
Introduction: Rustic Live Edge Log Slice Lazy Susan With LED Lighting
As the title and photos allude to, this is a handmade piece using wood log slices from some native trees here in Australia.
Doing some work on the raw log slices and adding a bearing and some led lighting gives the nice mix of rustic meets modern to make a Rustic Live Edge Log Slice Lazy Susan with LEDs!
I picked up some wood log slices from a local business that works with fallen trees and other woods to make unique and creative handcrafted items. Thought I would have a go at it myself.
This is my third Lazy Susan made out of wood log slices and the largest I've done out of the three and I am quite happy with how it turned out.
The top piece measured out to be about 60cm (~23.6") in diameter.
Step 1: Planing, Sanding and Leveling
Once I had the pieces at home on my workbench. I used my electric planer and belt sander to get rid of the chainsaw cuts and to get them nice and smooth and as leveled as I could.
Ended up sanding top and bottom piece to 240 grit on both sides.
Step 2: Cracks and Holes and Filling Them!
I chose the best side to be the top and I filled as many of the the cracks and holes I could with epoxy on the visible sides and wood putty on the sides that would not be seen. i.e. (Epoxy on the top of the top piece and the bottom of the bottom piece. Wood putty on the bottom of the top piece and the top of the bottom piece).
Waited overnight for the epoxy and putty to dry and harden. Then re-sanded all sides up to 1200 grit.
Step 3: Staining, Varnishing and Assembly
Added a 'Coffee Bean' stain to both the top and bottom pieces of wood after the sanding was finished.
Then once dry, I added a coat of clear satin spray varnish to seal and protect the wood.
Did a test fit and leveling of the slices on the bearing before pre-drilling and screwing in the bearing to both the top and bottom pieces of wood.
Step 4: LED Lighting and the Final Product
Once together and tested the bearing was spinning with no issues. I added some adhesive felt feet on the bottom of the piece. The placement of the feet also aided fixing any final unlevel areas after assembly.
I purchased some adhesive 'Cool White' LED strip lighting online that had a USB connector as its power input. I also purchased a 4x AA battery caddy with a USB connection and an on/off switch built into it.
Gave the lights a test before doing a dry measure with the LED strip on the underside of the top piece. I cut the LED strip to be the right length without overlapping itself and then stuck it on with its adhesive backing. The battery pack was attached with some adhesive velcro on both the underside of the lazy susan and onto the battery pack. Allowing it to be repositioned for easy access to the on/off switch or removed for battery replacement.
All in all, it took probably just over a week to complete. Working on it for a few hours a day and the waiting times for epoxy and varnish to cure/dry.
I think it has turned out quite well and it is a great decor table centerpiece of rustic meets modern.
Thanks for having a look at this project and feel free to let me know what you thought of it or if you've done something similar!

Participated in the
LED Contest

Participated in the
Lamps and Lighting Contest 2016


