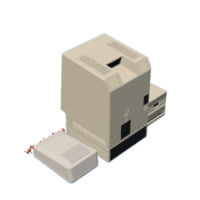
Introduction: SSD Case for Tiny Apple Pi [USB Type-C]
This time, it is a derivative version of "SSD Case for Tiny Apple Pi [micro SATA]".
Therefore, we will proceed in a rather abbreviated manner.
The reason why this is a derivative version is because I felt that the cable of the previous micro SATA version was not flexible enough for the Tiny Apple Pi and it was hard to handle. Also, I thought that USB Type-C might be more versatile.
After making the micro SATA version, I found out that there is honestly not much difference in material cost.
If you are going to enjoy it as an accessory, I recommend this version.
I know it doesn't look like instructables, but I thought I'd give it a try anyway. Please keep a warm eye on us.
Supplies
Resin A little (I use a stereolithography 3D printer)
USB Type-C Portable External SSD (I am making an external box with this size SSD)
Screw M3 * 6mm or 12mm 4pcs (Choose flat head screws as much as possible)
USB Type-A to Type-C cable A little bit of your choice
*The SSD itself may be okay in terms of size, even with this or this product, but I have not been able to verify this myself, so those who try it out do so at their own risk.
**The cable that comes with the SSD is also inflexible. Therefore, we obtained a curled cord (cable) separately.
***Either size of screw will work as long as it is a flat head; try to use the one you used for the Tiny Apple Pi or the micro SATA version.
Step 1: Outer Box Design
The outer dimension ratio is exactly the same as the micro SATA version.
This is because the length of the long side of the Portable External SSD was almost the same as the micro SATA adapter. The depth ratio is longer than the original, but please bear with us.
As with the micro SATA, the basic scale is the same as the Tiny Apple Pi, so we think it will look good when placed side by side.
Step 2: Outer Box Printout
I used the optical molding method for the printout as before.
As I mentioned in the making of the Tiny Apple Pi, please note that the reproducibility of the resin is surprisingly different depending on the manufacturer of the resin.
*Because the resin specs have caused me to produce a large number of failed pieces...
Step 3: Shaping & Painting
Paint as well as Tiny Apple Pi.
Has anyone found a resin in a color compatible with the Tiny Apple Pi?
* For me, the basic procedure was "Sanding > Filling the scratches with putty > Sanding > Surfacer > Color paint > Transparent matte paint".
Step 4: Now, Let's Assemble It.
...but all you have to do is put the portable external SSD in the outer box and screw it on. 😅
There is one caveat. When installing a portable external SSD, please install it so that the manufacturer's logo on the SSD faces the bottom. The reason for this is that it relates to the position of the USB Type-C connector that comes on the back. See the photo for details.
*As an aside, please choose the capacity of the SSD according to your preference. As long as the external dimensions are the same.
Step 5: Once Connected to the Tiny Apple Pi, There Are Things to Do...
As I mentioned in the micro SATA version, if you have just purchased an SSD, you will need to partition and format it.
Also, if you want to mount it permanently, you will need to set that up as well.
You can find various methods for these on the Internet, so please search by yourself.
* Sorry for not being kind. I looked it up, but it's faster and more accurate information to find on the internet.
Step 6: Thanks for Reading to the End.
It was quick, but the production of the Type-C version is now complete.
When the original Mac was released, the basic form of peripherals, which were quite expensive, was completed. (What about the keyboard? What about the mouse? What about the printer? There is no end to the list 😅)
I would like to see these peripherals loaded and lined up with Tiny Apple Pi.
See you.
Making Tiny Apple Pi: Mini VMac for Raspberry Pi Zero


![SSD Case for Tiny Apple Pi [micro SATA]](https://content.instructables.com/FMO/PN75/L0DUXUI9/FMOPN75L0DUXUI9.jpg?auto=webp&crop=1%3A1&frame=1&width=130)


![Tim's Mechanical Spider Leg [LU9685-20CU]](https://content.instructables.com/FFB/5R4I/LVKZ6G6R/FFB5R4ILVKZ6G6R.png?auto=webp&crop=1.2%3A1&frame=1&width=306)


