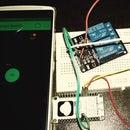
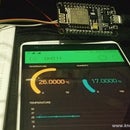
Introduction: Servo Motor Controlled With BLYNK Over WiFi
Hello All, I hope you are having a great time!
Today, we are gonna build a simple project to control a servo motor with BLYNK app over Wifi.
Overview: The slider on the blynk app will send a value to the NodeMCU/ESP8266 and this value will be written on PIN 8 and the servo rotates that much degrees.
Step 1: Things We Need
Hardware:
- Servo SG90
- NodeMCU
- MicroUSB cable
- Jumper Wires
Software:
- Arduino IDE
- BLYNK app
Step 2: Circuit and Connections
Connections:
- D8 pin of NodeMCU connects to Command pin of Servo Motor.
- 3V3 PIN of NodeMCU connects to Power PIN of Servo motor (usually RED one).
- GND PIN of NodeMCU connects to GND of servo motor (usually BLACK one).
Simple connections, huh!
Step 3: BLYNK App Setup on Phone
- Create a New Project in BLYNK app.
- Write Project Name and Select ESP8266 or NodeMCU from dropdown.
- An AUTH token will be sent to your registered email, note this down.
- Tap on the screen and add a SLIDER widget on the screen.
- Tap on the Widget, select Virtual PIN 3 and Start value must be 0 and End Value must be 180 (make sure to these values must not less than 0 and greater than 180 or you might break your servo).
Play responsibly!
Step 4: Time to Code:
We only need to add our AUTH ID(noted above), Wifi SSID and Password in the code and upload it to NodeMCU using Arduino IDE. In the code, we do not need to setup our pins this is already done by BLYNK in their library.
Code:
/* Comment this out to disable prints and save space */
#define BLYNK_PRINT Serial
#include <ESP8266WiFi.h>
#include <BlynkSimpleEsp8266.h>
#include <Servo.h>
// You should get Auth Token in the Blynk App.
// Go to the Project Settings (nut icon).
char auth[] = "YourAuthToken";
// Your WiFi credentials.
// Set password to "" for open networks.
char ssid[] = "YourNetworkName";
char pass[] = "YourPassword";
Servo servo;
BLYNK_WRITE(V3) {
servo.write(param.asInt());
}
void setup() {
// Debug console Serial.begin(115200);
Blynk.begin(auth, ssid, pass);
// You can also specify server:
//Blynk.begin(auth, ssid, pass, "blynk-cloud.com", 8442);
//Blynk.begin(auth, ssid, pass, IPAddress(192,168,1,100), 8442);
servo.attach(15); // 15 means D8 pin of ESP8266
}
void loop()
{
Blynk.run(); // You can inject your own code or combine it with other sketches.
}
If you do not have BLYNKEsp8266 library, download the BLYNKEsp library from Sketch menu --> Include Library -->Manage Libraries. Search for the BLYNK and install it.
Step 5: Upload Your Code to NodeMCU
Upload the code to your NodeMCU or ESP8266 and device will be displayed online on your BLYNK app. Click Play button on top right of your app and slide over the slider to rotate Servo as much you need.
Oh yeah!
Your suggestions and comments are always welcome! Feel free. Till then, Happy IOTing.
Follow knowshipp.com for more IOT projects.

Participated in the
Microcontroller Contest 2017
31 Comments
3 months ago
I want to use Blynk in a similar way - i have 6 x ESP32 boards and each has a single servo attached. Each has 2 positions - 0 Degrees (pos1) and position 2 will be different depending on where they are - so i would use variables to determine position. where can i get the view of what the code would look like?
2 years ago
my blink app says the servo is online but when i slide the slider ,it wont move
why?
Reply 1 year ago
set the range from 0 to 180
Reply 1 year ago
It worked by connecting the servo to another power source. Do not power the servo with NodeMCU.
Reply 2 years ago
Hey! Did you get any solution for this problem. i'm facing the same issue as well
Question 4 years ago on Step 1
Hi is the full code available for this or is it here but I don't understand it? I'm disabled from a head injury and find things hard to understand these days but want to build this. I have played with BLYNK but can not write code myself but hope to pick it up as I go along.
Thanks
Bill
Answer 2 years ago
This is full code
paste it in a new file and it'll work
2 years ago
How to control 2 or 3 servo motors with the same NodeMCU? I used pin D7 for the 2nd motor's signal wire. Please mention the modifications to the code.
Reply 2 years ago
/* Comment this out to disable prints and save space */
#define BLYNK_PRINT Serial
#include <ESP8266WiFi.h>
#include <BlynkSimpleEsp8266.h>
#include <Servo.h>
// You should get Auth Token in the Blynk App.
// Go to the Project Settings (nut icon).
char auth[] = "ihOu2yDI4kdMTNQIRLP9ALqzm1RnCIlW";
// Your WiFi credentials.
// Set password to "" for open networks.
char ssid[] = "Airtel_9314115171";
char pass[] = "air54162";
Servo servo1;
Servo servo2;
Servo servo3;
BLYNK_WRITE(V1) {
servo1.write(param.asInt());
}
BLYNK_WRITE(V2) {
servo2.write(param.asInt());
}
BLYNK_WRITE(V3) {
servo3.write(param.asInt());
}
void setup() {
// Debug console Serial.begin(115200);
Blynk.begin(auth, ssid, pass);
// You can also specify server:
//Blynk.begin(auth, ssid, pass, "blynk-cloud.com", 8442);
//Blynk.begin(auth, ssid, pass, IPAddress(192,168,1,100), 8442);
servo1.attach(15); // 15 means D8 pin of ESP8266
servo2.attach(13); // 13 means D7 pin of ESP8266
servo3.attach(12); // 12 means D6 pin of ESP8266
}
void loop()
{
Blynk.run(); // You can inject your own code or combine it with other sketches.
}
this should work for you
I have tested it my nodemcu using 3 servos
in the blynk app use 3 slider with V1, V2, V3
In nodemcu use d6, d7, d8
however if you want to control more than 4 or 5 servos, i would recommend using external supply for the servos
4 years ago
is it possible to display slider value on my serial monitor? if so, how can i do it?
4 years ago
don't know why the motor is making some noise continuously.
even when its Idle at desired angle.
5 years ago
My servo is an SG90, the same as yours, but it is moving incredibly slowly. I'm using it to unlock a door. Is there any way I can speed up the process? Thank you!
5 years ago
why do my servo sg90 turns continously instead of rotating in degree like in your video? huhu please help me
5 years ago
Hi, I'm desperately trying to control the servo.
I followed the instructions but the serve always turns in one direction. As soon as I plug in the servo, he tries to turn of his own accord. When I use the slider, it turns all the way and tries to keep turning.
Reply 5 years ago
Now I've managed to do it in both directions.
But I can not set the slider to 0-180. from 0 - 7 he turns in a circle.
It has more than 180 °. There are about 270 °
As soon as I plug in the servo he hums up very strong.
Reply 5 years ago
Are you using an SG90 Servo or a continuous rotation one?
Reply 5 years ago
Hello Yes I have the SG90. I took another sketch. but now it does not work as described as it should be
5 years ago
Hi PrakharR6
Is is possible to add a dfplayer mini or Sd card module? how to connect and code it, Thank you.
5 years ago
Hi,
Is it possible to control 2 servo motors in the same time?
Thank you.
Reply 5 years ago
Yes, add one more servo.attach(PIN_NUMBER); inside setup() function,
considering that you want to control both servos with same slider.
Else, create one more Servo variable, read values on another virtual pin from second slider and write this onto the PIN.