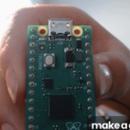
Introduction: Servo With Raspberry Pi Pico
Learn how to turn and control a servo with the Raspberry Pi Pico!
Supplies
3 Jumper Wires
1 Micro Servo
1 Breadboard
1 Raspberry Pi Pico
Step 1: Wiring the First Wire
First, slide the first tip of the jumper wire into the middle of the servo's 3 wires and connect the other side to the first slot in front of the 3V3(OUT), which is also the 36th pin.
Step 2: Wiring the Ground Wire
Next, slide a second wire into the brown wire of the micro servo and slide the other end into the slot 1 hole away from the GND Pin of the Raspberry Pi Pico, which is also the 38th slot.
Step 3: Wiring the Last Wire
Then, slide the last wire into the last of the 3 wires in the servo, and jab the other end into the hole in front of GPIO Pin 15 on the Raspberry Pi Pico, which is also the 20th Pin.
Step 4: Code
Copy this code into your Thonny window and click play. See your servo run!


