

Introduction: Surfboard LED Fins


A while ago I decided to combine two of my favorite hobbies river surfing and electronics, which resulted in motion-reactive LED strips for my surfboard. Since it is impossible to have too many LEDs on any project, I recently added glowing LED fins.
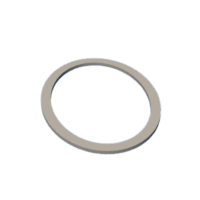
The fins are 3D printed from transparent filament and include a space in the center for a coin cell battery and a 5mm LED. The fins consist of two halves held together by screws and sealed with a gasket printed from flex filament.
UPDATE:
Version 2 with an improved seal is now available on Thingiverse.
Supplies
For each fin you will need
- CR2032 coin cell battery
- 5mm LED (color of your choice)
- small piece of packaging foam
- transparent 3D printer filament (e.g. Fillamentum Crystal Clear)
- flex filament (e.g. Polymaker PolyFlex)
- 6pcs M2.2 x 6mm plastic screws
Step 1: CAD Design


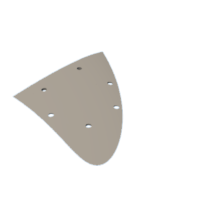
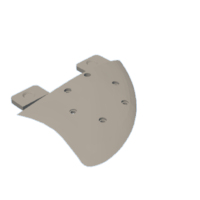
The parts were designed in Fusion360 based on these existing Thingiverse models. The fins are designed for the FCS system. I made a large fin and a small center fin as commonly used in rapid surfing.
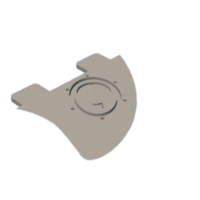
As already mentioned, each fin consists of two halves. The space where the LED and coin cell fits is surrounded by an elliptical groove into which a gasket is inserted. The gasket is squished together by a ridge on the top part with a triangular cross-section.
All stl files are attached below.


Step 2: 3D Printing

I tried out different types of transparent filament
- Filamentworld transparent PLA: very good print quality but lowest transparency
- XVICO transparent PETG: worst print quality, medium transparency
- Fillamentum Crystal Clear: good print quality, best transparency
As you can see I got the best results with Fillamentum Crystal Clear, however, it took me a while to get there as this filament can easily clog the nozzle of Prusa printers (see e.g. here, or here). As suggested in one of the forum posts the problem was mostly solved by replacing the heat break. I still sometimes experience the typical clocking noise on my extruder but the prints do not fail entirely.
Regarding the print settings, there are many tutorials on getting transparent prints (see e.g. here) and making 3D printed objects watertight (e.g. here). Luckily, the requirements are somewhat similar so it is not impossible to achieve both. After some experimenting I found the following adjustments to be useful
- infill: 100%
- nozzle temperature: 220°C
- infill/perimeters overlap: 5%
- cooling fans: off
- print speed: 70%
- flow rate: 110%
The gaskets were printed from Polymaker PolyFlex filament with 100% infill and 0.1mm layer height.
I did not do any post-processing except for some mild sanding. Coating the parts with epoxy might be a nice addition in order to improve transparency and waterproofness.
Step 3: Assembly


First, you have to shorten the leads of the LED a bit so that they fit inside the 3D print. The coin cell battery is simply placed in between the LED leads. The gasket is inserted into the bottom part of the fin and the top part is fixed with M2.2 x 6mm plastic screws. I also placed a small piece of packaging foam on top of the coin cell to hold it in place after the fin is sealed.
You can of course use whichever LED color you prefer. Most LEDs work fine when supplied 3V directly from a coin cell battery. For the center fin, I used an RGB LED with an integrated controller that cycles through the rainbow. I also printed fins from Fillamentum Iceland Blue filament that are used with a white LED.
Step 4: Testing Waterproofness

I immersed the sealed fin completely in water for several minutes to test if it is waterproof. At first, I tried this without the electronics. Only after I checked that no water entered I tested it with the LED and the coin cell inside.
Step 5: Final Remarks

The disadvantage of the simple design is that there is no switch to turn the LEDs on and off. In order to do so, you have to unscrew the top part and remove the battery but I was unable to find a watertight switch that is sufficiently small. With a switch installed one could also think about permanently sealing the 3D print with epoxy but then you would not be able to replace the battery. With a typical capacity of 220mAh for a CR2032 cell and a typical LED current of 10mA, the battery should last 22h.
Unfortunately, I was not able to try out the fins yet. When I do, I will post a video so that you can see them in action. I hope the fins will turn out to be as watertight in real-life conditions as in my tests.

Participated in the
Water Speed Challenge


