Introduction: Szilassi Polyhedron
Is it possible to create a polyhedron that has the shape of a torus (donut), but with a minimum number of faces?
Let's assume you can. And how many faces do we need?
A ring can be obtained from at least three faces, but these will only be internal faces. And you also need the outer edges to make it a truly geometric solid.
A task. Is it possible to make a toroidal polyhedron from seven faces?
This may seem overwhelming. Seven faces are too few!
And yet, in 1977, the Hungarian mathematician Lajos Szilassi found a way to construct a toroidal heptahedron.
A heptahedron is a polyhedron with seven faces. From the Latin words "hepta" - seven and "hedr" - an edge.
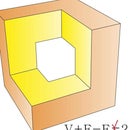
Heptahedron, topologically equivalent to a torus. Topologically, this means it preserves the property of a torus, even after visible deformation.
Step 1: Preparation for Assembling a Polyhedron
The polyhedron contains 7 parts. Each will require a colored sheet of paper. But you can make it out of ordinary white paper, followed by self-painting with a brush.
Print each sheet on paper in the correct color.
If the paper is thick enough, it may not be convenient to fold the petals.
To make the fold easier, you can draw fold lines. You can use a ballpoint pen for this. Draw a line with a ballpoint pen along the fold. Use a ruler to keep the line straight.
Then each part should be cut along the contour.
One can often find such a variant of the shape net of the Szilassi polyhedron. Two-part shape net:
But there are two reasons why this build option should be avoided.
The first reason is that the polyhedron model is too small.
And the second, most important, inconvenience during assembly. Those who offer such a shape net have most likely never tried to make a paper model from it themselves. If you start the assembly from the outer contour, then it is almost impossible to carefully glue the internal parts. This variant of the shape net of the Szilassi polyhedron can only be regarded as an auxiliary instruction.
The model has an internal part that is very difficult to handle during assembly.
Step 2: Assembly of a Polyhedron. Glue the Inside of the Model
The finished parts are glued together according to the scheme.
First, we collect the inside of the polyhedron.
The colored surface of the parts should be inside, forming a ring.
Step 3: Assembly of a Polyhedron. Glue the Sides
Glue the green part across the three petals marked with 4.
Glue the blue part across the three petals marked with 5.
Please do not glue the blue and green parts together. This should not be done yet.
Step 4: Assembling a Polyhedron. Add the Last Two Details
The next step is to glue the remaining two side pieces through the flap marked with number 6 for the red piece.
And through the flap marked with number 7 for the yellow part. Next, we consistently glue the free flaps to the red and yellow details, as indicated in the diagram.
Step 5: Assembling a Polyhedron. Glue Loose Petals
First, glue two loose petals of the red part.
Then glue the two loose petals of the yellow piece.
Step 6: Assembling a Polyhedron. the Final Stage
We begin to glue the petal of the blue part to the red one.
Next, glue the green part.
In the end, glue the remaining part of the yellow part.
We get the finished model - Szilassi polyhedron.
Step 7: Polyhedron Properties.
This polyhedron is loved by mathematicians for its unusual properties.
1. The Szilassi polyhedron has:
- 7 faces;
- 14 vertices of the polyhedron;
- 21 ribs.
Which will delight lovers of numerology and the number 7?
And also opened in 77 of the XX century.
2. Each face of a polyhedron is a hexagon (although none of them are regular hexagons).
3. Each pair of faces has a common polygon edge.
4. Like the tetrahedron, each face of the Szilassi polyhedron touches all the other faces.


