

Introduction: Teemo's Dart Shooter - Cosplay Prop With Arduino

For a school project I've been given the assignment to create something with an Arduino. I decided to recreate the dart shooter that Teemo, a character in League of Legends uses as a weapon for my friend to use when cosplaying.
Through blowing into the pipe hard enough it will play a dart shooting sound along with lighting up an LED at the end of the pipe.
Supplies
Quite a list of materials needed to make this thingy woaw-
Electronical components:
- 1x Arduino Nano
- 2x Prototype board 2 x 8 cm (or 1x board of 4 x 8cm)
- 1x Small powerbank 12 x 6 x 5 cm
- 1x Micro-usb cable 0,15 m (shorter is better)
- 1x MAX9814 Microphone
- 1x Speaker 4Ω 3W
- 1x DFPlayer Mini MP3 Module
- 1x SD card (max 32gb) & SD card reader
- 1x 1kΩ resistor
- 1x LED
- 1x 330Ω resistor
- 3x M/M Jumper wires (or more if preferred)
- M/F Jumper wires (however many necessary)
Equipment & Other
- 6x x_shoot.mp3 files
- DartShooter.stl or DartShooterv2.stl file
- 3D printer
- Soldering tin and supplies
- Superglue
- Tape
- Acrylic paint & paint brush
- Colored feathers


Step 1: Concept Phase


Before this project, I didn't even know what an Arduino was. Never seen it in my life, but art school being art school and wanting me to try out everything gave me the assignment to create something with it, but what?
I wanted it to be something that would get used, but I couldn't think of any gadget I'd want to make for myself, so my thoughts went to my friends. Was there something I could make for them? Turns out, there was. One of my friends likes to cosplay whenever she goes to a convention so I asked her what character she was planning on cosplaying next time and her answer was Teemo from the game League of Legends.
So, researching this character was my next step. What items did it use and was there anything I could try to recreate with a little flair of an Arduino inside? I eventually came up with two ideas, one of them being this dart shooter that would play a sound whenever blown into it and light up at the end.
Step 2: Prototyping

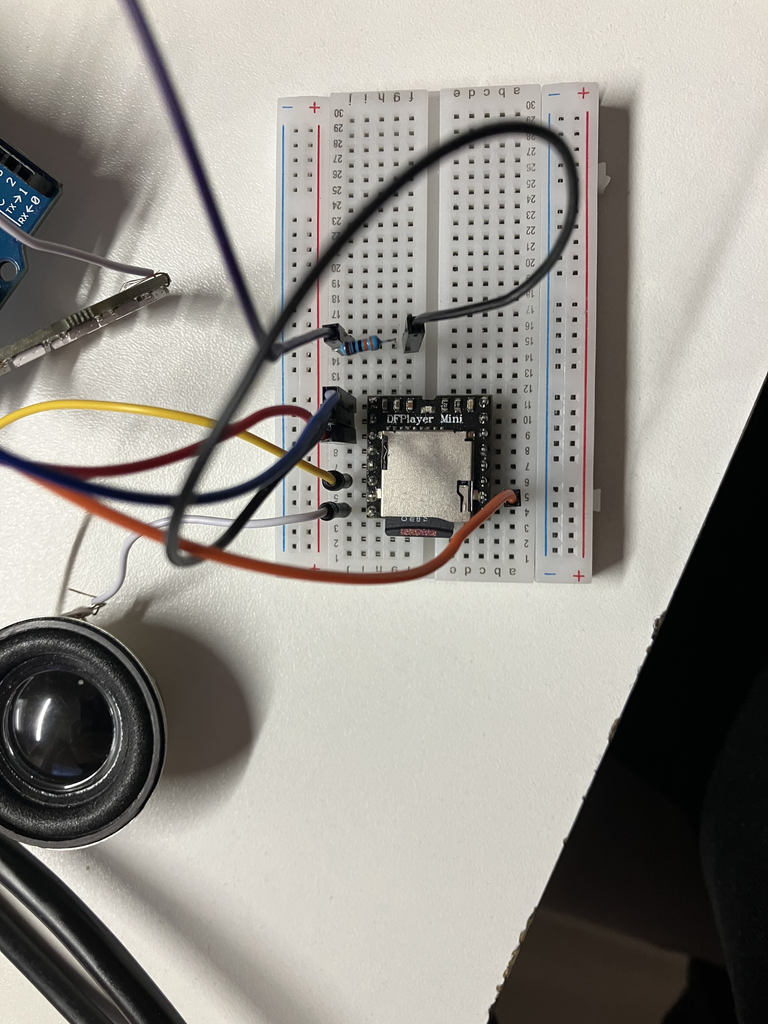
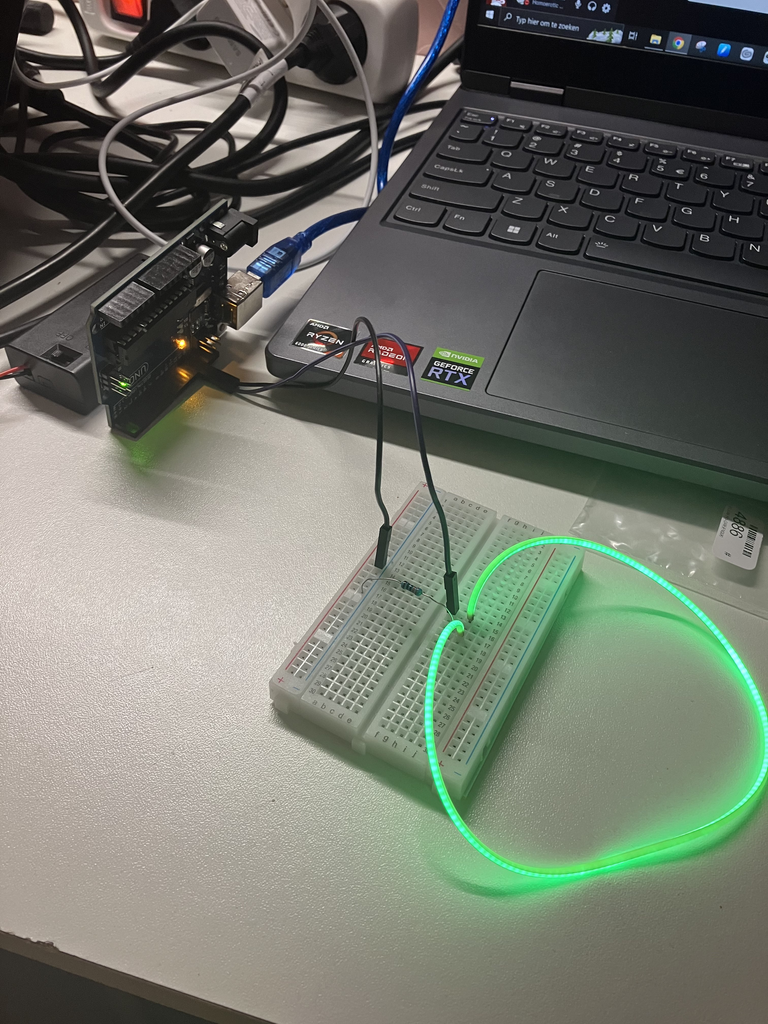


For prototyping I first started off testing things on an Arduino Uno and a breadboard. I could prototype more easily and after everything worked I could transfer it to the Nano. I had already soldered a few modules with wires for ease of use, mainly the mic and speaker.
Before I could put things together I wanted to test out every module individually. I did this by following tutorials I could find online on youtube or forums. By doing this I was able to learn how to use them and figure out how to connect them together.
The MAX9814 microphone was relatively easy to figure out how to use. Watching a tutorial I figured out which connections needed to be made and using the Arduino IDE I was able to pick up sound.
For the mp3 module, it took me some time to figure it out. My first hurdle was not knowing it could only handle up to 32GB SD cards, which I didn't have on me when I first started testing. I quickly ordered it and after it arrived I could start using it. Connecting the correct wires, uploading the mp3 files onto the SD card and connecting the speaker all went well, but there was one issue that came up. The sound was playing horribly. As unknowledgeable as I am about this stuff, I couldn't figure it out on my own, but after having some help of my teacher we discovered the problem to be that one of the connections lacked a 1k resistor. Adding that fixed the problem as my speaker now played dart shooting sounds!
For the LED part I had to go through several ideas. I first began with a flexible led filament, but as it turned out these types of things needed a precise amount of voltage, which needed another module to control that, so I had to scrap this option. On my teacher's recommendation I purchased an Adafruit NeoPixel ring 16 x WS2812. While it had beautiful results, I later discovered it would take too much energy, having to share the 5V output with the mp3 module. I also encountered problems with the library used resulting in errors, so I unfortunately had to also cross away that option. My last resort was using the simple small LEDS I had left. Those were very easy to use wiring and coding wise, but were lackluster when it came to the end result. Since I had limited amount of space I couldn't add another battery pack that could supply more power for the NeoPixel Ring, which is why I ended up choosing the small LEDS.
Step 3: Code & Wiring


Having connected all the wires to the Arduino and modules together and after several tests I was able to make a code that whenever the mic picks up a sound above a certain threshold, it would play a random mp3 file downloaded onto the SD card. The volume of the speaker is set to 25 so it would be quite loud. When you blow into the mic another thing that happens would be the LED lighting up. So you'd get two reactions in total. The only downside I found was that while the mic does pick up the noise of air being blown onto it, it still picks up regular sounds. This means other loud noises could trigger the sound too if loud enough (ex. talking loudly).
The code is really simple, the hardest part probably being installing the library for the mp3 module. In the Arduino IDE go to the library manager and download version 1.0.6 of the DFRobotDFPlayerMini by DFRobot. After doing this you can add the code I wrote with added comments explaining what it does.
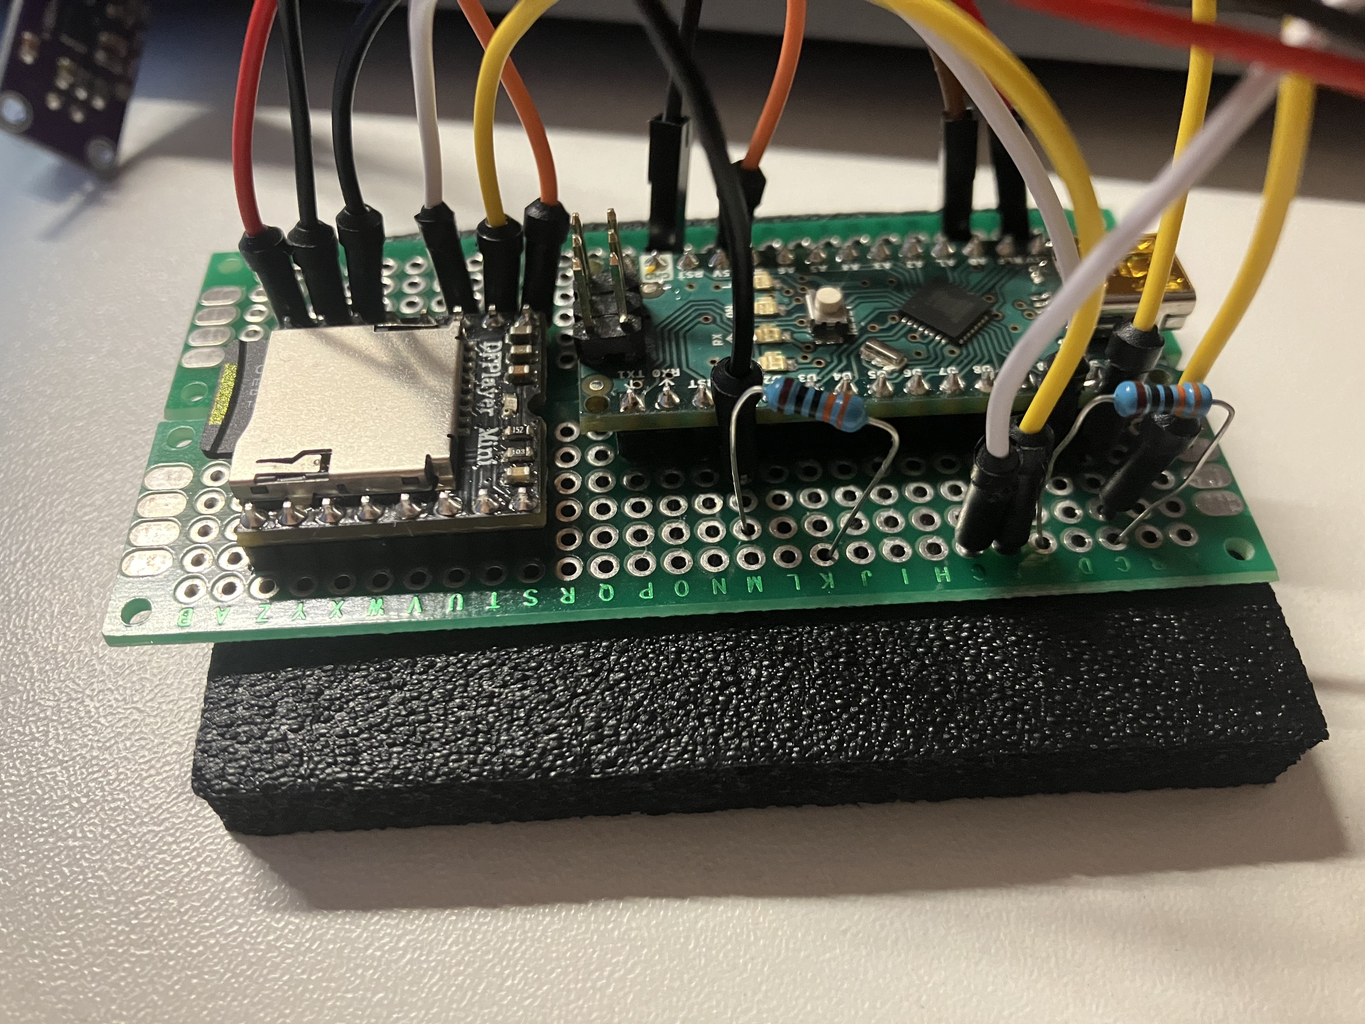
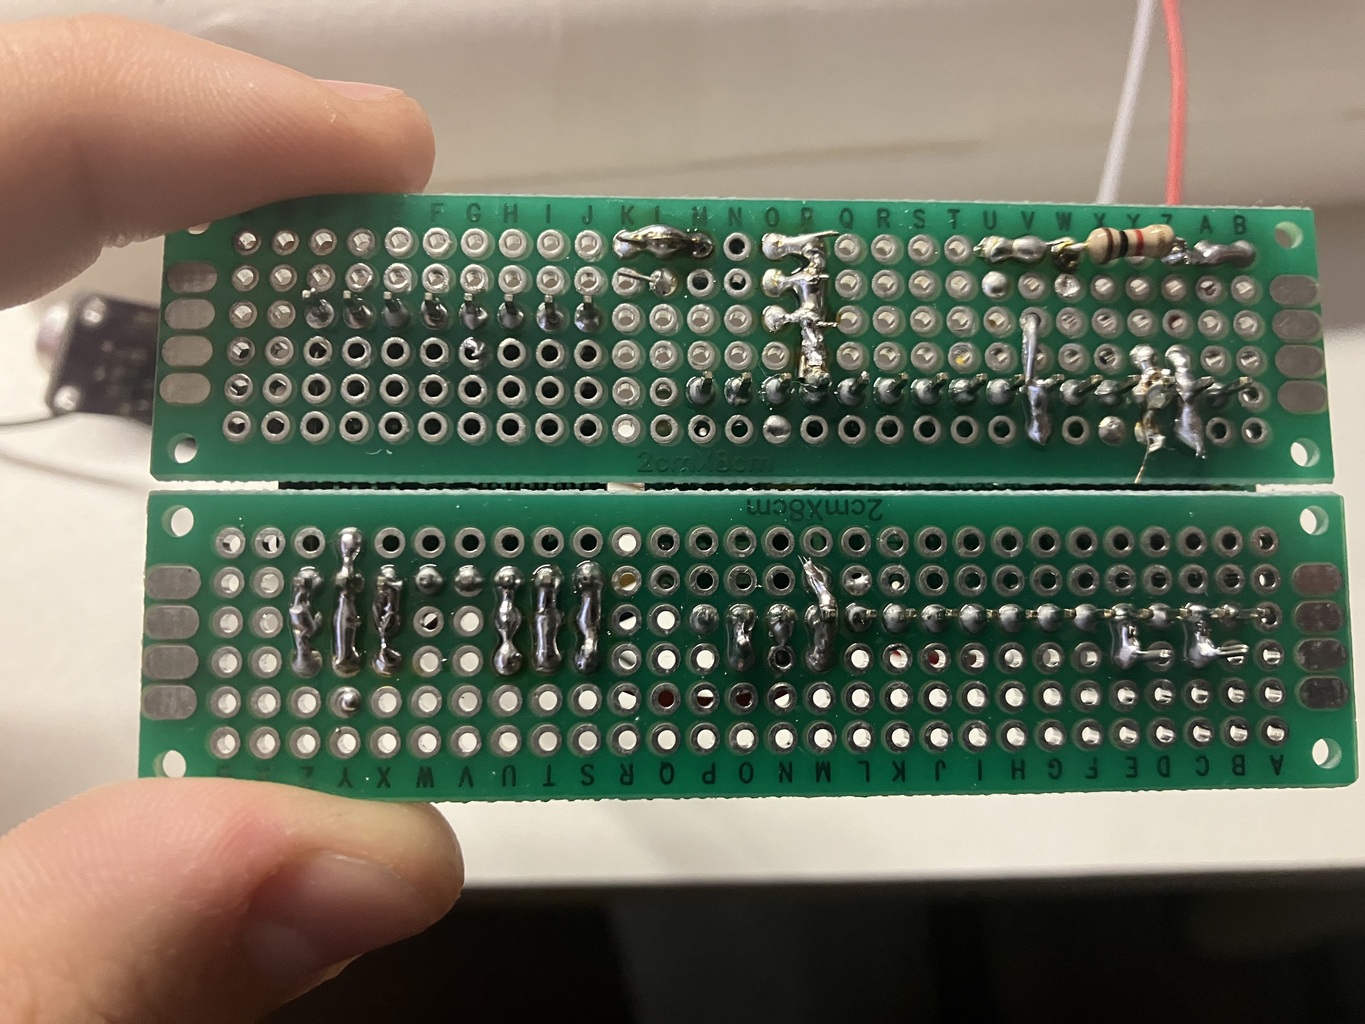
After everything worked I transferred it all over to my Arduino Nano and soldered it together. Following the schematic I made, you should see where you should connect things to. Please take note of the following:
- MAX9814 microphone should use 3 M/M wires with a recommended length of 8 cm
- Wires connected to the speaker and LED should at least be 28 cm
- All other wires you can connect as you see fit (mine look messy, but it works!)
- In the soldered picture you might see 2x 330Ω resistors next to each other. I only ended up using one, but I added it in case I wanted to add a second LED
int micVolume = 0;
int LED1 = 7;


//


#include "SoftwareSerial.h"
#include "DFRobotDFPlayerMini.h"


//


#include "Arduino.h"
#include "DFRobotDFPlayerMini.h"


#include <SoftwareSerial.h>
SoftwareSerial softSerial(/*rx =*/10, /*tx =*/11);
#define FPSerial softSerial


DFRobotDFPlayerMini myDFPlayer;
void printDetail(uint8_t type, int value);


void setup() {
  Serial.begin(9600);
  FPSerial.begin(9600);


  // Set led out when arduino gets powered
  pinMode(LED1, OUTPUT);


  Serial.println();
  Serial.println(F("DFRobot DFPlayer Mini Demo"));
  Serial.println(F("Initializing DFPlayer ... (May take 3~5 seconds)"));


  if (!myDFPlayer.begin(FPSerial, /*isACK = */true, /*doReset = */true)) {  //Use serial to communicate with mp3.
    Serial.println(F("Unable to begin:"));
    Serial.println(F("1.Please recheck the connection!"));
    Serial.println(F("2.Please insert the SD card!"));
    while(true){
      delay(0);
    }
  }
  Serial.println(F("DFPlayer Mini online."));


  // Set volume value 0 to 30
  myDFPlayer.volume(25);


}


void loop() {
    serialPlotter(0, 700);


    // Records mic volume
    micVolume = (analogRead(A0));
    Serial.println(micVolume);
    delay(5);


    // Triggers led on when mic reaches a threshold
    if(micVolume > 450)
    {
      digitalWrite(LED1, HIGH);
    } else {
      digitalWrite(LED1, LOW);
    }


    // Choose randomly between given mp3 files
    int currentMP3 = int(random(1, 7));


    // Triggers mp3 to play when mic reaches a threshold
    if(micVolume > 520)
    {
      myDFPlayer.play(currentMP3);
    }


}


void serialPlotter(int min, int max)
{
  // Setting a limit so the serial plotter becomes readable
  Serial.print(min);
  Serial.print(" ");
  Serial.print(max);
  Serial.print(" ");
}
Step 4: Making the Design


Because of a lot of constraints on both the means of 3D printing and space needed for the Arduino to fit with all its components, making the design ended up being quite te challenge. I have a limited amount of knowledge when it comes to using 3D modeling software so it took some time to learn it and then to create something that could be printed out. Since 3D printers have relatively small spaces I had to either design it to fit into the space given or break it down into multiple pieces to be printed out.
The biggest parts used with the Arduino was the prototype board with a width of 4cm. This meant the diameter of the dart shooter had to be at least that big for it to fit. With how I set up the wiring it would start with:
Mic at the front > prototype board > powerbank > speaker & LED
Some hours later in blender, I ended up with a rather large diameter of 6cm, slimming down in the middle and becoming bigger again at the exit. Inside I made supports to help keep parts in places. Because I wanted to be able to take it apart and charge the powerbank I had to break down the design in half so you could open it from the top.
With it finished and in theory working I now had a 6 x 6 x 35 cm dart shooter model. Additionally from cutting it in half, I had to cut it again so the 3D printer could actually print out such a long design. I would seperate it at the thickest part so glueing would be easier and less chance of it breaking apart.
I've included two stl files for you to choose what fits for you.
- DartShooterFile.stl > 3d model broken up in top and bottom part. If you have a 3d printer that can handle printing such a length you can use this one.
- DartShooterFilev2.stl > 3d model broken up in 4 pieces. I used this one because I didn't have a printer capable of printing such large objects.
Step 5: Assembly


After printing out the model, I removed the supports and started painting it so it could finally start resembling Teemo's dart shooter. When the paint dried up I glued the smaller parts to the longer ones with superglue.
Now it was time for the truth, would it work? I put my Arduino and all its components inside and then taped the top and bottom together with masking tape. This is so I could take it off whenever I need to charge the powerbank again. I held it in my hands as I blew into the mic and whoosh it worked! Download Video_test2.mp4 to see the end result~


