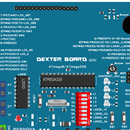
Introduction: Temperature and Humidity Sensor (DHT22) With Dexter Board
Dexter board is an educational trainer kit that makes learning electronics fun and easy. The board brings together all the necessary parts a beginner requires to change an idea to a successful prototype. With Arduino at its heart, a huge number of open source projects can be easily implemented directly on this board. Interactive features like on board LCD display, switches, motor drivers and LED's help make development faster and debugging easier.
Together with I2C and SPI pin outs, we have also integrated wireless protocols like Bluetooth on the board itself. This opens a whole spectrum of ideas to build creative IoT projects. Most importantly all these features are implemented on a single board thus all your projects are now portable, mobile and wireless.
Dexter Board can be used in wide variety of applications for training and development in domains such as embedded systems, robotics, practical electronics education, electronic hardware development and more...
Supplies
· Dexter Board
· Ada-fruit DHT22 temperature sensor
· Resistor 10K
· Connecting wires
· Arduino Programming IDE
Step 1: Connect the Pins As in the Diagram
Step 2: Adding CH340G Driver
If you are using Arduino first time with Dexter then please install ch340g driver. Go to the link and follow the instructions
Step 3: Adding Ada-fruit Sensor Library
Now you have to add the adafruit sensor library to your Arduino IDE. If you already have the library no need to download again, you can proceed to next step
Download adafruit_sensor library
Download the file as zip then
go to Arduino -- > Sketch-->Include Library-->Add .Zip Library
Then select the zip file you downloaded.
Your library is added to the Arduino IDE. You can see it at the bottom of your library list.
Step 4: Adding DHT Sensor Library
Now you have to add the library for you adafruit DHT sensor.
Repeat the above steps to add the library to Arduino IDE.
Step 5: Compile and Upload Your Program to Dexter
Now Download this given Arduino code to your IDE.
From tools select the board as Arduino Uno, and also select the your port at tools-->port
Now compile and Upload the program
Attachments
Step 6: Adjust LCD
If your LCD display shows nothing,adjust your LCD’s potentiometer You will get the output as in the picture


