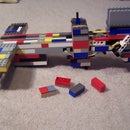
Introduction: The A1.1 Mini Crossbow Mod
This is the mod of the A1 Crossbow. Even though I already have the A2, I think that the A1 definitely is better in some ways (its smaller, more powerful for its size), and it deserved to be modernized to a level that some of my newer guns are at. The gun is 9x6.5x2 inches, its size being improved by a couple inches in terms of its height, and about an inch width wise. The crossbow fires a larger 2x4(1/3) F round (meaning its a 2x4 brick with flat pieces on top). It has a range of 35+ feet. Here are the improvements:
-Improved Runway (More Accurate)
-Improved RB Holder (More RB Power, Smaller)
-More Stable Body (Meaning That More RBs can be put on)
-Improved Bottom RB Holder
-New Trigger Handhold (Smaller, More Comfortable)
-Improved Sight
Video of the A1.1:
-Improved Runway (More Accurate)
-Improved RB Holder (More RB Power, Smaller)
-More Stable Body (Meaning That More RBs can be put on)
-Improved Bottom RB Holder
-New Trigger Handhold (Smaller, More Comfortable)
-Improved Sight
Video of the A1.1:
Step 1: Bottom
The main body's bottom layout, as well as the bottom rb holder, and the trigger handgrip.
Step 2: Rear Sight+Back
Here, we build the sight on the back of the gun, as well as put the flat pieces on the back.
Step 3: Crossbow Arms Pt. 1
This is the first part of the crossbow arms.
Step 4: Trigger
Same basic trigger as some of my earlier guns.
Step 5: Firing Runway
Here we are just putting the studless pieces on the runway.
Step 6: Crossbow Arms Pt 2
This completes the crossbow arms (where the firing rbs are held)
Step 7: Assembly + Rbs
In this step, we put on the trigger handhold (from Step 1), and attach the Rubber Bands. Note, that because this gun uses my older trigger, the counter weight rubber bands on the bottom need to be stronger than the firing rubber bands. (I am going to make a A1.2, which will change the trigger to the more reliable, easier-to-use, and more powerful gear trigger).
Step 8: Ammo + Firing
The ammo is a 2x4 brick with flat pieces on top. To fire, place the firing rbs on the trigger, and put the ammo at the back of the runway, and pull the trigger all at once (not slowly, or it will misfire-this will be corrected in the A1.2- coming soon)


