Introduction: The Hydroponic, Automated, Networking, Climate Controlled Greenhouse Project Update (July 22, 2012)
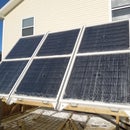
This is a quick update to show what I've accomplished so far in the construction of my greenhouse. As usual I'm far behind schedule mainly due to weather, landscaping projects, work, etc. It's hard to find the time right now to write full instructables on my projects with the level of detail that I try to provide. I expect to have the hydroponics system as well as the climate control equipment installed and in working order just in time for the end of the growing season :( The programming however, is waaaaay over my head for the moment and I believe I'll be working on that all winter long.
I will try to make another one of these update slideshows in 1-2 months when I hopefully have a lot more done. Shortly after that I will try to write detailed instructables on how I did it all. Please subscribe to stay tuned.
I hope I've provided enough information in the details of the photographs. As always, if you have any questions, comments or constructive criticism I'd be happy to hear it. Thanks for looking!

Participated in the
Green Tech Contest
44 Comments
10 months ago on Introduction
Please provide me all source code and documents I made my house.
my gmail - giashsmart@gmail.com
1 year ago
Ottimo complimenti si può avere il codice? Vorrei realizzarlo è veramente eccezionale
Question 2 years ago
hi is very good work plz share with me schematics and code i need your answer
3 years ago
As a network engineer, this project makes my giney tingle. If you need help with the code, or would like to collaborate feel free to contact me on Twitter @WithWhitt. I have plenty of free time (medically retired).
I didn't even think of running power over ethernet using a 66 block and relays. I had the idea to use a PoE switch but transforming and stepping down the voltage is more hassle. This looks genius!
3 years ago on Introduction
Do you have a schematic for the plc that you can share?
3 years ago on Introduction
Excelente trabajo, mucha calidad, lo felicito, muy bien hecha la instalación y el orden en lo electrico.
5 years ago
Has this project continued or died off?
5 years ago
great
5 years ago
Hi,
What brand is the big enclosure you are using? the one with the transparent front door.
Thank you.
5 years ago
great
6 years ago
Love it!
6 years ago
Hey I was wondering if you had a material list and as well the arduino code?
6 years ago on Introduction
Congrats, you should be proud! I don't know much about construction work, carpentry, let alone gardening, but I'm fond of your electronics - looks very professional, well-thought and clean; some industrial controller designers could learn from you :).
7 years ago on Introduction
Could you please for me refer this detail your poject? I like it. I like box control panel by arduino. I don't know how to make it. Please for me refer. thanks so much.
My email: huynhquoc1990@gmail.com
7 years ago on Introduction
Congratulations for your project.
I want to ask you what type and size of wires are you using on your project!
I want to connect my arduino mega to my gsm shield,keypad,lcd and i dont know what type fo wire to choose
7 years ago on Introduction
Very nice work. how have you come along with the programming? I am a C++ developer and just about to embark on a similar project myself. Im intrigued as to why you used those large relays when you have 16 available rated at 10A/250V AC? Also, what is the item next to the large relays in the middle of the unit? Couldn't figure that one out :)
Reply 7 years ago on Introduction
Hi. Because of time and budget issues and because of an epiphany that simpler is better I have abandoned this project in favor of a passive solar greenhouse. I recently bought a large lot of land in the country and will eventually build a homestead and move there.
The reason I used the large relays instead of the ones built into the blue board is that the blue board is not UL listed or CSA approved and I don't trust them with 120 VAC. Instead, the blue board relays are used to switch the 12VDC coil on the larger relays which are UL listed.
That small green thing that you asked about is another relay. It's used to activate the big motor contactor beside it. The motor contactor has a 120VAC coil so again, I didn't trust those blue board relays with 120VAC so the blue board relays activate the small green realy which activates the motor contactor.
Hope this helps! Let me know if you have any more questions and good luck on your project.
Reply 7 years ago on Introduction
Thanks for the info, I can see the logic behind using more heavy duty relays now. ah, thats a shame to hear you've dropped the project. Well if you need any help with that kind of programming feel free to drop me a message in the future
8 years ago on Introduction
Hi,
I'm quite interested in your greenhouse project and have a question for which I can't seem to get a clean answer.
Where do you place the temperature sensor, inside the greenhouse? And how do you protect it from the sun, and moisture / wind?
i.e. how do you know the temperatures reported are accurate, and not affected by the elements?
Reply 7 years ago on Introduction
I mounted my interior temperature sensor in the center of the greenhouse. That way it isn't affected by any false temperature reading that could occur near the exterior walls and especially the door.
It's mounted at the same height as the white PVC pipes that the plants sit in. In case there is any temperature stratification in the greenhouse the sensor gives the reading from the same level as the plants which is the most important. However, a circulation fan in the greenhouse prevents temperature stratification.
There is also a plywood "awning" that is mounted over the temperature sensor that shields it from direct sunlight and prevents any false temperature readings that way.
Thanks for your questions.