

Introduction: Timeshifting Food – Pizza From Scratch


Let’s do the time shift again, with apologies to The Rocky Horror Picture Show.
Dinner for two? No problem.
Imagine a 12-inch pizza with a “from scratch” crust filling the kitchen with its yeasty aroma! You just don’t get that with frozen or delivered pizza.
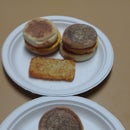
Thaw a crust “puck”, roll and dock it, and let it rise. Also thaw a tub of pizza sauce and a pack of Canadian Bacon. Parbake (aka partially bake) the crust for crispness. Top with pizza sauce, shredded mozzarella, chopped black olives (can), sliced marinated artichoke hearts (jar), and “cubed” Canadian bacon. Bake for 12 minutes, cool to cut, and serve with pre-shredded Parmesan cheese.
Almost everything in this preparation is timeshifted in some manner. The crust, Canadian bacon, and pizza sauce are portioned and frozen. Chopped olives are in cans. Marinated artichoke hearts are in glass jars. Mozzarella and Parmesan cheeses are both pre-shredded and have good refrigerated shelf lives.
This recipe may seem like “a lot”, but it quickly becomes familiar.
I use an older Panasonic microwave and a Breville BOV800XL oven for cooking. They work well when cooking for two.
Step 1: Timeshifting the Pizza Crust


This recipe yields three crust “pucks” for 12-inch pizzas. I usually make two batches. It comes together quickly
Ingredients
568 grams King Arthur Unbleached Bread Flour
1 cup + 2 Tablespoons water
1-3/4 teaspoons Fleischmann's dry yeast
1-3/4 teaspoons sugar
1-1/4 teaspoons salt
1-1/4 Tablespoons corn oil.
1. Put the dough hook on the mixer.
2. Weigh out the flour. I use weighing because it has the least variability of measuring methods. Too much or too little flour affects the consistency of the crust. Too little and the dough is sticky and hard to handle. Too much and it never comes together .
3. Microwave water in a 2-cup glass measure on High for 25 seconds (about 100ºF to 110ºF). If it is too hot, the yeast will die.
4. Add yeast, sugar, and salt to the water and stir to disperse. If you are concerned with the yeast; leave it for a few minutes. If bubbles start forming, it is active. I have never had a problem with Fleischmann's.
5. Pour the liquid into the mixing bowl and add the oil. Run the mixer at 4 for a few seconds to disperse the oil.
Caution: DO NOT EXCEED SPEED "2" WHEN MIXING DOUGH.
Edit 2017-07-03-----------------------------------------------------------------------------
I have found that starting the mixer on setting 1 allows the liquid and flour to mix without the mixer tossing flour out of the bowl. Move up to 2 when you need more torque.
--------------------------------------------------------------------------------------- End edit
6. Pour the flour into the mixing bowl. I have tried adding it slowly while mixing and just pouring it in and then mixing. I can’t tell a difference other than just pouring it in is less messy. Recipes say to “Mix until a ball forms”, however, it never does so I finish it by hand. See the note below regarding mixers.
7. Place the dough ball in rising box or bowl. I have two 4 liter Rubbermaid rising boxes with lids.
8. Let the dough rise 24 hours in the refrigerator to develop flavor. Make sure to let it rise in the refrigerator.
9. “Punch down” the dough ball and cut into three equal pieces. Form each piece into a puck about 5-inches in diameter. Think “thick hamburger patty”.
10. Place each puck into a quart Ziploc freezer bag and freeze.
11. Thaw in refrigerator when ready to use (1 to 2 days). Thaw on the counter if in a rush.
Edit 2016-03-12 -----------------------------------------------------------------------------
Note: I have started weighing the water (280g), as well as the flour, and the dough is more consistent. I use two 8-cup tubs to pre-weigh the flour and two 2-cup measures to pre-weigh the water and to prep (#3 and #4). Mix the first batch. Don't clean up. Mix the second batch.
Note: I have started "Crisco'ing" my rising boxes for better release.
Note: Budget an hour from getting out the tools to putting them away (washed).
--------------------------------------------------------------------------------------- End edit
Note: I am extremely disappointed with the KitchenAid 5 Quart Artisan Stand Mixer for bread products. I use it for pizza crust simply because I own it. It does fine with chocolate chip cookies and the like but just not bread products. Also, it has an open gear train and leaks grease. The set screw comes loose, even with removable thread locker, and the head bucks up and down. I came to find out that these are all known design limitations of this mixer. Buy something else for bread and look for one with an enclosed gearbox.
Step 2: Timeshifting the Pizza Sauce


No cooking at all here. However, the draining is slow and boring. Just remember “Water is the enemy of crisp crusts”. That also applies to toppings. This recipe is a leftover from when I used to make 16-inch pizzas. It makes a lot of sauce, but it also makes a lot of pizzas.
Ingredients
3 28 oz. cans Hunts crushed tomatoes
1-1/4 teaspoons dried Basil
1-1/4 teaspoons dried Thyme
1-1/4 teaspoons dried Oregano
1. One at a time, pour the entire can of crushed tomatoes into a stainless steel fine mesh strainer to drain. Hold the strainer at about 45 degrees and rotate it until water stops draining. The crushed tomatoes will “firm up” when most of the water is gone. If you “toss” the crushed tomatoes in the strainer, you will lose some of the solids and get a smaller yield but it will work. Also, the amount of water in crushed tomatoes varies.
2. Put the tomatoes into a 2-qt glass measure, add spices and mix well.
3. Divide into containers and freeze. I use 9.5 ounce lidded containers and usually get about six containers.
Edit 2016-03-12 -----------------------------------------------------------------------------
Note: The difference between a 28-ounce can of regular or no salt added crushed tomatoes is 3/4 teaspoon salt.
--------------------------------------------------------------------------------------- End edit
Step 3: Timeshifting the Canadian Bacon


This is the easiest step.
Portion out one bulk pack of Jones Canadian Bacon. Put three slices into each 1-quart Ziploc freezer bag and freeze.
Step 4: Pepperoni *****Added 2016-05-03*****


Pepperoni *****Added 2016-05-03*****
Freeze the Pepperoni stick. It wont actually “freeze” because of the fat content but it does become firmer and easier to cut. Cut the slices 1/8th inch to 3/16th inch thick. Save your counter, use a cutting board or flexible cutting sheet. Put the “coins” in a quart freezer bag and thaw them as you need them. An article I found interesting regarding thickness and cupping is Pepperoni Curl.
I have been buying Margherita brand sticks at Walmart. If you don’t see them on the deli counter, look on top of the cheese island.
The 12 minute final cook time for the pizza is not going to crisp up the Pepperoni. The solution is to partially cook them in the microwave.
Put some paper towels on a microwave safe plate, put the sliced Pepperoni on the paper towels, and cover them with another paper towel. Microwave them on High for about 15-20 seconds, depending on your microwave (17 seconds for mine). Blot if you don’t want the grease. Transfer them to the pizza and finish cooking.
I originally microwaved the Pepperoni for the 30 seconds that several articles recommended. The Pepperonis were badly overcooked, just from the microwaving. You want them partially cooked and for them to finish cooking in the oven. You will need to experiment to find the right settings.
Note: When my pizza wheel died, I was cutting pizzas with a 6-inch chef’s knife, you know, tip horizontal, press down, and rock the blade. I wanted an 8-inch chef’s knife, cheaply and quickly. I checked my favorite cheap utensil place, Tuesday Morning, and they had a “Todd English Super Titan Titanium Ceramic Eight Inch Chef’s Knife” for $6.99. Funny but it is light, cleans easily, and is incredibly sharp. I wasn’t expecting that. And, I got to choose a blue handle!
Note: I had an OXO Good Grips pizza wheel that I liked. Unfortunately, the axle snapped and pieces of black plastic fell onto pizza. It is hard to tell chopped black plastic from chopped black olives. I bought a “Dexter Russell P177A-PCP Sani-Safe White Handle 4" Pizza Cutter” based on it being “professional” grade with a steel axle and stellar ratings. It is all that but ergonomically, I don’t care for it. I don’t get complete cut through with every roll that I got with the OXO. I suspect that it is the 4-inch wheel versus a 3-inch (2-3/4”) wheel.
Pepperoni *****Added 2016-05-03*****
Step 5: Pizza - Roll Out the Crust


1. Thaw the crust “puck”.
2. Roll out the crust “puck” on floured surface to just over 12 inches. I use a pizza mat; it is easier cleanup than using the counter and shows the diameter. Don’t be skimpy with the flour on both sides of the crust; it keeps the crust from sticking to the mat or rolling pin.
Note: You will need to experiment with what works best for you when rolling out the crust. I start by pressing out the puck by hand to about 9-inches, flipping it several time to flour both sides. Then I roll it outward to stretch it to 12-inches.
3. Dock (poke holes) the crust to help keep it from getting bubbles. The dough docker is the cylinder with the rods sticking out. You don’t need an expensive one; I bought a “professional” model and it will last several lifetimes. You can also use a fork.
4. Put the crust on a perforated pizza pan and place in a warm oven for 30-60 minutes to rise.
Breville – put the perforated pan with the crust into the oven on the middle rack. Set it to “Roast”, 450 degrees F, and 1 minute. Start the oven and watch the heating element. When the heating element just glows all of the way across, turn the oven off and let the crust rise.
Edit 2016-02-28 -----------------------------------------------------------------------------
Note: For pizza for one, cut the dough into six pieces, instead of three. Roll out to eight inch crusts.
--------------------------------------------------------------------------------------- End edit
Step 6: Pizza - Parbake the Crust

Preheat the oven to 450 degrees F and bake for 4-1/2 minutes. Remove the crust to a rack. Handle with heat resistant pads or glove.
If you get a bulge in the pizza, use a heat resistant pad or glove to press it down gently. The crust is still somewhat flexible but do it gently to keep from breaking the crust.
Breville – set to “Roast”, preheat to 450 degrees F, 4-1/2 minutes, middle rack and restart the oven after taking the crust out so the oven remains hot.
Step 7: Pizza - Assemble and Bake the Pizza


This is the money round.
1 parbaked crust
1 pack thawed pizza sauce
2 cups shredded mozzarella
1/2 can chopped black olives (4.25 ounce can)
6 marinated artichoke heart quarters
3 slices thawed Canadian bacon,
Shredded Parmesan cheese
1. “Cube” the stack of Canadian bacon with three equal cuts and three more equal cuts at 90 degrees.
2. Open the chopped olives can, drain, and scoop half the can into an airtight container for next time (refrigerate). I carefully press down on the lid and pour off the liquid. Remember, you used a can opener and edges are likely to be sharp.
4. Remove six marinated artichoke heart quarters and cut them in half.
5. “Paint” the parbaked crust with pizza sauce. If you see water in the pizza sauce when you open the container, blot it up with a paper towel before you use it because “Water is the enemy of crisp crusts”.
6. Cover the pizza with mozzarella.
7. Evenly distribute the chopped olives.
8. Evenly distribute the sliced marinated artichoke hearts.
9. Evenly distribute the cubed Canadian bacon.
10. Bake at 450 degrees F for 12 minutes. Keep an eye on the pizza in the last few minutes until you know how your oven cooks. You may also need to turn the pizza part way through for even browning.
11. Remove the pizza from the oven to a rack using heat resistant pads or glove. Allow the pizza to set for about 3-5 minutes. Move the pizza to a cutting board, cut and serve. Have shredded Parmesan on the table.
Breville – set to “Roast”, preheat to 450 degrees F, 12 minutes, and middle rack.
Note: Different brands of marinated artichoke heart quarters have different tastes. Private Selection from Kroger is my favorite with a "sweet" vinegary taste.The Del Allo brand on the other hand was saltier and garlicky.
Edit 2016-04-22 -----------------------------------------------------------------------------
What had been my favorite marinated artichoke hearts, Private Selection from Kroger, now rates a "Do not buy". They have significantly changed the product. This is not just batch to batch variability. The hearts are mushy and all you taste is garlic, for hours. They are going back to the store.
--------------------------------------------------------------------------------------- End edit

Participated in the
Meal Prep Contest


