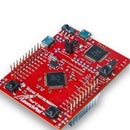
Introduction: Tiva C Projects: Seven Segment Display With Tiva C Launchpad
How to interface seven segment display with tiva C launchpad
Let`s do it
Step 1: Watch the Video
Step 2: Hardware Components
- Tiva C board
- Breadboard
- Jumpers
- Seven Segment Display
Step 3: Schematic of the Circuit
- Connect pin A on 7Seg with PB0 on Tiva C
- Connect pin B on 7Seg with PB1 on Tiva C
- Connect pin C on 7Seg with PB2 on Tiva C
- Connect pin D on 7Seg with PB3 on Tiva C
- Connect pin E on 7Seg with PB4 on Tiva C
- Connect pin F on 7Seg with PB5 on Tiva C
- Connect pin G on 7Seg with PB6 on Tiva C
- Connect common pin on 7 seg with 3.3 V on tiva C
Step 4: Seven Segment Display
There are two types of seven segment display:
- Common anode: you should connect the common pin with 3.3V
- Common cathode: you should connect the common pin with ground
In this project, we used a common anode seven segment display so the common pin should be connected with 3.3V and when we want to turn on a specific led we should let its pin as low
To turn on A LED, PB0 must be LOW (common anode 7 segment display)
To turn on B LED, PB1 must be LOW (common anode 7 segment display)
Note: If we use common cathode display, the corresponding pin should be HIGH to turn on the LED.
In the above table, there are the binary and hexadecimal formats for each digit in 7 seg
for example for digit 0 in 7 segment, we should turn on all LEDs on 7 Seg except G LED and DP LED
0 <- 11000000 -> 0xC0
and so on for all digits.


