

Introduction: Ultrasonic Sensor With Micropython Using BharatPi Board


In the world of electronics and robotics, Bharath Pi has emerged as a popular choice for hobbyists and enthusiasts. One of the key reasons for its widespread adoption is the ease of integration with various sensors. Among these, the ultrasonic sensor stands out for its versatility and applications in distance measurement, obstacle avoidance, robotics, and more.
In this blog, you’ll learn how to use the HC-SR04 Ultrasonic Sensor with the ESP32 to get the distance to an object using Micropython firmware. This tutorial covers how to wire the sensor to the ESP32 boards and provides a simple Micropython script to get the distance to an object and display it on an lcd display.
The HC-SR04 ultrasonic sensor uses sonar to determine the distance to an object. This sensor reads from 2cm to 400cm , which is good for most hobbyist projects. In addition, this particular module comes with ultrasonic transmitter and receiver modules.
Supplies


Required Components:
To complete this tutorial you need the following parts:
1. HC-SR04 Ultrasonic Sensor
2. ESP32
3. Jumper Wires
4. LCD Sensor
5. USB Cable
To follow this instruction you need an IDE to write and upload the code to your board, we are using uPyCraft IDE here. . You also need Micropython firmware installed in your ESP32 boards.
if you don't have the setup means then you can check the README file of installing and setup of uPyCraft in our Bharat Pi github page you can find the link below,
> https://github.com/Bharat-Pi/MicroPython/blob/main/README.md
Step 1: Technical Specifications
In this project, we are using Bharat Pi which has both ESP32 microcontroller and a SimCom A7672S 4G/LTE module. Bharat Pi is an IoT prototyping board for students, innovators, startups, and developers. A simplified board with an all-in-one compute, network and storage on a single board to build rapid prototypes.
How Does the HC-SR04 Ultrasonic Sensor Work
The ultrasonic sensor uses sonar to determine the distance to an object. The ultrasound transmitter (trig pin) emits a high-frequency sound (40 kHz). The sound travels through the air. If it finds an object, it bounces back to the module.The ultrasound receiver (echo pin) receives the reflected sound (echo).
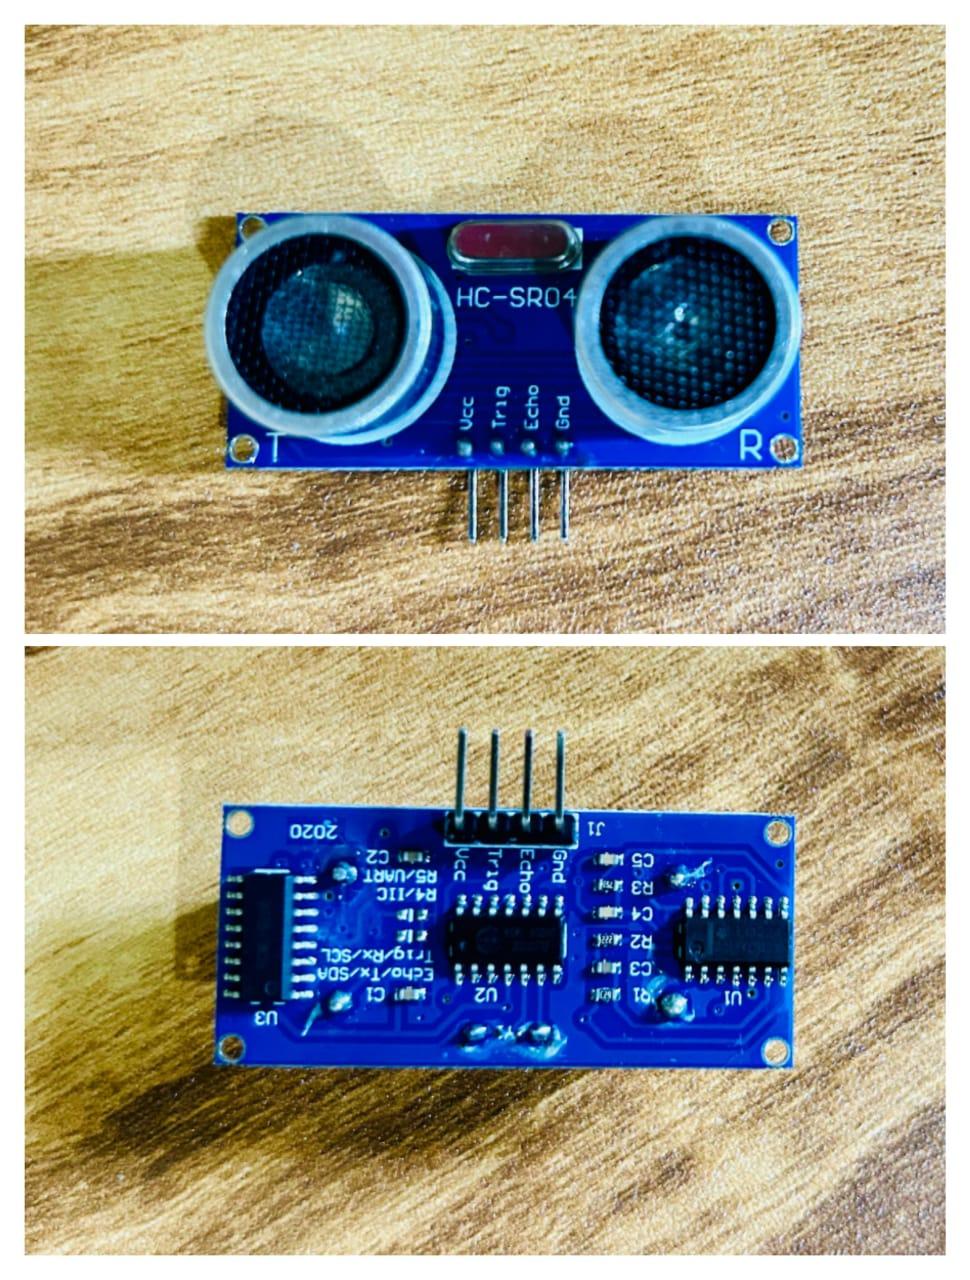
Here’s the pinout of the HC-SR04 Ultrasonic Sensor :
VCC
Trig
Echo
GND
HC-SR04 Ultrasonic Sensor Technical Data
The following table shows the key features of the HC-SR04 ultrasonic sensor. For more information, you should consult the sensor’s datasheet.
Power Supply − +5V DC
Quiescent Current − <2mA
Working Current − 15mA
Effectual Angle − <15°
Ranging Distance − 2cm – 400 cm/1″ – 13ft
Resolution − 0.3 cm
Measuring Angle − 30 degree
Step 2: Schematic – ESP32 With HC-SR04 Ultrasonic Sensor

HC-SR04 Ultrasonic Sensor Pinout
VCC - Power Supply
Trig - Trigger Input Pin
Echo - Echo Output Pin
GND - GND
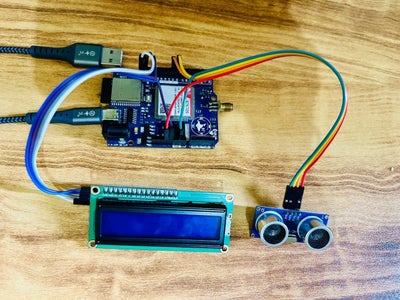
Wire the HC-SR04 ultrasonic sensor to the ESP32 as shown in the following schematic diagram. We’re connecting the Trig pin to GPIO 33 and the Echo pin to GPIO 32, but you can use any other suitable pins.
ESP32 Wiring With Ultrasonic Sensor
Ultrasonic Sensor ESP32
VCC - 5V / 3V
Trig - GPIO 33
Echo - GPIO 32
GND - GND
ESP32 Wiring With LCD Sensor
LCD Sensor ESP32
SDA and SCL - SDA and SCL OF ESP32
VCC - 5V
GND - GND
Step 3: HC-SR04 MicroPython Library
Upload HC-SR04 library with uPyCraft IDE
This section shows how to upload a library using uPyCraft IDE. there are multiple ways to get the distance to an object using the HC-SR04 and the ESP32/ESP8266 boards using MicroPython firmware. We’ll use this HC-SR04 MicroPython Library that makes it straightforward to interface the sensor and get measurements.
The library we’ll use isn’t part of the standard MicroPython library by default. So, you need to upload the following library to your ESP32/ESP8266 board and save it with the name (hcsr04.py).
Click on the given link for the HC-SR04 library on Bharat-Pi github page :
> https://github.com/Bharat-Pi/MicroPython/blob/main/Bharat_Pi_HCSR04_Ultrasonic_Sensor/hcsr04.py
First, make sure you have a connection between the IDE and your board. Go to Tools > Serial and select the COM port. Go to Tools > Board and select the esp32 board.
1. Create a new file by clicking the New File button.
2. Copy the HC-SR04 library code into that file.
3. After copying the code, save this new file as hcsr04.py by pressing the Save button.
5. Click the Download and Run button.
After this, the file should be on the device folder with the name hcsr04.py.Now, you can use the library functionalities in your code by importing the library in main code.
Upload lcd library with uPyCraft IDE :
You can find the lcd libraries on Bharat-Pi github page :
> https://github.com/Bharat-Pi/MicroPython/tree/main/Bharat_Pi_LCD_Display
Step 4: Code (HC-SR04 Ultrasonic Sensor)

After uploading the library to the ESP32 , copy the following code to the main.py. It simply prints the distance to the closest object.
CODE :
import machine
from hcsr04 import HCSR04
from machine import Pin, SoftI2C
from lcd_api import LcdApi
from lcd_i2c import I2cLcd
from time import sleep

I2C_ADDR = 0x27
totalRows = 2
totalColumns = 16

#initializing the I2C method for ESP32
i2c = SoftI2C(scl=Pin(22), sda=Pin(21), freq=10000)

#initializing the I2C method for ESP8266
#i2c = I2C(scl=Pin(5), sda=Pin(4), freq=10000)

lcd = I2cLcd(i2c, I2C_ADDR, totalRows, totalColumns)


# ESP32
sensor = HCSR04(trigger_pin=33, echo_pin=32, echo_timeout_us=10000)

while True:

    distance = sensor.distance_cm()
    print("Distance: ", distance, "cm")
    sleep(3)
    lcd.putstr("Distance:")
    lcd.putstr(str(distance))
    lcd.putstr("cm")
    sleep(2)
    lcd.clear()
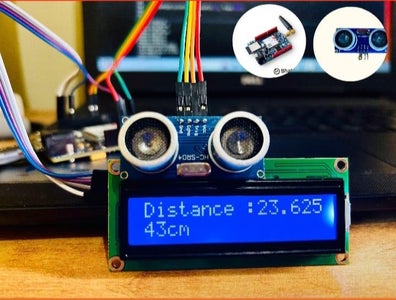
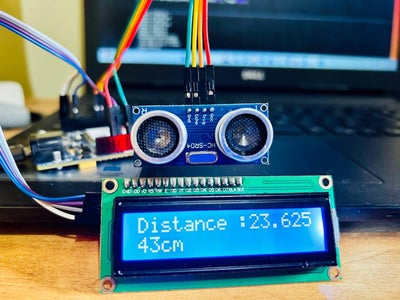
Step 5: Demonstration
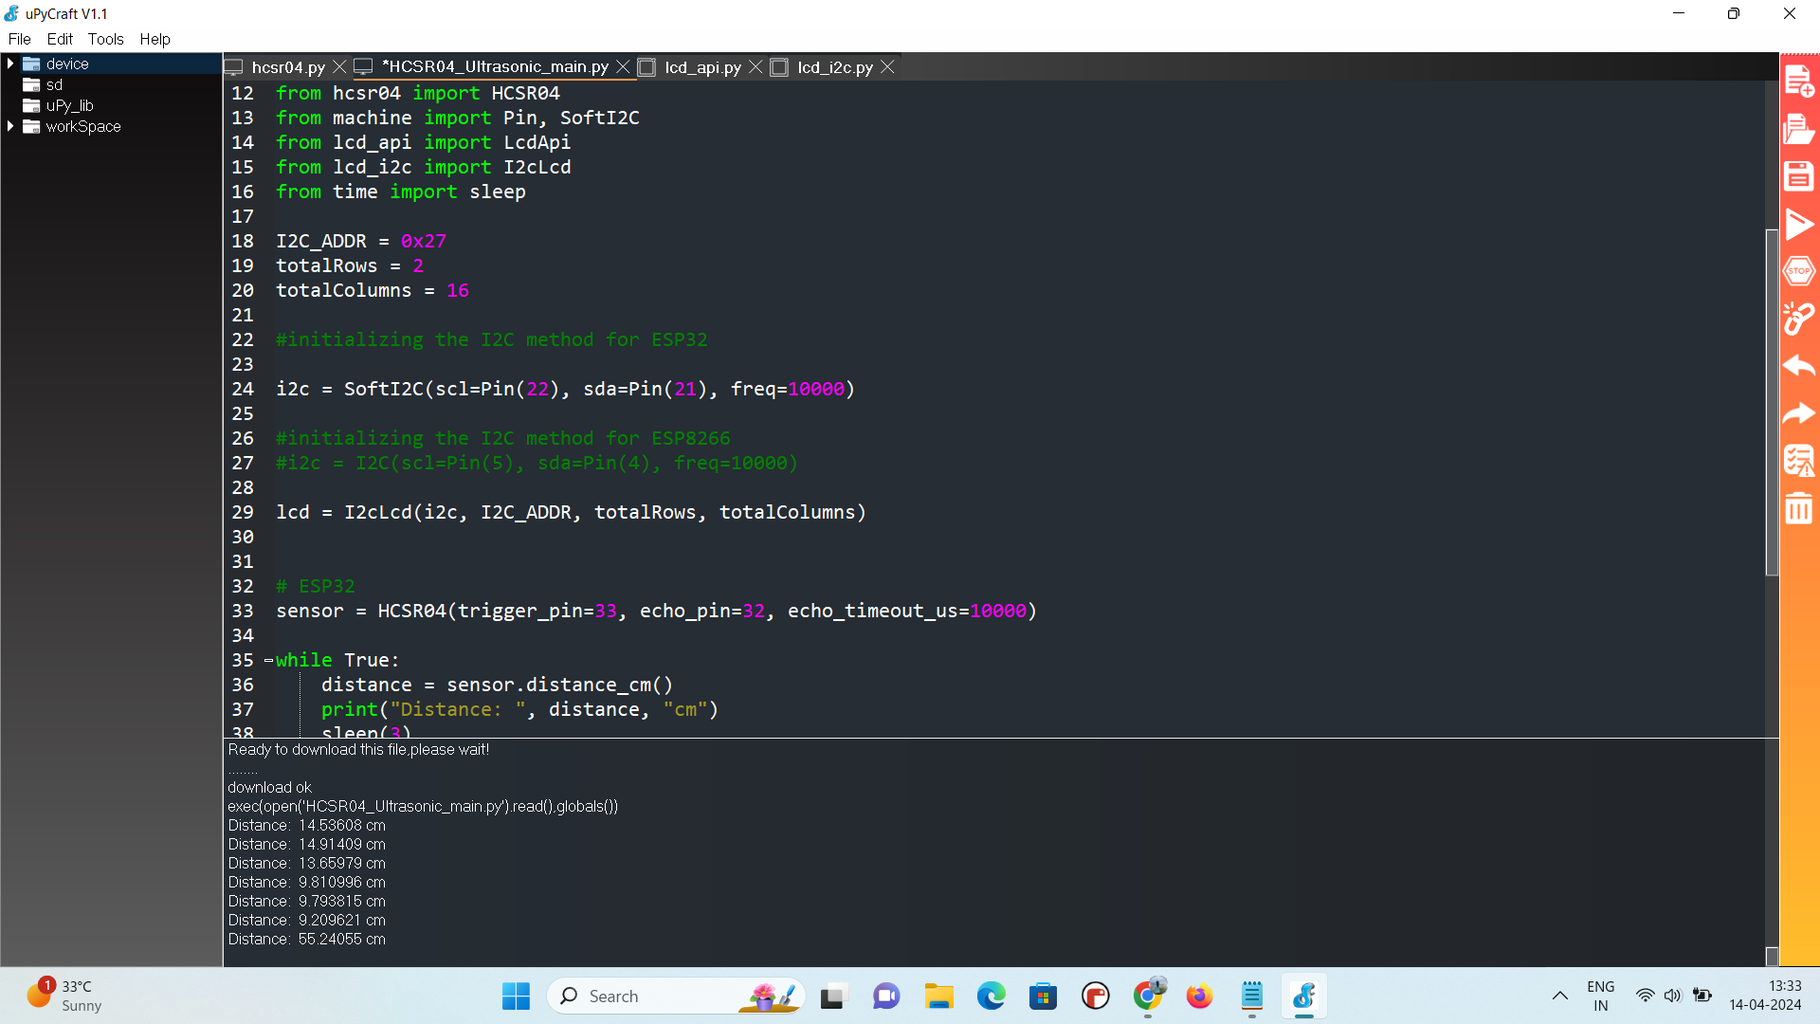

After uploading the code to your board, press the reset button to run the code. The distance to the closest object should be printed on the console.
If your are not able to see the values in lcd means may be i.e due to lcd display setting you can check the lcd blog trouble shooting part at the end of the blog.
Click on the below link for the blog :
> https://www.instructables.com/LCD-Sensor-With-Micropython-Using-Bharart-Pi-Board/


![Tim's Mechanical Spider Leg [LU9685-20CU]](https://content.instructables.com/FFB/5R4I/LVKZ6G6R/FFB5R4ILVKZ6G6R.png?auto=webp&crop=1.2%3A1&frame=1&width=306)


