Introduction: Unbalanced Vase
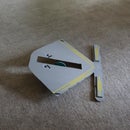
This unbalanced vase (weight inserted in the base) is a 3d print of a freeform drawing.
The 3d printing and design files are available at:
http://www.thingiverse.com/thing:24280
The 3d printing and design files are available at:
http://www.thingiverse.com/thing:24280
Step 1:
I drew a 100mm by 125mm box on a sheet of paper (within the buildable limits of my MakerBot Replicator) and drew a vase. I marked dots at points that would sort of define the curves. I measured the x,y coordinates of each dot (lower left corner is 0,0--upper right is 100,125).
Step 2:
In Autodesk 123d I created a "box," 100mm by 125mm by 36mm high. Then I used the "spline" tool to input my points on the upper curve.
Step 3:
Using the "extrude" tool, I selected the upper left area and "cut" (-36mm) from the box.
Step 4:
Using the "spline" tool and my coordinates, I drew the bottom curve and "extrude, cut" the lower part of the box. What you see in the image is the "top view" of the box.
Step 5:
I changed the view (tool in upper right corner) so that I could see the bottom of the vase. Then I selected the "circle" tool and made a circle in the center of the bottom of the vase. I "extrude, cut" 15mm (enough for 9 quarters). I would suggest going to 20mm for more quarters and a better weight balance.
I changed the view to the top of the vase and made a small hole for the flower.
I changed the view to the top of the vase and made a small hole for the flower.
Step 6:
Using the "fillet" tool, I selected sharp edges to be rounded.
Step 7:
I sent the file to the printer. This photo shows the inside of the vase and the "match" to the original drawing.
Step 8:
This is the finished vase--but it won't stand on its on--top heavy to the right.
Step 9:
Insert quarters in the base.
Step 10:
Now it will stand!
Step 11:
Add a few flowers and you're done.


