

Introduction: Vehicle Dog Barrier


We travel a lot and have three dogs. They always tend to make dangerous moves inside the cabin, so I needed to make something that keeps them away from me when I'm driving. Two of the 3 are so active, that they can get through anything smaller than 12 cm. They are not that small, I really dont know how they do it!
So when we adopted the black sisters last year, I needed to make something very quickly, so I used what I had: plastic water pipes welded together to create a frame, than zip-tied a thin grid sheet, that are supposed to keep rabits in their cage. Well, it did the job very poorly. The tubes are too soft, the grid is too weak, one could climb on top and jump to forward seats while the other could creep under my seat and messing around my legs and the pedals. Not good! Plus the whole stuff looks ugly, and really is a mess.
I saw a plenty of aftermarket options on internet, but none of the them looked like it were suitable to keep these cutie moles away from the driver.
So I decided to try more professional approach,and make a barrier that is following the shape of the interior, and lefts no way-throughs to the front part of the car.
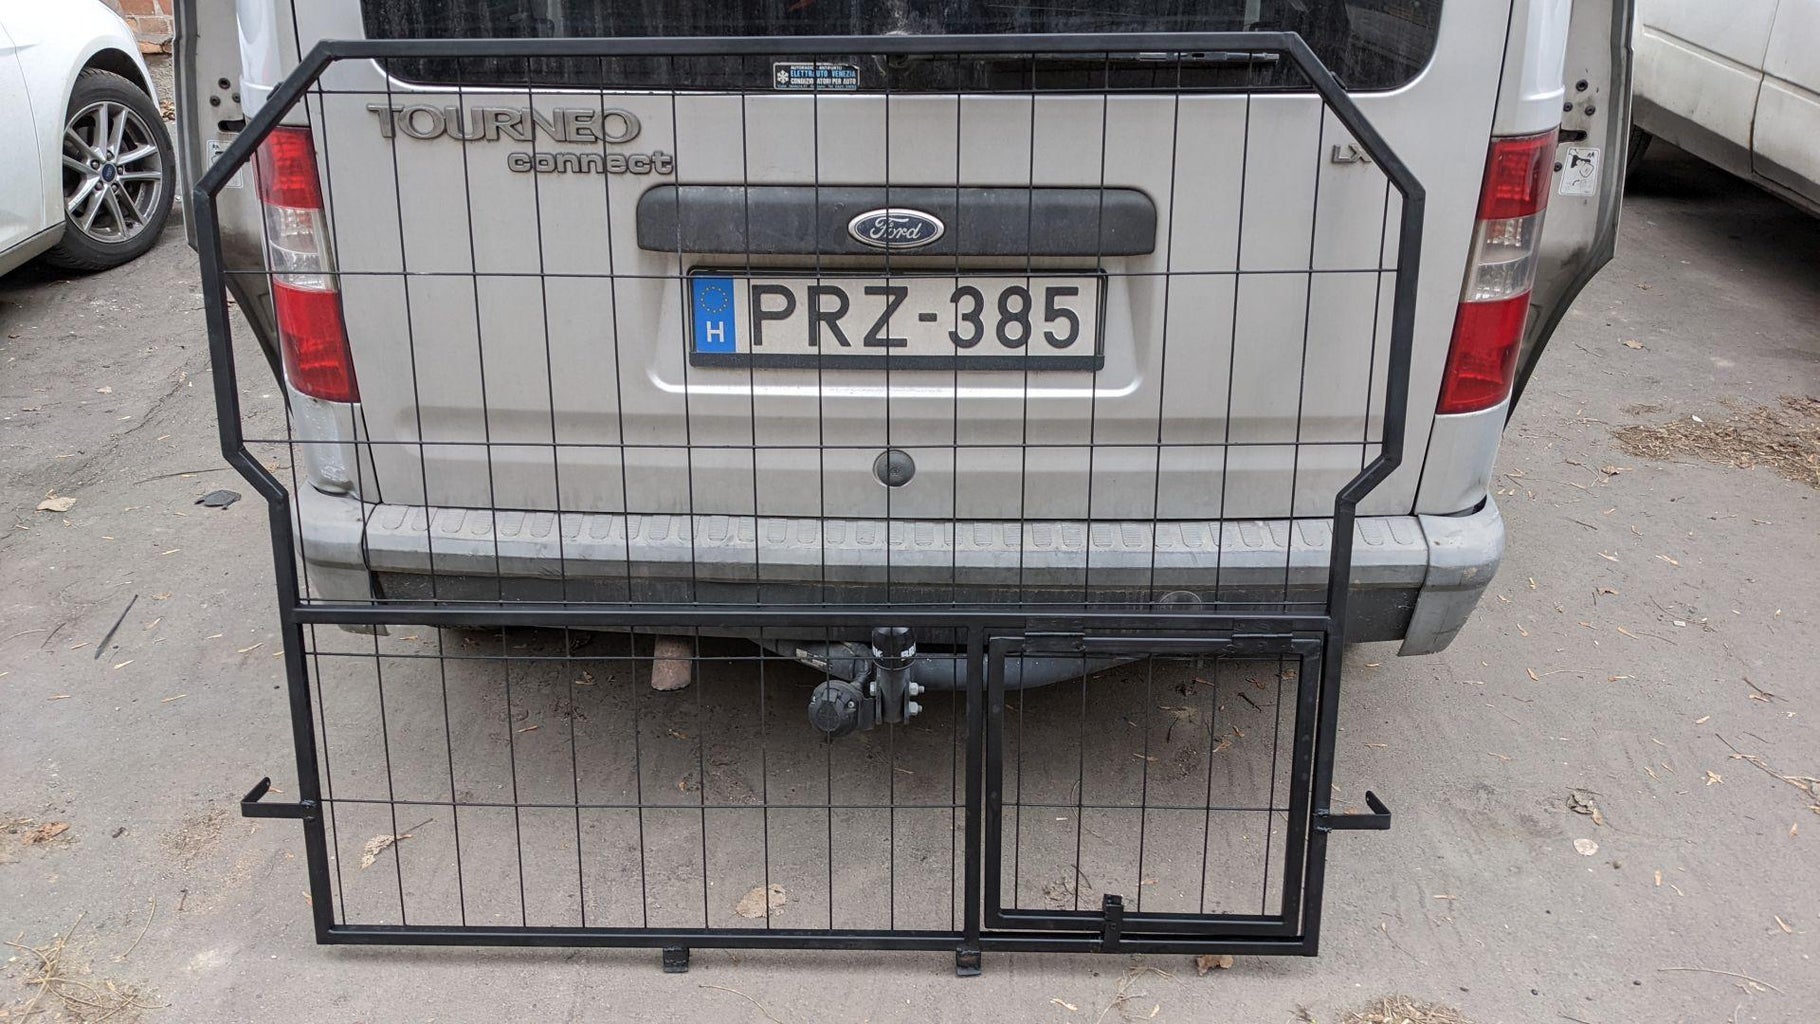
My car is a Ford Tourneo Connect 2003, I love it! Despite its nearly 20 years of age and its 330.000 km I still believe to have several more years in service so I thought it worths making this pimp.
As you see, this is like a mini-van, plenty of space inside.
Supplies
Welder (I use MIG), grinder, hammer, vice, clamps, drill, hinges for door, steel square tube for the frame, steel bar for the holders. A piece of steel net for covering the frame, bolt cutter to cut the steel net pieces quickly.
Step 1: Design


This is the most important step! I spent a whole day to find the correct location in the car, measure everything and create a design that will most probably work. And still made mistakes I needed to correct.
The idea is create the frame first that fits the car shape, then fill the frame with steel grid.
Just behind the sliding doors I found two M8 threaded hole down on the sides, I could use them as main supports. I decided to use the floor clips that are there for securing the rear seats if installed. The barrier must be removable, to be able to install the rear seats if necessary (once in every 3 years). So I will need to create holders on the side, to be mounted by the M8 bolts, and some kind of stands that fits over those small rods inside the floor clips. I attach photos about these. I also found holes for supporting the top part, but those are not threaded unfortunately, so I will need to use screws work like pins to support the construction. As the bottom legs and threaded M8 bolts will hold the frame quite hard, I only need those top supports for extra rigidity, mainly to stop a few millimeters back-and forth swing.
This design is made for a Ford Tourneo Connect 2003 SWB (1.8 TDCi, 90HP) model, but I beleive the same method works on any car, only the shape and dimensions are different. :)
The rear door of the car is opening upwards, so I needed to make a door on the barrier, in order to be able to put in/get out my puppies through the left side sliding door when necessary. Its a separate unit, so it can be left out completely from the barrier, the frame remains the same. The door must be big enough for them to walk in, but still small enough to be able to open it up completely, so I decided to make it 400x400 mm.
All dimensions here are outside dimensions, meaning from outer side to outer side of the square tubes. I use millimeters (mm) and centimeters (cm), for conversion to imperials: 1 inch = 2.54 cm = 25.4 mm
There are some cuts, and there are 45 degrees cuts. Unless you have access to an industrial level wet sawing machine, it's very hard to make those nice and straight, so I bought all steel from a company who made the cuts for me. It speeds up the job a real lot!
I did the whole job in 3 hard days. :)
Attachments

Step 2: Creating the Frame


As I bought "ready-made" pieces, I just needed to do the welding. Its important to check all 3 directions multiple times after each welding and correct it instantly, otherwise it will be impossible to correct later, if the whole structure is out of shape. I learnt this the hard way, I made the door first, because the position of the middle horizontal cross bar was depending on the door slot size. I made that perfectly in size and I got 4 right angles. However later I noticed, that the door frame is twisted like 5mm. For now I just left it as is, it doesnt look bad with bare eyes. :)
First I welded the 4 long pieces to make right sized and shaped frame base, then attached the top bars with those tricky 45 degree cut ends.
Please forgive me, my welding skills are only at a hobby level, so my seams are ugly, but I know they are strong. You don't need perfect seams, it will last, there are no true forces here. :) I used the grinder to smoothen out the welding seams, and make the connected pieces more or less...well...seamless :)
Step 3: Creating the Holders


Installed the frame temporary in its place to measure the sizes and mark their places on the frame.
For the side supports, that will be held in place by the M8 bolts, it's important to measure very precisely. If they are shorter or longer by just a few millimeters, than the frame might either tilt forward or backward significantly, or simply just doesn't fit into its place, as it happened to me first. :) I needed to cut out and re-weld both side supports 2mm inwards. The best is to hammer the steel bar to right angle first, and only after doing the cuts and drilling the hole, because it's hard to predict the curve along the right angle of the bar. I also drilled holes for M6 bolts as I forgot that they should be M8, so I needed to widen those later.
For the stands ("legs") I cut a piece of 8mm gasoline tube to protect the clip rods and avoid metal rattling noises and measured the height with those installed. Don't forget to add the floor grooves for the height, you want the full load on the clip rods and not on the plastic floor cover, not even partly. I needed 30 mm height "legs" so I cut a small piece of square tube, and another cut half along its long side diagonally. Then welded together, and its done. :)
With these legs the whole structure will be more or less fully fixed by its own weight, because this shape snaps tight on the floor clip rods they dont allow any movement.
The floor and side supports hold the whole barrier firmly enough but I added some support also for top part, just to eliminate even the slightest movements that can occur potentially in sudden/hard vehicle maneuver. As I only had threadless holes around the top area, I needed to use 60mm long M6 bolts secured with a nut on the frame holder, so that the free end of the bolt acts like a pin in the threadless hole. The supports here were a little tricky, as they are connected to a 45 degrees piece of the frame, so the support bar needed to be twisted 45 degrees too.
Step 4: Intalling the Steel Net


Pretty straightforward, just layed the fence element on the frame and cut all parts like they reach around the middle of the square tube, then go through all connection points with the welder.
Step 5: (Optional) Installing Door and Lock


Layed down the frame and placed the door into its frame, then positioned and welded on the hinges. Maybe it would have been better to install the hinges with bolts, by cutting threads into the frames, but I wanted to save time so I made it permanent right away. :) I made a simple lock for the door from 3 pieces of the steel bar, please see the pictures. A thin sheet of rubber (like a piece of inner tube for bicycle tire.) should be placed around the lock part, to prevent metal rattling and make it completely silent. If I weren't be so exhausted, I would think first and let the lock be like 10mm longer, so that when the door is upened up completely, the lock can reach the next steel net stick and lock itself in opened position. Maybe later I will make a little longer one.
Step 6: The Finish


A sprayed the whole structure with a self-priming black spray. It will make it look very nice and also covers a lot of the mistakes. :) I layed down insulation sheets on the floor of the back part for puppies safe and comfort.
Now the barrier is ready, safe, effective, nice and fully quiet. If I'd needed to do it again, I would make them 50mm shorter in height, by using 25cm vertical square tubes instead of those 30cm ones that are on the side at the upper part of the frame. That way some corners wouldn't be that close to the car frame like they are now. There's about 2 mm-s at its closest point, however it's luckily lays just on the rubber frame of the window, it's just perfect for me now as it is. :)
Thanks you for reading I really hope you enjoyed!


