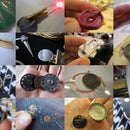
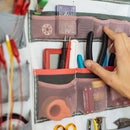
Introduction: Vibrating Crochet Hook
This vibrating crochet hook can be used to measure the resistance of a crochet stretch sensor while it is being made. Continuity and resistance can be measured while the sensor is being crocheted. The vibration motor is powered by a 3V coin cell battery. The less resistance, the stronger the crochet needle will vibrate.
Step 1: Materials and Tools
Materials
- metal crochet hook
- vibration motor
- coin cell battery holder
- 3V coin cell battery
- wire
- alligator clip
- shapelock/polymorph/friendly plastic
- the vibrating crochet hook that you can build from the above materials, is great for crocheting with the resistive and stretch sensitive conductive yarn from Plug and Wear!
Tools
- pliers
- soldering iron
- wire clippers
- hot water boiler
Step 2: Dismantle the Crochet Hook
Depending on the type of crochet hook you have you'll either be able to simply pull the hook out of the handle or you might have to saw or clip it off.
See photos for reference.
See photos for reference.
Step 3: Solder the Parts Together
Once you've successfully extracted your metal crochet hook you can start to assemble the circuit.
Strip some wire and wrap it around the far end of your crochet hook, as shown in the photos. Wrap the wire tightly and solder it to itself to keep it in place. Now solder one of the leads from your vibration motor to the wire wrapped around your crochet hook.
Solder the other lead from your vibration motor to one of the leads of your coin cell holder. because the vibration motor doesn't have polarity, it does not matter if you connect to plus or minus.
Finally, take the alligator clip connector and cut off one end, leaving the cable as long as possible. Strip the tip of the cable and solder it to the remaining battery holder lead. You should now have a circuit that resembles that shown in the picture.
Step 4: Test for Vibration
Before proceeding you should test your circuit to make sure it works. Insert the battery and now when you touch the alligator clip to the tip of your crochet hook you should feel it vibrate strongly. If it does not vibrate, take a knife and scrape at the tip of your hook, as it may well be coated in an isolating layer. Try again. If it still does not vibrate, check that the battery has enough power to drive the vibration motor.
Step 5: Shape the Shapelock
Boil some water and add a handful of shapelcok pellets to it. Stir and wait for them to become transparent and stick together, forming a clump. Remove the clump and shake off excess hot water. Kneed the shapelock together and then mould it around your circuit. Starting at the hook, shaping it around the battery holder and ending at the alligator clip cable. See photos for how the final design should look.
Step 6: Crochet a Stretch Sensor
The vibrating crochet hook is the perfect tool for crocheting stretch sensors from conductive yarn (Nm10/3 from Plug and Wear) because it gives you a feeling for how sensitive your sensor is and what range it has. Basically you can crochet as you normally would, with the alligator clip connected to the beginning end of your yarn. Your hook will vibrate depending on how much resistance there is between the alligator connection and the tip of your hook. When you pull at your hook, stretching your crochet, you will lower the resistance of the yarn, resulting in stronger vibrations of the motor.

Participated in the
4th Epilog Challenge


