Introduction: Video Drummer
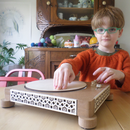
The video drummer is an instrument that allows you to play with a video/audio fragment. I use it to play with content downloaded from youtube. Behind the scenes is a music data sheet (json) generated by music analysis software that handles the timing.
involves:
- arduino for capacitive sensing
- youtube dl for retrieving youtube content.
- ffmpeg for mp4 to mp3 conversion.
- amen / echonest for music data analysis
- web audio api for sound in a browser
- npm: serial and websocket
- javascipt/html/css for the webapp.
Step 1: The Box
The box is made out of cardboard (6mm). The design was done in sketchup. (files are in attachment)
Inside the container is space for an Arduino board and some wiring.
The design shows 12 buttons:
- 8 for going through the video/audio sections
- 2 for switching samples forward and backwards
- 2 for pitch up / pitch down.
Attachments
Step 2: Buttons
Each button is made of 6 pieces:
- three pieces of cardboard (see svg below)
- a metal mudguard washer
- a paper fastener
- a piece of wire
There is no soldering required with the paper fastener. However, I did solder the end of the wire to a pin header to simplify attaching/detaching to the Arduino.
Attachments
Step 3: Arduino
The instrument uses capacitive sensing on 12 pins. I can not use 0 -1 rx / tx because I need to send over serial. So:
- 8 digital pins (for the sample triggers - 2,3,4,5,6,7,8,9) and
- 4 analog pins (read as digital - 14,15,16,17) for controlling pitch and location.
Below is the arduino code. It's pretty straight forward. More information on capacitive can be found at the arduino playground. The manual unrolling of the loop is not really necessary, it seems to be sensitive enough.
Attachments
Step 4: Arduino to Browser
In order to establish communication between the arduino and a browser, you need to install some things. I followed Tom Igoe's post on setting up the communication. It involves installing node.js and a few extra libraries on top of that. (serial / websocket)
When done, you should be able to access your computer’s serial port and read data from it in a browser environment. Below is the server script you need to run (test.js).
To execute in node
- go to terminal and go to the folder containg test.js (window users can go to command prompt)
- type: node test.js /dev/tty.usbmodem1421 (where /dev/.. stands for the serial port you want to listen to)
- it should return: port open. Data rate: 9600. (see picture)
Step 5: Web App
The webapp is written in javascript and uses html and css. It also uses jquery, just because it's easier.
It's a bit hard to comment on code here but essentially it does these steps:
- it opens a websocket with 2 functions attached (openSocket and showData) enabling and handling communication with arduino)
- it set's up the AudioContext.
- it loads a song which means it loads an mp3 (loadTrack) and the according analysis stored in a json file (loadAnalysis) to push all 'bars' in a list.
- it then it waits for input from the triggers to either play a section of a bar (cuts the bar in 8 segments) or to change the bar to the next or previous one or to increase / decrease pitch.
- playing sound is done via some web audio api nodes: createBufferSource() to store the audiosamples + createGain() for volume control. Pitch can be changed by calling source.playbackRate.value
- if sound is played (remember: only a section of the bar) it also indicated the mp4 file to go forward (document.querySelector('video').currentTime = beat.start + cutter[key])
The code is below/ run it in a localhost (loading is async otherwise). I added a json file ( analysis for DJ Qbert Cosmic Assassins, the generated mp3 from ffmpeg and a random youtube video in this case: greatest moments: GW Bush). Note that the timing of the audio works on any video. :)
You can add html elements like a select with several options, I have a version with a lot more audio data sheets but I'm not sure if its a good thing to throw music videos on instructables. :)


