

Introduction: Walking in Someone Else's Shoes: a Micro:bit Coding Unit


The micro:bit is a fantastic educational tool due both to its affordability and versatility. This is a design thinking unit that could be implemented in 4th through 12th grade with varying levels of complexity. I hope that educators can plug and play this unit for both coding and design thinking. It’s an intro-level design thinking unit, but students would benefit from some prior block coding knowledge (I highly recommend this intro to coding curriculum with Makecode via Microsoft).
Students are tasked with designing a “Smart Shoe” that performs a function beyond standard footwear. This unit was implemented with a 6th-grade coding club, but could be expanded for any comp sci or design class.
The project is a true design project that incorporates design thinking, maker skills, and coding. Here is a rubric developed for the project. Please feel free to use or modify.
This tutorial will explain each step of the student design process and how I taught it to a sixth-grade coding club. The work these students did was both ungraded, but I’ll share resources that would be used if we implemented it as a graded, whole-class project. It will also highlight the club’s project, but each step (no pun intended) could work with any similar design.
Our coding club has eight students, which worked for this project. In a full class, I would aim to put students into groups of four or five and, ideally, have them grouped by similarities with their interests once they defined the problem they wanted to solve.
Supplies
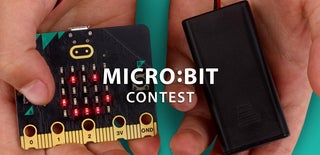
- Micro:bit - our students used the micro:bit V2, but that’s not necessary for implementing the project.
- Pair of shoes-these can be old or new. I brought in a pair of my old shoes, but it would be possible to get a cheap pair from Goodwill or have students bring in an old pair of their own.
- Shoe working tools-My students had access to our Makerspace with cutters, utility knives, masking tape, and velcro strips. Realistically any way you can adhere a micro:bit to shoes would work.
- Computer, tablet, or Chromebook that can pair with micro:bit. We used Makecode as our coding platform.
Step 1: Empathize
Students are challenged to think about their shoes. Specifically, what are some things that make their shoes good for them. I show them a YouTube video about the shoe design process.
They are then asked to think about the target audience of shoe design. Students quickly realize that the design process for general goods are inherently exclusive to the average customer. Students are then challenged to design a shoe for a person who may not be fully part of the target audience. They need to go through similar processes that Nike does when designing running shoes to create a more equitable product for a smaller group of people. This video is shown to get them thinking in this direction.
Step 2: Define
Students are asked to think about different groups of people that don’t have shoes designed for them. I challenge students to try to make as large of a list of possibilities as they can. Elementary and middle school students tend to come up with one problem and then fixate on it versus finding a variety of potential solutions.
Our Coding Club decided to focus on creating assistive footwear for people who are visually impaired.
Step 3: Ideate


In this step students brainstorm ideas for the problem they identified. Much like with the definition stage, students are again challenged to come up with as many different solutions as possible.
These students decided to create a shoe with a built-in pedometer with an audio component. They thought about tools like Fitbits that are essential in their own lives, but may not be accessible for people who can’t look at their watch. By adding a micro:bit, they believed they could add an audio component to a standard pedometer to make the design more inclusive for only the cost of a microprocessor.
Step 4: Prototype (Shoe Design)

The prototyping for this project is especially challenging since there is both a coding component and a shoe design element (figuring out how the micro:bit will be able to attach to the shoe). There’s a bit of a chicken-or-the-egg situation. Depending on the project, it can make more sense to do one or the other first.
For prototyping some questions I ask students to consider:
- How will the location of the micro:bit on your shoe impact what you will code?
- How can you be sure that movement won’t damage the shoe or the micro:bit?
- How can you test different shoe designs without permanently modifying the shoe?
This group wanted to have a traditional pedometer that read numbers of steps on top of the shoe with sound made after every X number of steps. This limited the amount of possibilities for micro:bit locations to spots that were visible on the foot. They used masking tape to test several different locations before permanently attaching the microbit to the shoe with velcro and a place where a foot bend wouldn’t damage the shoe or micro:bit.
Step 5: Prototype (Create the Code)

Coding the actual shoe is a challenge, and the way it’s introduced will depend heavily on the coding experience of students in the class. My students had some prior coding experience, so they were able to have minimal introduction to this phase of the activity. With no prior knowledge, I think a mini-lesson on the coding platform, programming basics, and if-then statements would be necessary.
Some coding questions I ask students to consider:
- What do you want your code to do?
- What does each line of your code do?
- What are some situations where your code wouldn’t work? Is there anything you can do to correct that?
The code my students created can be found here. They used variables to make each step a number. Past five steps, a melody would play to let the wearer know they had crossed a threshold. They kept the threshold of steps low to better allow for rapid testing of their prototype.
Step 6: Test the Prototype

The final stage of this project is the test. Shoes are incredibly easy to test and document. I had my students record “foot”-age of their initial test so they could either see success or see where their prototype failed. If something goes wrong, students will determine where the failure occurred, and go back to either the code modification or shoe design and fix the error (that’s why it’s so important the students don’t permanently alter the shoe prior to a successful prototype test).
My students recorded their attempt in our classroom. You can watch the result of that in the video here.
Step 7: Next Steps
At this point, the project can wrap up or there are some different directions you can go. My students refined their prototype by making the micro:bit a semi-permanent attachment with velcro. The students are also going to refine their code to be a larger number of steps before the melody plays, and attempt to have the melody change so that the user can track their total number of steps only with sound.
Runner Up in the
Micro:bit Contest


