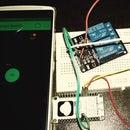
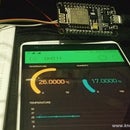
Introduction: WiFi Controlled LED Strip With BLYNK
Today we are going to create a mood light(LED strip) controlled by BLYNK app.
Overview:
BLYNK app will send message to your NodeMCU over Wifi, these signals will be translated by NodeMCU and LED strip will change color as received in the message.
Step 1: Things We Need:
Hardware:
- SMD 5050 RGB Led Strip
- Jumper Wires
- 3 TIP 120/122 NPN transistors: Buying these from local shops would be a better option
- 12V & 3.3V Supply
- BreadBoard
Software:
- Arduino IDE
- BLYNK App
Step 2: Circuit and Connections:
- D5 pin is connected to TIP 120 NPN(U1) transistor's Base pin.
- D6 pin to Base pin of U2.
- D7 pin to Base pin of U3.
- U1, U2 and U3's Collector pins are connected to respective LED color pin.
- U1, U2 and U3's Emitter pins are grounded. Grounded, That's sad!
- NodeMCU is connected to 3.3 Volt power supply.
- LED strip's power PIN is connected to 12V supply.
Now, we are done with the circuit of our Mood Light!
Step 3: BLYNK App Setup on Phone
- Create a New Project in BLYNK app.
- Write Project Name and Select ESP8266 or NodeMCU from dropdown.
- An AUTH token will be sent to your registered email, note this down.
- Tap on the screen and add a ZERGBA WIDGET on screen.
- Tap on the Widget and select Digital PIN 5 for RED, D6 for GREEN and D7 for GREEN, rest unchanged.
Note: This will change colors only over WIFI not over internet.
Step 4: Code
Working with BLYNK is so simple that we only need to add our AUTH ID(noted above), Wifi SSID and Password in the code and upload it to NodeMCU using Arduino IDE. In the code, we do not need to setup our pins this is already done by BLYNK in their library.
Find Code here: NodeMCU simple BLYNK example
Note: Modify Debug console Baud Rate to 115200 for NodeMCU.
If you do not have BLYNKEsp8266 library, download the BLYNKEsp library from Sketch menu --> Include Library -->Manage Libraries. Search for the BLYNK and install it.
Step 5: Upload the Code to NodeMCU and Play
Upload the code to your NodeMCU or ESP8266 and device will be displayed online on your BLYNK app.
Click Play button on top right of your app and start changing colors of your light. Oh yeah!
Your precious comments and suggestions are always welcome, feel free. Till then, Happy IOTing.
Follow KnowShipp.com for more articles like this.

Participated in the
Microcontroller Contest 2017


