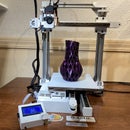
Introduction: Wiring 3D Printer RAMPS 1.4
I've had some requests about how to wire a 3D Printer and more specifically, how I wired my Laminated Prusa I3 printer.
In this instructable I will walk through all the components and steps required to setup a 3D Printer using the most commonly used RAMPS 1.4 controller board.
Please note that although most components on the 3D printer run 12Volts and less. You do need to connect your power brick to 110 Volts. BE CAREFULL, YOU ARE DEALING WITH LIVE POWER.
Also some of the Parts of a printer can get very hot (specifically the Extruder Hot-end and Heated Bed).
There are many other boards on the market and I've personally had good luck with the KFB2.0 board with acts almost identical to the RAMPS 1.4 but uses slightly different connectors.
All parts mentioned in this instructable are sourced from Amazon.com. If you are patient, you could order them from AliExpress.com and pay a lot less (sometimes less than half).
Step 1: Parts Required
In the Laminated Prusa I3 printer the only electronic parts I added were the Nema 17 Stepper motors and the MK8 Extruder.
The Type of extruder you purchase is up to you. You can choose from Direct Extrusion (motor on the Extruder) or a Bowden type of extrusion (motor feeds filamant through a tube to Hot-end) but it won't make a difference in hooking them up.
For this setup I purchased a RAMP 1.4 Kit which has all components needed to setup the controller board
RAMPS 1.4 kit $38.99 http://amzn.to/2E3gvYc
Nema 17 1.7A (5 pack) http://amzn.to/2Fyzy9I
Mk8 Extruder $36.99 http://amzn.to/2Gzd4H6
For end stop control you can go with two options (I will discuss wiring for both):
The fully wired Limit switch (with cables): $7.98 http://amzn.to/2DSkvHS
The simple Micro Switch: $8.99 http://amzn.to/2Ev4YPi
Stepper Cables: $9.49 http://amzn.to/2GAPdXo (these are specific to RAMPS)
12V/30Amp Power supply 19.98: http://amzn.to/2FwxIGt
Power Cable $9.99 http://amzn.to/2DYZ0Zd
Heated Bed $31.99 (optional but will describe wiring) http://amzn.to/2GEibpk
it was pointed out, some of the pictures show wires directly screwed into components. It best to use fork connectors and ferrules for better connectivity:
Ferules kit (comes with proper crimping tool): Amazon $25.89 https://amzn.to/2Jy3oSB
Fork terminals: Amazon $6.69 https://amzn.to/2JqRcmi
Step 2: Assembling the RAMPS 1.4
The RAMPS 1.4 kit comes with the following components:
Arduino Board Mega 2560 (generally a cheap knockoff) which is the blue board you see above
RAMPS 1.4 Shield which will sit on top of the Arduino which is the red board above (yes the yellow fuses come bent like that don't worry)
Jumpers (the little black thingies above)
A4988 Stepper Drivers with heat sinks
an LCD with cables, which nowadays tends to be the bigger 12864 Graphic Smart Display Controller
a USB cable, that is never long enough to reach your computer (be prepared)
Assembly is as follows:
The Shield should fit right on top of the Arduino board. The USB port on the Arduino should be on the same side as the Green power connector on the Shield. Make sure that all the pins from the bottom of the shield line up with the connectors on the Arduino. Push both boards snuggly together (this may sting a little)
Step 3: Add Stepper Drivers
Before adding the Stepper Drivers you need to decide what type of micro stepping is needed by the 3D Printer. I'm not going explain what exactly it means (there is plenty of articles on that). in general, when you buy a 1.8 deg. step angle (200 steps/revolution), the micro stepping becomes a multiplier. What's important is that for the RAMPS 1.4 most precise stepping is 1/16th micro stepping (16 x 200 = 3200 steps/rotation).
In order to instruct the hardware to use 1/16th micro stepping, jumpers are added between the banks in which the stepper drivers will fit. For 1/16th stepping you need to add three jumpers under each driver. Make sure they are on straight, it's easy to plunge one of these past the actual pin.
At this point you can insert the Stepper drivers (assume adding all 5 X, Y, Z Extruder 1 and potentially Extruder 2)
VERY IMPORTANT!! Note how the drivers A4988 Stepper drivers above have a little potentiometer on top (this little phillips screw). When inserting your stepper Driver MAKE SURE THE POTENTIOMETER POINTS AWAY FROM THE BOARDS POWER END (GREEN CONNECTOR).
If you use other drivers like the DRV88 or the TMC2xxx they will be different. fellow instructable memberreschchrissi added a useful image in the comments (Thank you!).
If you are still unsure: Find a labeled pin on one or more corners of the stepper driver board (DIR, GND, ENABLE, VMOT) and match it up to the RAMPS pinouts.
I hate to say this but, sometimes you'll find that the bays for these stepper drivers are too close, or the edges of your stepper driver are a bit too wide. In the image above you can see a gap between the top two drivers, whereas the bottom ones barely fit. It might make for a very tight fit and in cases where it doesn't fit, you may have to file some of the edges from the stepper driver.
Once the drivers are in you can remove the 3M stickers from the heat sinks and place them on top of the chip on each driver.
Step 4: Adding the LCD
The LCD part of the kit consists of 4 components
- The LCD itself
- 2 flat cables
- LCD Smart Adapter that connects to the Shield
The Adapter will fit on top of the the RAMPS 1.4 Shield as seen in the images above.
It's a bit hard to see on the smart Adapter I have here, but but you can kind of make out that the left connector (10 pins) says EXP2 and the right connector says EXP1. These correspond with the EXP1 and EXP2 connectors on the LCD board
Step 5: Adding Power Source
As you can see in the image above (from
http://reprap.org/mediawiki/images/6/6d/Rampswire1...)
power comes in on two tracks into the Ramps 1.4 shield. One track is 12V 5A which powers the board and motors, the second track is 12V 11A which powers the heated elements like the extruder and heated bed.
Connect the wires as seen in the images. Be careful, as you can see, the 110V live wire is exposed. Unplug your power source prior to lifting the lid accessing the screws.
Since we're dealing with potentially 20Amp here, make sure you use a strong enough wire gauge. I believe 14 to 16 will do.
Also, note that when you plug in the RAMPS 1.4 with a USB cable to your computer the LCD will come one and you can program the Arduino that way. There is no power to run any motors or heating elements though. For that, you do need the external power source.
Earlier image here showed wires plugged in without ferrules and the power strip remains somewhat exposed without further action. One of the first thing I recommend you print is the power unit cover from thingiverse: https://www.thingiverse.com/thing:3347689 that I've used in one form or another on several of my other designs. it covers up (and fuses) all mains wires and allows for on/off state which currently is missing from this printer.
Assembly of this power unit can be found in step 14 of https://www.instructables.com/id/3D-Printer-the-C3...
Step 6: Connecting the Stepper Motors
A 3D printer will use stepper motors for the following functions:
- X motion (left/right)
- Y motion (front/back)
- Z motion (up/down) (common to have two stepper motors)
- Extruder 1
- Possibly Extruder 2
Remember in a previous step we added 5 stepper drivers. Technically we only need 4 as most printers do not have a second extruder (one can always plan, although dual extruders are fraught with issues).
Stepper motors come in many varieties and with different power specifications. The printer built in the previous instructable uses Nema 17 0.4Amp Stepper motors. These aren't the strongest steppers but they do just fine. My CoreXY printer that can handle more speed/torque runs 2.0Amp stepper motors.
When I purchase Steppers motors I do tend to buy the ones that have a cable plug in them. That way I don't have to deal with crimping wires myself.
Generally the Nema 17 Stepper motors and associated cables are configured correctly, so when you plug them in, they'll run at first try. If your stepper motor is making funky jumps or just shakes, it generally means the wires from the motor don't line up with the 2B 2A 1A 1B pins on the board.
If that happens you'll need to closely look at the data sheet that generally is shown when you purchase the steppers (or it will say something like Black(A+), Green(A-), Red(B+), Blue(B-)). Granted when the wires don't line up it can be a bit of a puzzle trying to figure out the proper combination.
In the video embedded here you can see how an off the shelf stepper and off the shelf cable properly operate the Nema 17. (btw, don't disconnect wires like I do in the video, I have plenty of spares in case it goes wrong).
If you're building a Prusa/RepRap type printer, you'll employ 2 stepper motors for the Z-Axis. The RAMPS 1.4 shield has accounted for this and offers two rows of connection pins for the Z-Axis.
Step 7: Connecting End Stops
Nowadays you can buy really fancy stepper drivers that feel resistance. Along with Marlin software changes you can do without end stops. In most printers though, you'll need end stops to make sure your X/Y and Z axis don't run off the rail (or worse; tear something of your printer apart).
The RAMPS 1.4 comes with 6 end stop connections (X Min, X Max, Y Min, Y Max, Z Min, Z Max). Rarely do you use all six. What you're really interested in is either the Max or Min. If you know one, you can limit movement based on it's location (0) via the software (if I can detect Min and know my bed is only 200mm wide then I can tell the software to not move beyond min+200)
The most common types of end stops are mechanical swithes, optical switches and proximity sensors. Proximity Sensors tend to only be used for the Z-Axis in conjunction with Auto Bed Leveling. I won't cover inductive sensor wiring here but if you're interested, I did write something on the wiring in this article Proximity-Sensor-Detection LJ12A3-4-Z-BX vs LJ12A3-4-Z/BY wiring
I've never used Optical sensors before but it is my understanding it's wiring is identical to that of the mechanical switches.
Step 8: Connecting End Stops: Makerbot Design End Stops
If you are using the most commonly used end stops "Makerbot Designed Mechanical Endstop Kit", it comes with little circuit board and wiring. It will light up an LED when triggered.
There are 3 wires coming from the end stop: RED/BLACK/GREEN IMPORTANT: make sure the wires correspond with the image above. If you turn around the connector on the RAMPS board and accidentally put the RED wire on the Signal (as opposed to +) YOU WILL SMELL SMOKE real fast.
Step 9: Connecting End Stops: Micro Switch
If you forego the fancy Makerbot Switch (don't do it for the price, it's generally more about the size of the sensor) and instead go with a micro switch it's my experience wiring is a bit easier. You really only need two wires. solder the wire to the two outside pins of the Micro switch and connect them to the -(minus) and s (signal) pin on the ramps.
Since in this configuration the connection is open you will have to flip the configuration in the Marlin software to reverse the signal.
You can test the micro switches and their behavior by opening an application like Pronterface or Octo Print and sending the g-code m119. It will show the state of all end stops. As seen in the video below.
Step 10: Connecting the Extruder
The Extruder (the hot-end that spits out the plastic) generally has 6 wires associated and possibly more if you you use auto bed leveling and an additional Hot-end Cooling fan (Unlike the Heat sink fan, it cools the last layer of deposited plastic).
In this step we'll focus on the Basic wires:
2 Wires for the Heating Cartridge (generally thicker wires)
2 Wires for the thermistor
2 wires for the Heat sink fan
The normal wiring setup generally means we hook the heat sink cooling fan to the 12V fan connector on the RAMPS 1.4. These fan pins can be found between the fuses and the X Stepper Driver (see image above). On the image the left pin is + so make sure the red wire from the fan connects to that one. Oh, and for some reason all wires on 3D printers seem to come at 1 meter but the cooling fan wires generally never do. Be prepared to extend them.
In the same image you see the Blue connectors (bottom left). D10 is for the hot end. Polarity does not matter here.
The RAMPS Board has 3 Thermistor hookups (2 extruders, 1 heated bed). The Thermistor wire for the extruder (The white skinny wires) go on T0. Polarity does not matter.
Step 11: Connecting Heated Bed
Most heated bed you buy will come with wires and thermistor but are often not yet connected. The most common heated bed is the one seen in the image (the MK 2B by Joseph Prusa, or most likely some clone of it).
Since there will be a lot of current running through, make sure you use proper gauge wiring (12-16 gauge should do).
At the bottom of the bed you'll generally see either two or three metal connectors to which to solder the power. If your printer is 12V follow the instructions and solder one wire to both 2 and 3 and the second wire to 1. Don't bother with the LED connection, There really is no point to those.
The glass bead head of the thermistor goes right into the tiny hole at the center of the bed (this so it will close up to the material on top (like a glass plate).
I used Brush-on Electrical tape to keep the thermistor in place. It can handle up to 204°C which is more than the bed will get.
The heat wires go into the RAMPS at D8 and the thermistor is attached to T1 (both polarity doesn't matter).
Step 12: Conclusion
There you have it. All the wiring that was done for the Laminated 3D printer. These instructions are pretty much the same of any other RAMPS 1.4 installation. There are additional options such as Hotend Cooling fan and Auto Bed Leveling (both of which can be done with the standard RAMPS 1.4) but I'll save those for another instructable.
Hope this was useful and if you feel I left something out or royally screwed up (after 5 years the printer hasn't caught fire yet, but who knows) let me know and I'll make changes where warranted.
If you liked this check out my other instructables or visit my website at https://core3d.tech


