Introduction: Guide to ThingSpeak With SPEEEduino V1.1 + IR Sensor!


What is the SPEEEduino?
The SPEEEduino is a Wi-Fi enabled microcontroller board based around the Arduino ecosystem, built for educators. The SPEEEduino combines the form factor and the microcontroller of the Arduino with the ESP8266 Wi-Fi SoC, making it a highly configurable and compatible system. It is immediately compatible with the hundreds of libraries that people wrote for the Arduino Uno, as the SPEEEduino shares the same microcontroller unit as the Arduino Uno.
This project is done by a group of students from Singapore Polytechnic. We have a total of 3 members in the group: Pan ZiYue, Julian Kang and myself. Our supervisor is Mr Teo Shin Jen.
This simple guide is part of the collection of Instructable for the SPEEEduino. In this Instructables, we are going to learn how to set up ThingSpeak account, open a channel, acquire its API key, configure the SPEEEduino for the ThingSpeak channel and connect it to the internet, for the SPEEEduino to send the number of times the IR Sensor was triggered into that ThingSpeak channel! Let us begin!
Things you need:
1. A computer loaded with the Arduino IDE, available here.
2. The SPEEEduino itself
3. ESP8266 ESP01 Module
4. USB to Serial Converter (For this instructables, we are going to use the CP2102)
5. An active WiFi connection (and active internet connection). The ESP8266 does not work with Enterprise Networks, neither could I use it with 5GHz networks.
6. SPEEEduino Low-Level Library. To know how to set up your SPEEEduino/if you don't have it installed in the Arduino IDE, click here.
7. IR Module and some Female to Male Jumper wires/cables.
6. Most importantly, yourself! :)
Step 1: ThingSpeak Setup


If you have ThingSpeak account set up and have your API key ready, feel free to skip this step.
1.Go to ThingSpeak.com
2.Click either Get Started For Free or Sign Up
3.Enter your credentials and follow the rest of the steps.
4. After you are done setting up your account and have logged in, click New Channel.
5. Enter in the information you need. For this, I only input the Name and Field Label.
6. In that particular channel, click API Keys
7. Keep in mind the API Key circled. We will need to use it later.
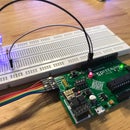
Step 2: Connect the Circuit!


1. Connect the OUT pin to pin 6.
2. Connect the GND Pin to GND on the SPEEEduino.
3. Connect the VCC+ Pin to 3.3V
Step 3: Connect the SPEEEduino to Your PC Using the USB to Serial Converter.


Use the table to wire your SPEEEduino up correctly. In this page, we are using a CP2102 USB-TTL converter. Your converter might be different, but make sure that it uses 5V logic levels and outputs 5V power, not 3.3V.
Step 4: Open the Example Code and Configure It


To open the example code, go to:
File > Examples > SPEEEduino_Low_Level_Library > IR_Sensor_ThingSpeak
and open the example.
Next, in the code, make sure you change the YOUR THINGSPEAK API KEY HERE, NETWORK-NAME-HERE and NETWORK-PASSWORD-HERE to your ThingSpeak API, WiFi SSID and password. What this program will do is that it will register the amount of triggers on the IR Sensor in 30 Seconds and send that data to ThingSpeak.
Now you can upload the programme to the SPEEEduino!
Step 5: Oh No! Someone Is Taking My Snacks!

Just kidding. I activated the IR sensor more than 50 times LOL.
This is a sample of results you should obtain!


