

Introduction: 3.2.2.ADC


More by the author:


About: Let's play together! All about pcDuino,Arduino,Raspberry pi and technology. My facebook :Sherry Wu https://m.facebook.com/sasha.wu.775
#include void setup() {//Initialize serial with baudrate setting, the default config is SERIAL_8N1 int rate = 115200; Serial.begin(rate);Step 1:

ADC
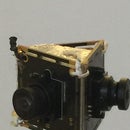
Arduino functions analogReference()andalogRead() Because pcDuino8 Uno has no on-chip ADC module, so if you want to use analogRead() you should mount an external ADC module(as shown in the following image) on J10 to read analog signal.
This ADC module has ADI AD7997 12-bit ADC chip, and 6 ADC channels are available. Users can access these ADC port on J7, please check the details from the image below.
Step 2:


Notes:
If you want to measure the high voltage, you can purchase the bridge board for pcDuino, it can measure max 5V input.Connect Please take the picture to mount the ADC module to pcDuno8 Uno.
Step 3:
Setup
Connect the battery’s N to any GND and P to the ADC0.
/*
* ADC test program
*/
#include
int adc_id = 0;

void setup()
{
    if ( argc != 2 )
    {
        printf("Usage %s ADC_ID(0/1/2/3/4/5)\n", argv[0]);
        printf("Default will get ADC0 value\n");
    }

    if(argc==2)
        adc_id = atoi(argv[1]);
}

void loop()
{
    int value = analogRead(adc_id); // get adc value

    printf("ADC%d level is %d\n",adc_id, value);

    delay(1000);
}


