

Introduction: Android Voice Commands to Arduino


Speech to text is something really new. I'm going to show you how to use it in android studio and how to control the outputs of an arduino with it.
For example when you say "TV on", the TV switches on etc.
In this tutorial I'll explain how to write a very simple app with 1 button to activate your phone to listen to you.
What you then say to your phone will be send to the arduino.
The code I'm using gives 5 solutions for everything you say, so the right thing is probably one of the five options.
This code works when you choose phrases which don't pronounce the same.
Let's get started!
Step 1: Parts


For this tutorial you'll need some parts, these are the parts you'll need:
An Arduino (I got mine from gearbest.com)
An Arduino Ethernet shield (gearbest.com)
A Breadboard (gearbest.com)
Some Jumper wires (gearbest.com)
2 Led's with 220 ohm resistors
An Android phone
You'll also need a (windows) PC with android studio installed.
Step 2: Arduino Sketch

This is the sketch for the arduino. It looks very similar to the one from my previous instructables. I only changed the "Get request" parameters to check if a "message" was send and if so, if there was a command send with it.
#include <SPI.h>
#include <Ethernet.h>

//Led for TV on pin 22
#define TV_pin 22
//Led for stereo on pin 24
#define stereo_pin 24

// Set the MAC address
byte mac[] = {0xDE, 0xAD, 0xBE, 0xEF, 0xFE, 0xED};

// Set the IP address
IPAddress ip(192, 168, 1, 177);

// Start a server at port 80 (http)
EthernetServer server(80);

void setup() {
  // Open serial communications
  Serial.begin(9600);

  // start the Ethernet connection and the server
  Ethernet.begin(mac, ip);
  server.begin();

  // Pin 22 + 24 output (leds)
  pinMode(TV_pin, OUTPUT);
  pinMode(stereo_pin, OUTPUT);
}


void loop() {
  // Check if client connected
  EthernetClient client = server.available();

  if (client) { // If there is a client...
    boolean currentLineIsBlank = true;
    String buffer = ""; // A buffer for the GET request

    while (client.connected()) {

      if (client.available()) {
        char c = client.read();// Read the data of the client
        buffer += c; // Store the data in a buffer

        if (c == '\n' && currentLineIsBlank) {// if 2x new line ==> Request ended
          // send a standard http response header
          client.println("HTTP/1.1 200 OK");
          client.println("Content-Type: text/html");
          client.println("Connection: close");
          client.println(); // Blank line ==> end response
          break;
        }
        if (c == '\n') { // if New line
          currentLineIsBlank = true;
          buffer = "";  // Clear buffer
        } else if (c == '\r') { // If cariage return...
          //Read in the buffer if there was send "GET /?message=..."
          if(buffer.indexOf("GET /?message=")>=0) {
            // Read the message you said and see if it is a command
            if(buffer.indexOf("tv on")>=0) {
              digitalWrite(TV_pin, HIGH);
            }
            if(buffer.indexOf("stereo on")>=0) {
              digitalWrite(stereo_pin, HIGH);
            }
            if(buffer.indexOf("tv off")>=0) {
              digitalWrite(TV_pin, LOW);
            }
            if(buffer.indexOf("stereo off")>=0) {
              digitalWrite(stereo_pin, LOW);
            }
          }
        } else {
          currentLineIsBlank = false;
        }
      }
    }
    delay(1);
    client.stop();
  }
}
If you have any questions about this script, please post them in the comment section.
Attachments

Step 3: Android Layout

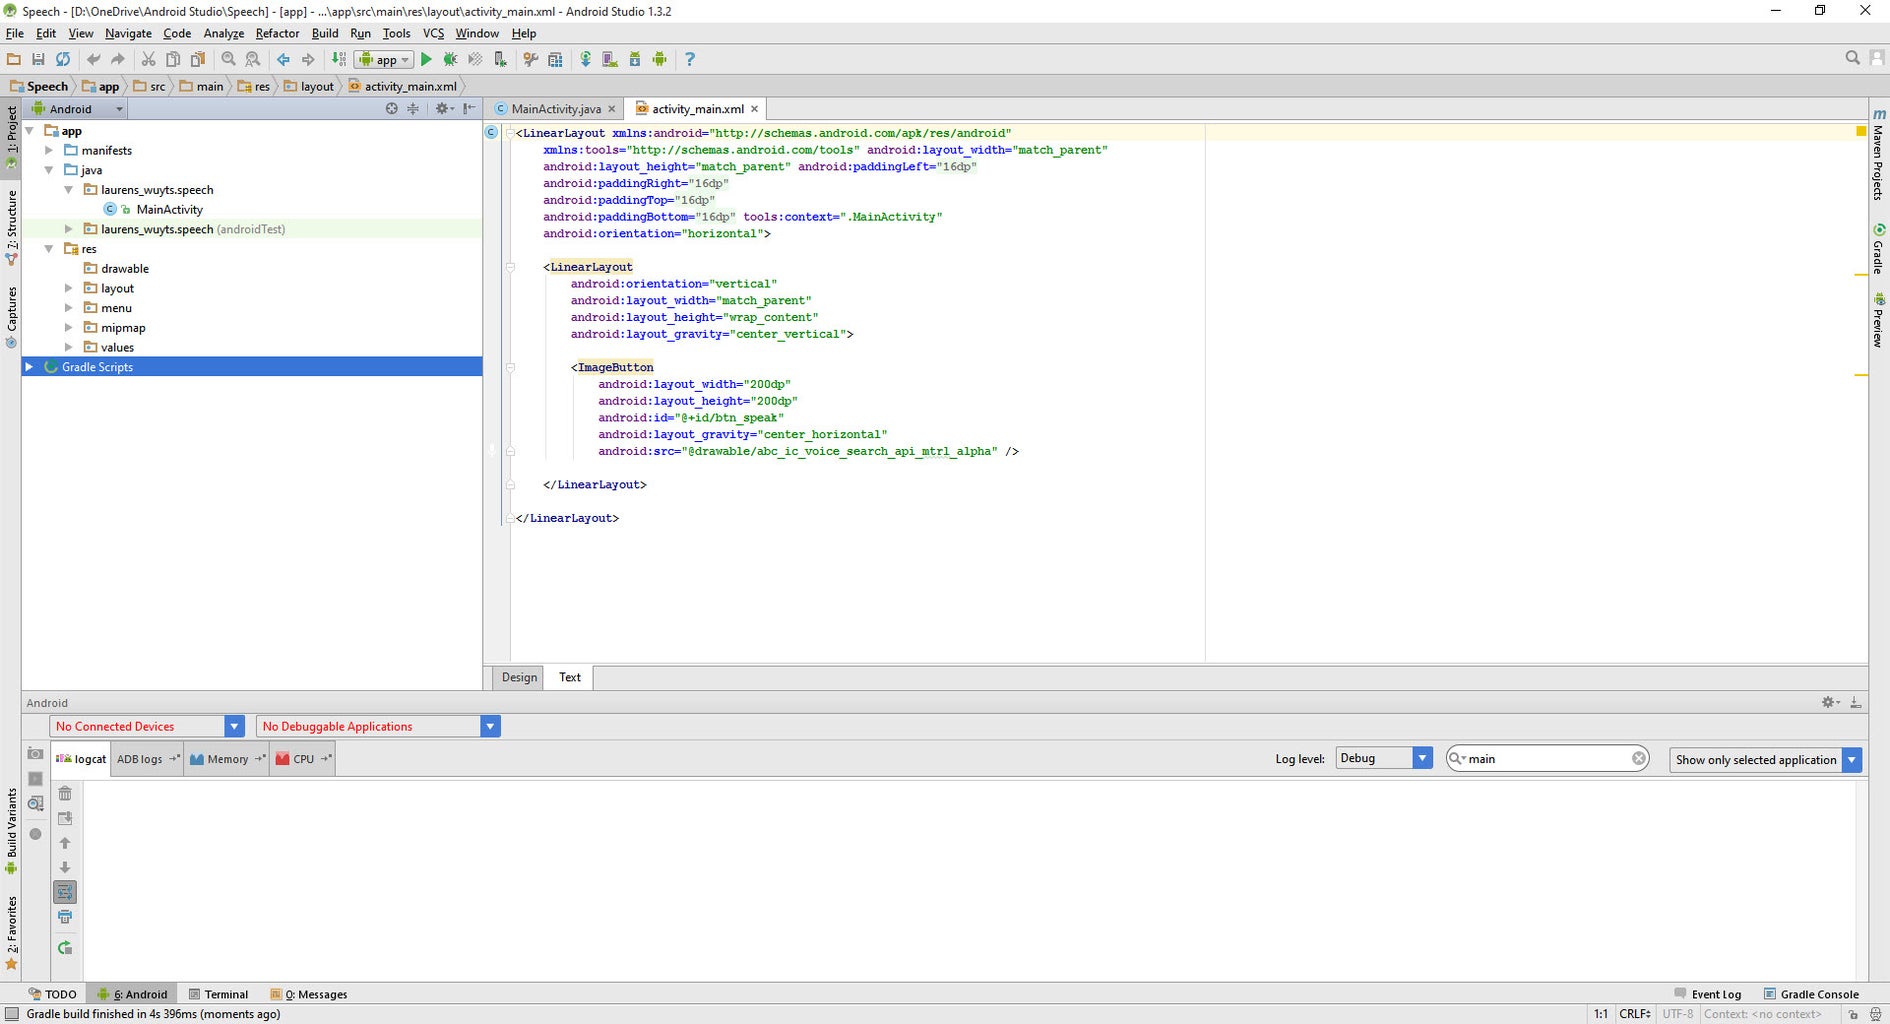

For more info on how to setup a android studio project, see my first instructables. For the android layout, I just made an app with one big imagebutton(mic icon) in the center. When you push this button, your phone starts listening to you.
<LinearLayout xmlns:android="http://schemas.android.com/apk/res/android"
    xmlns:tools="http://schemas.android.com/tools" android:layout_width="match_parent"
    android:layout_height="match_parent" android:paddingLeft="@dimen/activity_horizontal_margin"
    android:paddingRight="@dimen/activity_horizontal_margin"
    android:paddingTop="@dimen/activity_vertical_margin"
    android:paddingBottom="@dimen/activity_vertical_margin" tools:context=".MainActivity"
    android:orientation="horizontal">

    <LinearLayout
        android:orientation="vertical"
        android:layout_width="match_parent"
        android:layout_height="wrap_content"
        android:layout_gravity="center_vertical">

        <ImageButton
            android:layout_width="200dp"
            android:layout_height="200dp"
            android:id="@+id/btn_speak"
            android:layout_gravity="center_horizontal"
            android:src="@drawable/abc_ic_voice_search_api_mtrl_alpha" ></ImageButton>

    </LinearLayout>

</LinearLayout>
Attachments
Step 4: Android Code

For the android code, you'll need to do several things.
First, just in the mainactivity class, you need to add two things. The first thing is a SpeechRecognizer and the second thing is a TAG for debugging your app.
private SpeechRecognizer sr;
private static final String TAG = "MainActivity";
Now, in the onCreate function, you need to add these four lines. The first two are for the button to do something, the third and fourth are for the speech recognition.
ImageButton speakButton = (ImageButton) findViewById(R.id.btn_speak);
speakButton.setOnClickListener(this);
sr = SpeechRecognizer.createSpeechRecognizer(this);
sr.setRecognitionListener(new listener());
After the onCreate function you need to make a new class for the speech recognition.
class listener implements RecognitionListener
{
    public void onReadyForSpeech(Bundle params)
    {}
    public void onBeginningOfSpeech()
    {}
    public void onRmsChanged(float rmsdB)
    {}
    public void onBufferReceived(byte[] buffer)
    {}
    public void onEndOfSpeech()
    {}
    public void onError(int error)
    {
        if(error != 7) {
            Log.d(TAG,  "error " +  error);
        }
    }
    public void onResults(Bundle results)
    {
        String str = ""; // Create new empty string
        // Get the results from the speech recognizer
        ArrayList data = results.getStringArrayList(SpeechRecognizer.RESULTS_RECOGNITION);
	// If there is data
        if(data.size() != 0) {
            // Add all the data to a string
            for (int i = 0; i < data.size(); i++) {
                Log.d(TAG, "result " + data.get(i));
                str += data.get(i);
                str += " ";
            }
            // Create a lowercase string
            str = str.toLowerCase();
            // Send the GET request with message
            String message = "message=" + str;
            new Background_get().execute(message);
        }
    }
    public void onPartialResults(Bundle partialResults)
    {
        Log.d(TAG, "onPartialResults");
    }
    public void onEvent(int eventType, Bundle params)
    {
        Log.d(TAG, "onEvent " + eventType);
    }
}
After this class you need to add a onClick function which activates when you press the button.
public void onClick(View v) {
    if (v.getId() == R.id.btn_speak)
    {
        // Activate the speech listener
        Intent intent = new Intent(RecognizerIntent.ACTION_RECOGNIZE_SPEECH);
        intent.putExtra(RecognizerIntent.EXTRA_LANGUAGE_MODEL,RecognizerIntent.LANGUAGE_MODEL_FREE_FORM);
        intent.putExtra(RecognizerIntent.EXTRA_CALLING_PACKAGE,"voice.recognition.test");

        intent.putExtra(RecognizerIntent.EXTRA_MAX_RESULTS,5);
        sr.startListening(intent);
    }
}
The only thing we need to add now is the class which handles sending the GET requests.
It's the same class as I used in my previous instructables.
       /*****************************************************/
      /*  This is a background process for connecting      */
     /*   to the arduino server and sending               */
    /*    the GET request with the added data            */
   /*                                                   */
  /*             !! INTERNET Permission !!             */
 /*                                                   */
/*****************************************************/

private class Background_get extends AsyncTask<String, Void, String> {
    @Override
    protected String doInBackground(String... params) {
        try {
            /* Change the IP to the IP you set in the arduino sketch */
            URL url = new URL("http://192.168.1.177/?" + params[0]);
            HttpURLConnection connection = (HttpURLConnection) url.openConnection();

            BufferedReader in = new BufferedReader(new InputStreamReader(connection.getInputStream()));
            StringBuilder result = new StringBuilder();
            String inputLine;
            while ((inputLine = in.readLine()) != null)
                result.append(inputLine).append("\n");

            in.close();
            connection.disconnect();
            return result.toString();

        } catch (IOException e) {
            e.printStackTrace();
        }
        return null;
    }
}
This was the coding for the app. The only thing we need to do now is adding permissions to your app, so it can use the speech and the internet.
Attachments
Step 5: Adding Permissions
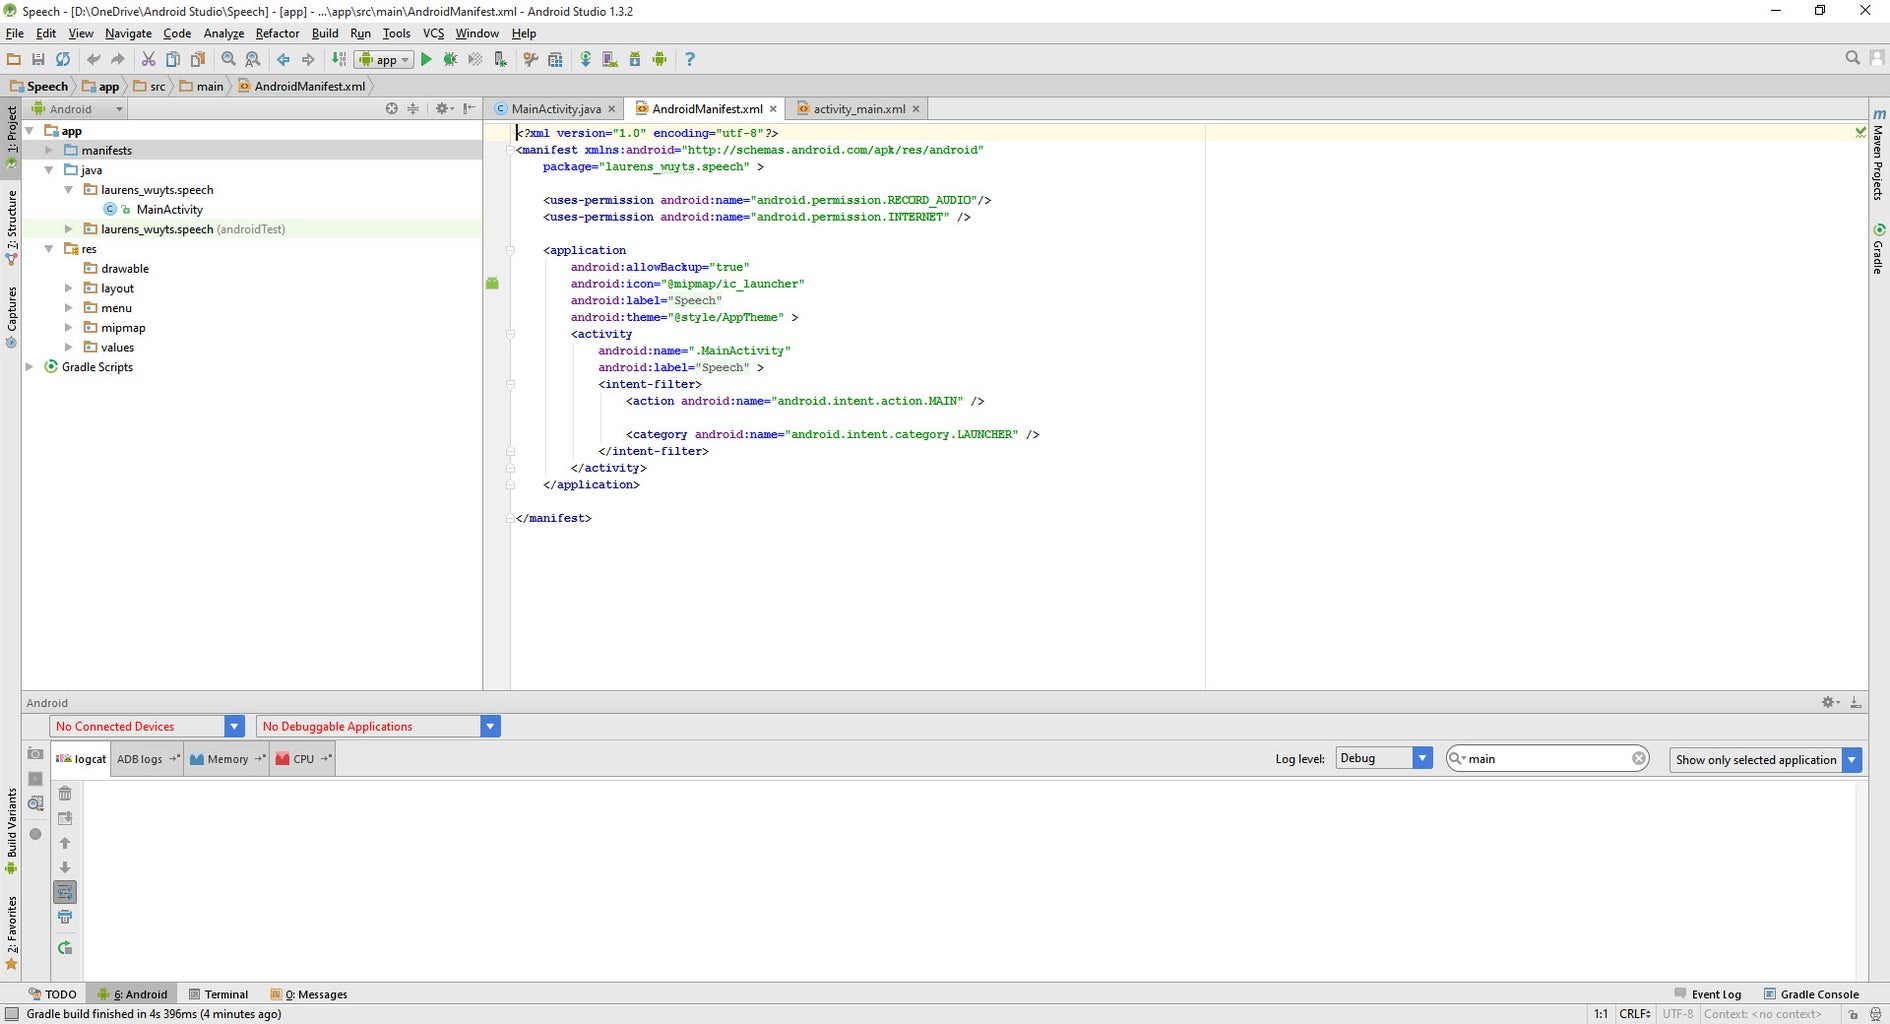
For adding permissions to your app you need to change the manifest file.
You just need to add these 2 lines just before "
<uses-permission android:name="android.permission.RECORD_AUDIO"/>
<uses-permission android:name="android.permission.INTERNET" />
So that's it for the app. Upload your app to your phone and you're good to go!
Attachments
Step 6: Resume

In this tutorial, I showed you how to make an app with voice recognition and how to control your arduino using your voice commands.
I hope you liked it, if so, please vote for it and share it!
If you have recommendations, tips, ideas, questions, etc.
Please post them in the comment section. I'll see what I can for you!
Laurens
Attachments

Participated in the
Phone Contest


