

Introduction: Autostart a Program When Raspberry Pi Boots (Newbie Method)


Most tutorials for autostarting programs will direct you to use commands in a terminal window and edit files you've never heard of. (Welcome to Linux!) While understanding the command line is a foundation skill if you're going to get serious about understanding how your computer works (and making it do what you want it to do) it can be a little intimidating and a lot confusing to new users. There is a lot you can do through your desktop though without ever facing the command line in a terminal.
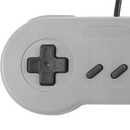
This should work with most (if not all) programs on your Pi, but for this Instructable I'm using two examples from a recent project of mine: the Chromium browser and Qjoypad. I described how I set up Qjoypad so I could use an inexpensive gamepad to control one of my Pi projects here: https://www.instructables.com/id/Gamepad-Controll...
If you're trying to autostart some other program you might only need to substitute that program's name and options for the ones I used here. Give it a try. If it doesn't work you'll probably just get an error message.
Step 1: You Only Need to Do This Part Once


You only need to do this part once, but you need to do it first. Click on Applications -> Preferences -> Main Menu Editor on your Pi desktop.
In the Main Menu Editor window click on Preferences in the first column. Check the box for Default applications for LXSession in the second column. Click Okay.
Now when you click on your Applications -> Preferences menu you should see Default applications for LXSession listed. You don't need to click on it yet, but you'll need it after the next step.
Step 2: Figuring Out the Command Syntax
You'll need to do a little research for this. If there is documentation for the program you want to autostart, the information you need should be in there somewhere. But the completeness and quality of documentation varies from excellent to practically non-existent. Searching forums is another good source.
What you're looking for is the command and any options/arguments required to start the program you want. For example, I wanted the Chromium browser to autostart, to load a particular web page that I created and stored in my Documents folder, and to run in kiosk mode. I determined that this should work:
/usr/bin/chromium-browser file:///home/pi/Documents/cal_ver.html --kiosk
All of this is case-sensitive. Nearly everything in Linux commands is lower case, the exceptions are most likely to be some folder names (like Documents) and some file names (I could have named my web page CalVer.html instead of cal_ver.html for example).
I know I said that you can avoid the command line, but it's a good idea to try the command in a terminal window before going on to the next step. If it doesn't work there, chances are it won't work in autostart either.
Step 3: Adding a Command to Autostart


Now that you have the command syntax you need to add it to the autostart sequence. Choose Applications -> Preferences -> Default applications for LXSession from your Pi desktop. Select the Autostart tab.
In the Manual autostarted applications section enter the text of your command in the box next to the Add button. Then click the Add button and your new command should be added to the list. When your Pi boots (or reboots) these commands should run.
You can temporarily disable a command by unchecking the box in front of it. This will add # in front of the command and it will be ignored until you go back and check it. And obviously you can remove a command from the sequence completely by clicking the Remove button beside it. (There is no undo for this.)
Step 4: But What If It Doesn't Work?
When I was setting up Qjoypad to autostart it kept failing to find the layout even if I provided the complete path. I don't know why -- it's possible that if I added to the PATH environment variable for the system it could have worked. (Don't worry if you don't know what that means.) But I found another way.
Qjoypad can be started from the command line by typing
qjoypad "layout_name"
I was able to write a shell script for this and add that script to autostart and it worked!
Step 5: Writing a Shell Script

A shell script is basically a simple text file containing commands and their options. In fact, you could have several commands all in the same file. We don't need to do that though. Just putting the name of the script in a terminal window (or in autostart) will run all the commands in that script. Here's how I did it:
Choose Applications -> Accessories -> Text Editor from your desktop menu. You'll need the name of one of your layouts from when you set up Qjoypad. Substitute the name of your layout for layout_name in the text below. In the Text Editor window type:
#!/bin/bash
qjoypad "layout_name" &
The spelling, case, and punctuation all have to be correct for this to work. Typically everything will be lower case, but if you used any upper case letters in your layout name you have to do so here as well. Make sure you have the quotation marks around your layout name. The rest of the details about what you need in a shell script and why are beyond the scope of this Instructable, but you can find tons of tutorials online.
Save this in your /home/pi folder. You should use a name that is simple, but descriptive, and add .sh to the end of it. My layout is called kiosk so I used qpad_kiosk.sh when I saved mine. (The .sh is a standard way of identifying this as a shell script. You should always follow standard practices.) After saving the file you can close the Text Editor.
Step 6: Make It Runnable

There's another step required before the Pi will recognize that it should run the commands in this file. This step is traditionally done with a command in a terminal window (chmod) that looks like complete gibberish if you don't know what it means. Here's another way!
Choose Applications -> Accessories -> File Manager from your desktop menu. It should open in your /home/pi folder and you should see an icon for the script you just wrote. Right-click on the icon for your script and select Properties. Click on the Permissions tab. Under Access Control change Execute to Anyone. Click OK.
Step 7: Testing the Shell Script

Here's a way to test the script before adding it to the autostart sequence. In the File Manager right-click on the icon for your script again and this time select Open. You should get an Execute File alert asking what you want to do with the file. Choose Execute.
With my script Qjoypad opened and loaded the kiosk layout and I got no error messages. (Doing the Snoopy dance!)
Step 8: Adding a Script to Autostart

You add a script to autostart pretty much the same was as described above. You just need to add a little to it. The syntax I used for my script is
./qpad_kiosk.sh
Note that I used the full name of the script including the .sh at the end. Placing ./ in front essentially tells the Pi that the script is in home/pi folder.

![Tim's Mechanical Spider Leg [LU9685-20CU]](https://content.instructables.com/FFB/5R4I/LVKZ6G6R/FFB5R4ILVKZ6G6R.png?auto=webp&crop=1.2%3A1&frame=1&width=306)


